10 years ago I made my husband and I a fabric advent calendar. The numbers were made out of an old green t-shirt, and the pockets were red I think, all on a white ticking backing. We used it for two years and despite its flaws, we loved it. When I say flaws, let’s just say that the numbers were all slightly different sizes and fonts, and the pockets were too small. I wanted to put in a wrapped chocolate for both of us into every pocket – but I had to choose the chocolates carefully to ensure they were small enough to go into the pockets! 2 years after making that advent calendar, we moved house, and despite unpacking every box, and looking everywhere, it’s not been seen since.
Every year I have said that I would make another advent calendar, and every year it’s got around to the 1st December without me having made a start. This year, however, fate intervened – one of the biggest things to stop me has been finding suitable numbers for an advent calendar, but on the reverse of the Prima Pattern were templates for the numbers!
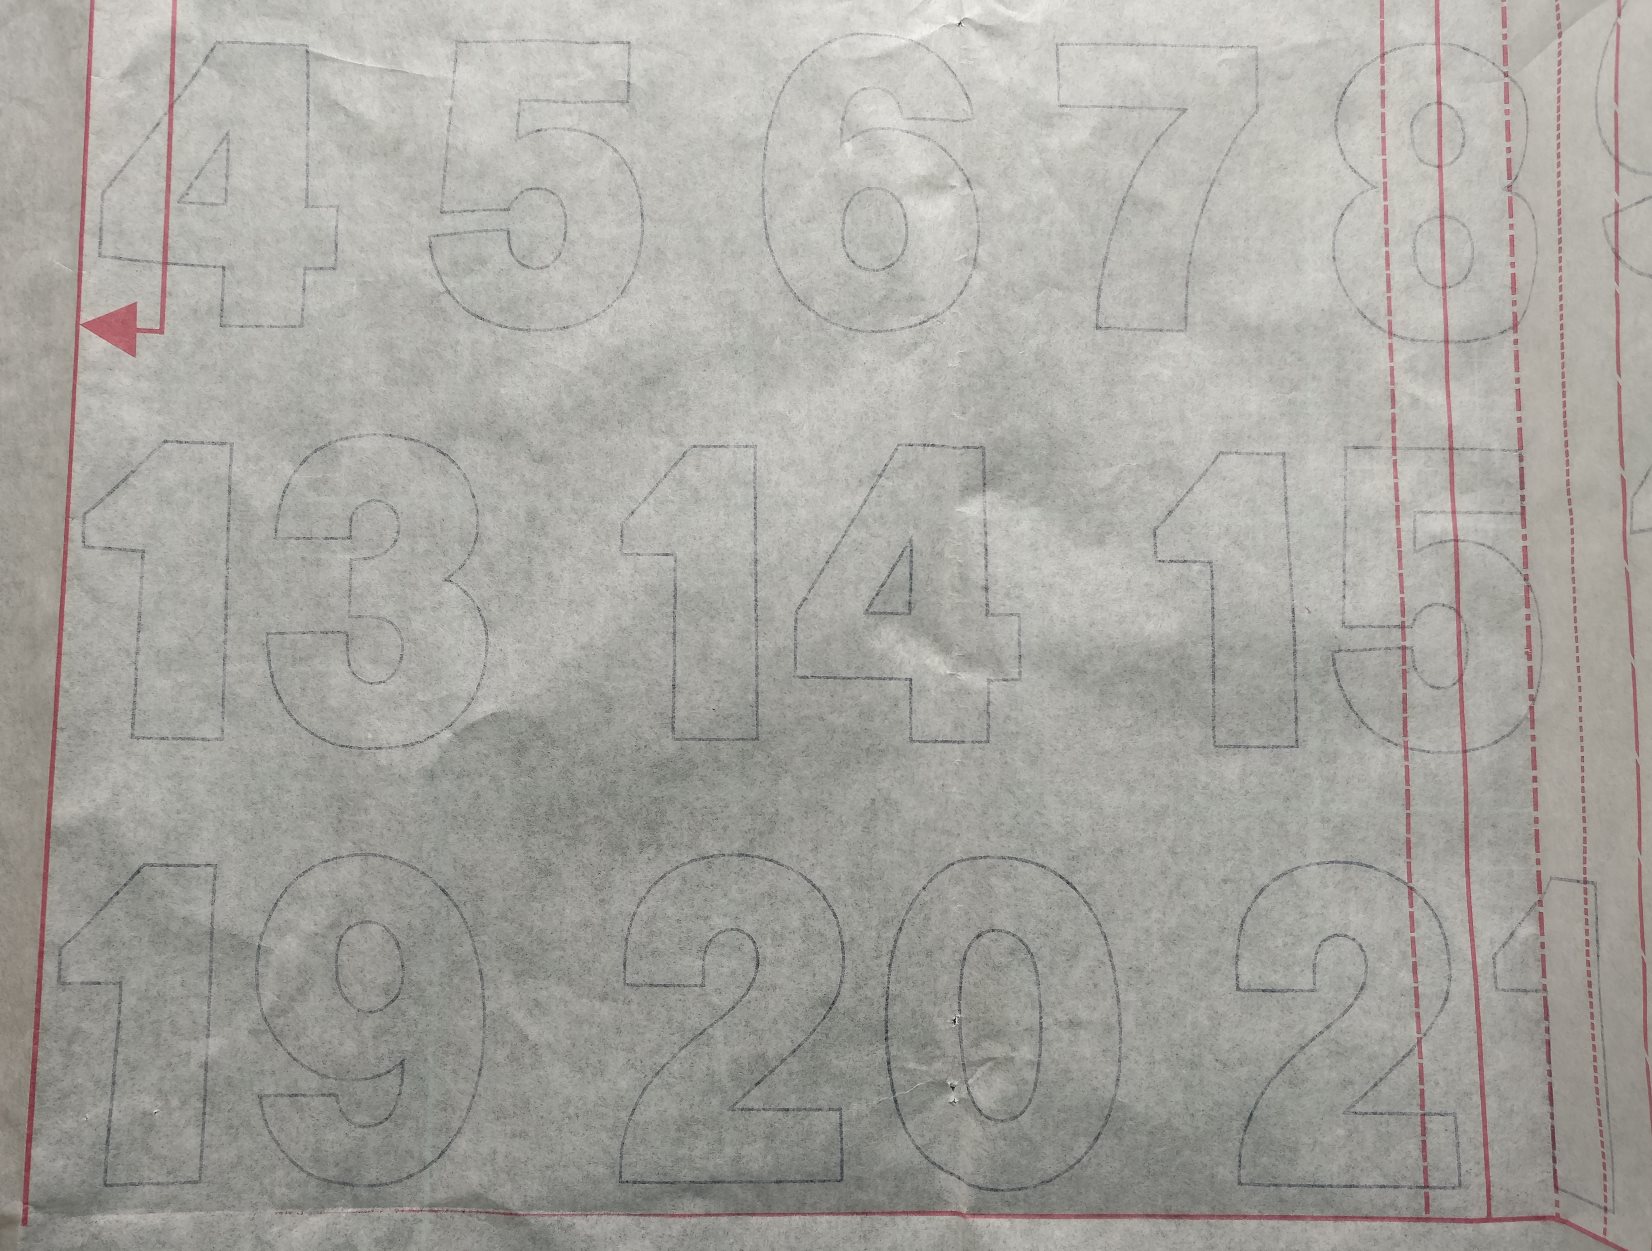
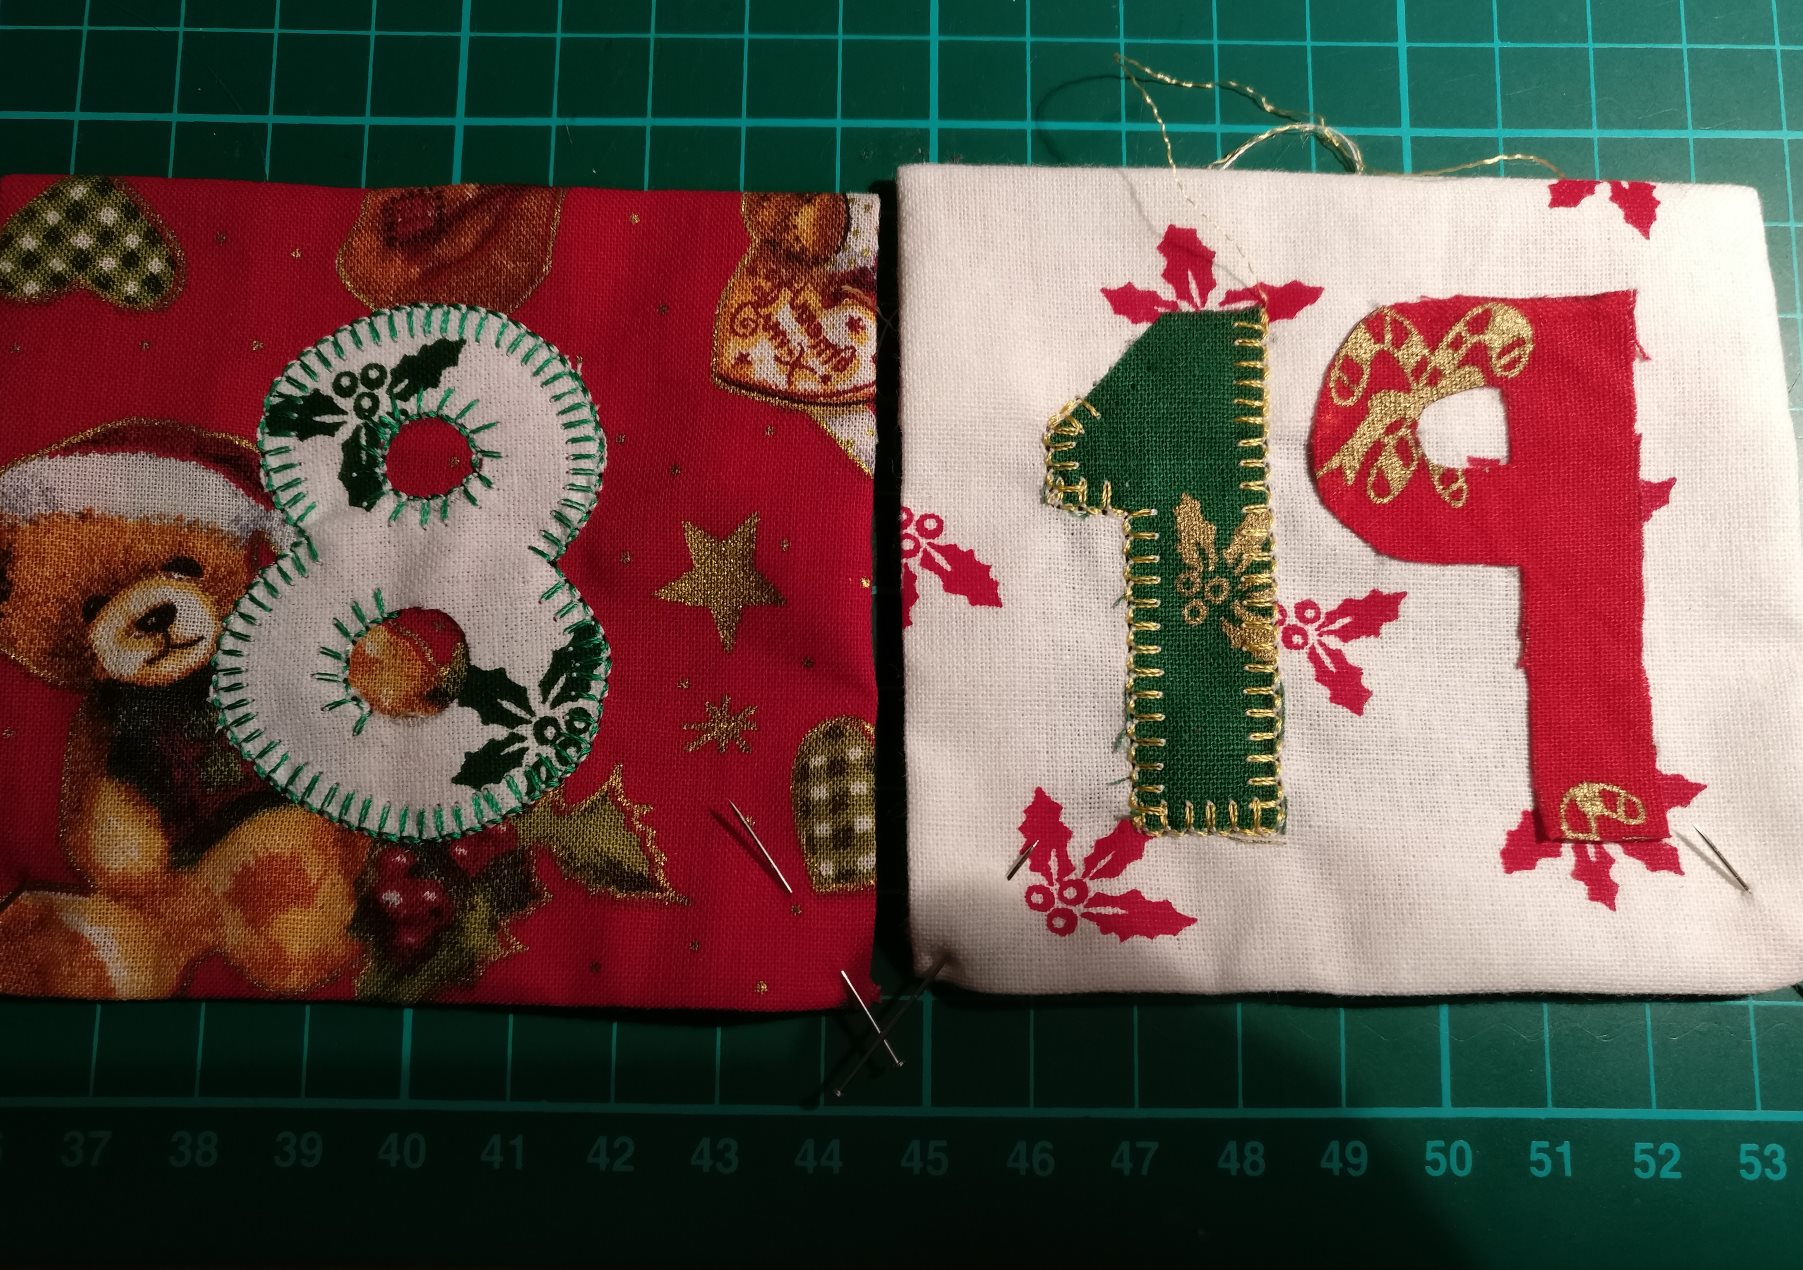
I bought a bundle of Christmassy fat quarters, and set to work cutting out numbers. I soon decided to alter some of the numbers slightly to remove curves – I straightened the tails of the 6 and 7 and made the 9 without a curled tail.
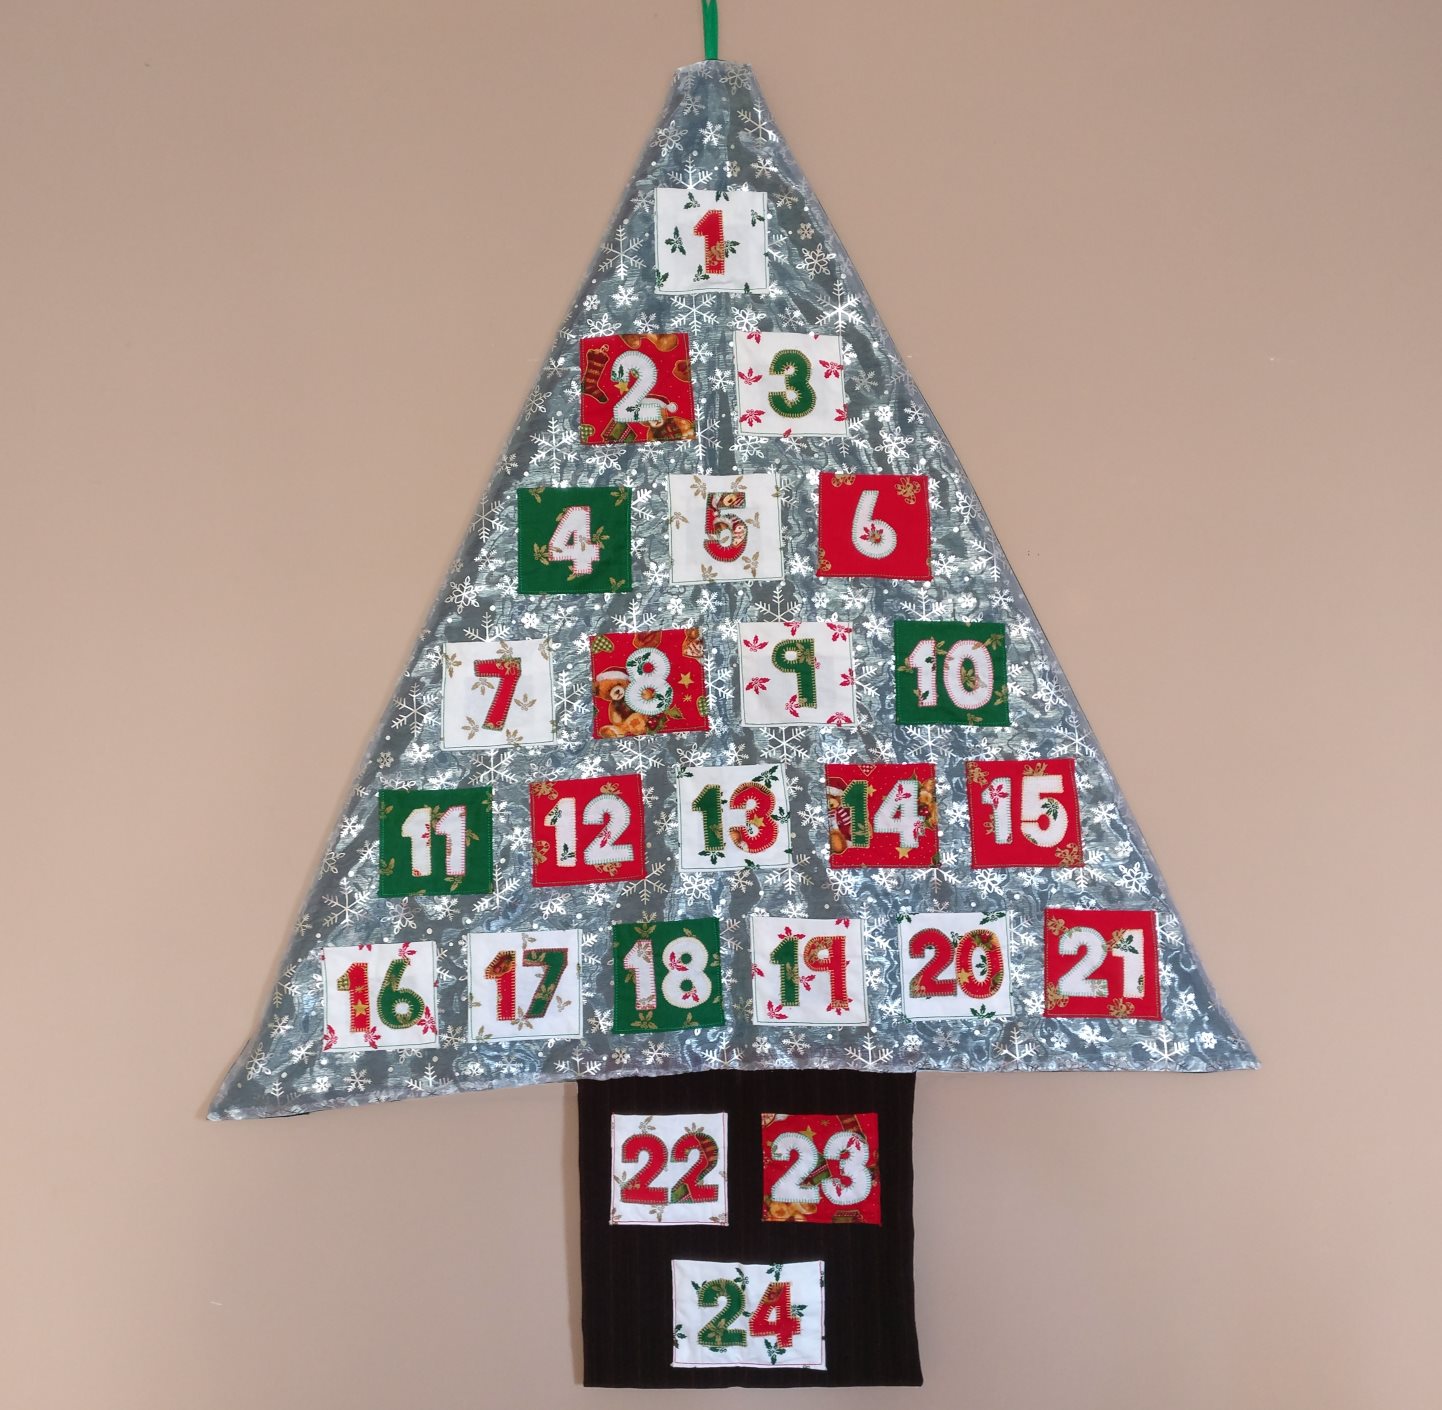
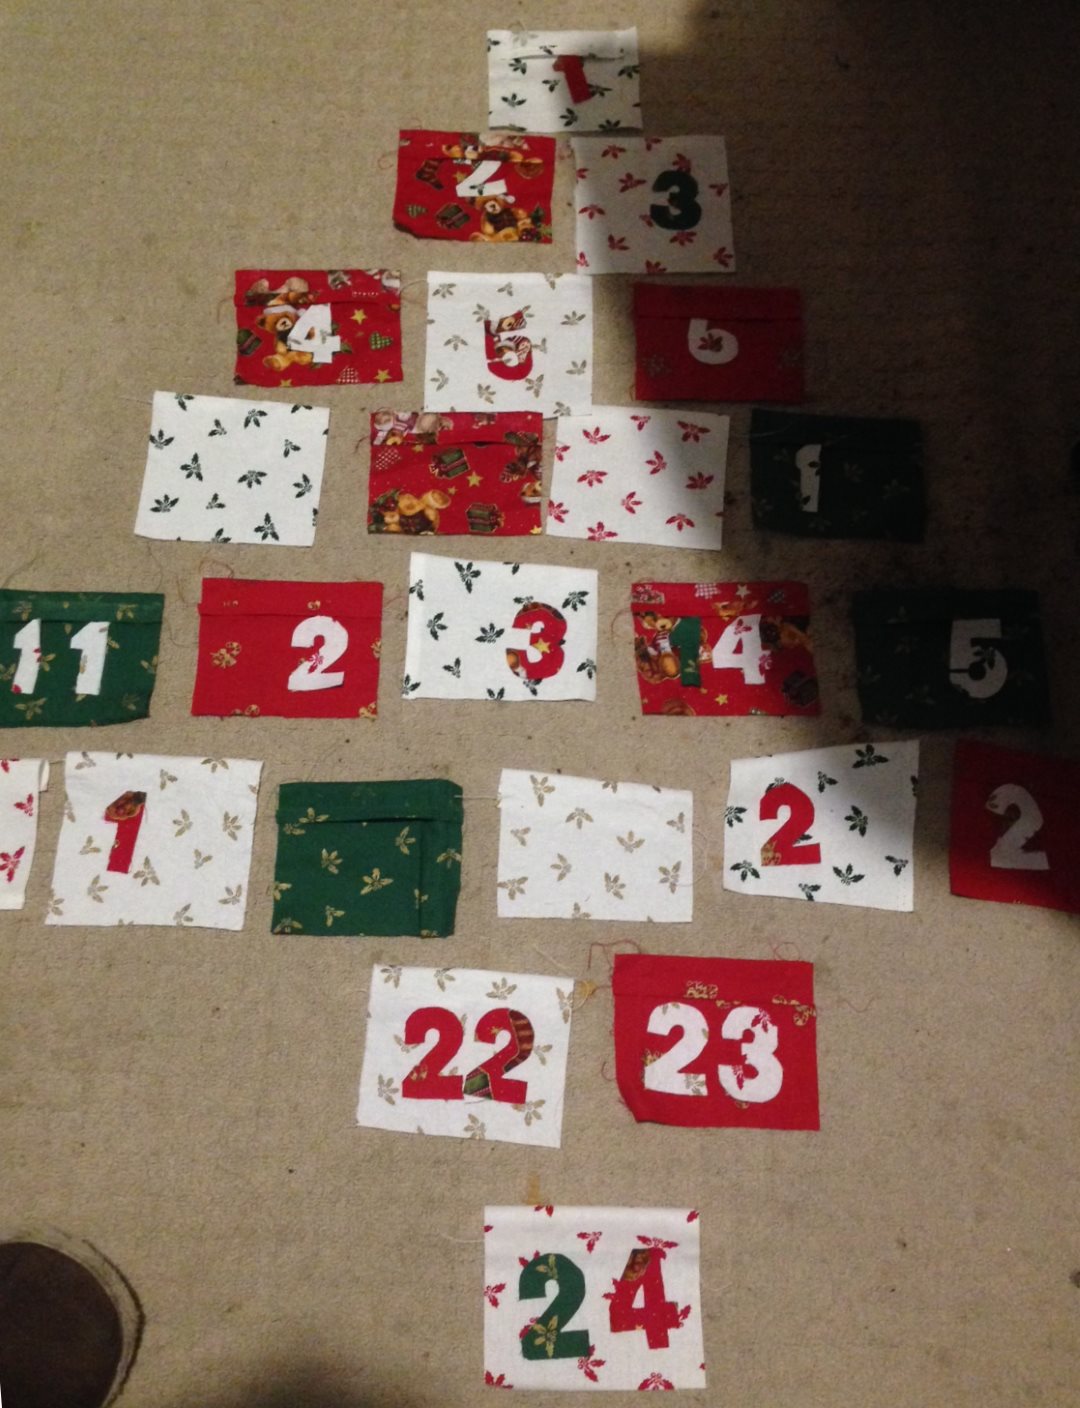
I had decided that I wanted the pockets to be lots of different fabrics (from the fat quarters) and that I wanted the numbers to be different fabrics also. What soon became clear was that I needed to make the pockets first in order to ensure that the numbers to be appliqued on top were in a different fabric for clarity. I wanted to ensure the pockets were big enough, and unlike my last attempt, made properly. There on the top of the washing pile was my daughters pyjama top – and even the biggest of the numbers fitted nicely on top of the pocket and more to the point, I could fit in 4 wrapped chocolates; enough for my current family, so that was that – I used the pockets from New Look 6090. After I had cut out pockets I decided to lay out the pockets and the numbers I had already cut in a provisional layout in order to get a reasonable balance of colours. I wanted the finished calendar to be a bit more interesting than the usual rectangle, and after much fiddling I realised that I could make a nice Christmas tree shape if I put some numbers on the trunk of the tree.
On my first number (number 1, unsurprisingly!) I decided to pin the number in place before appliqueing it down. This unfortunately didn’t work out quite as well as I’d hoped, as the number is significantly wonky!
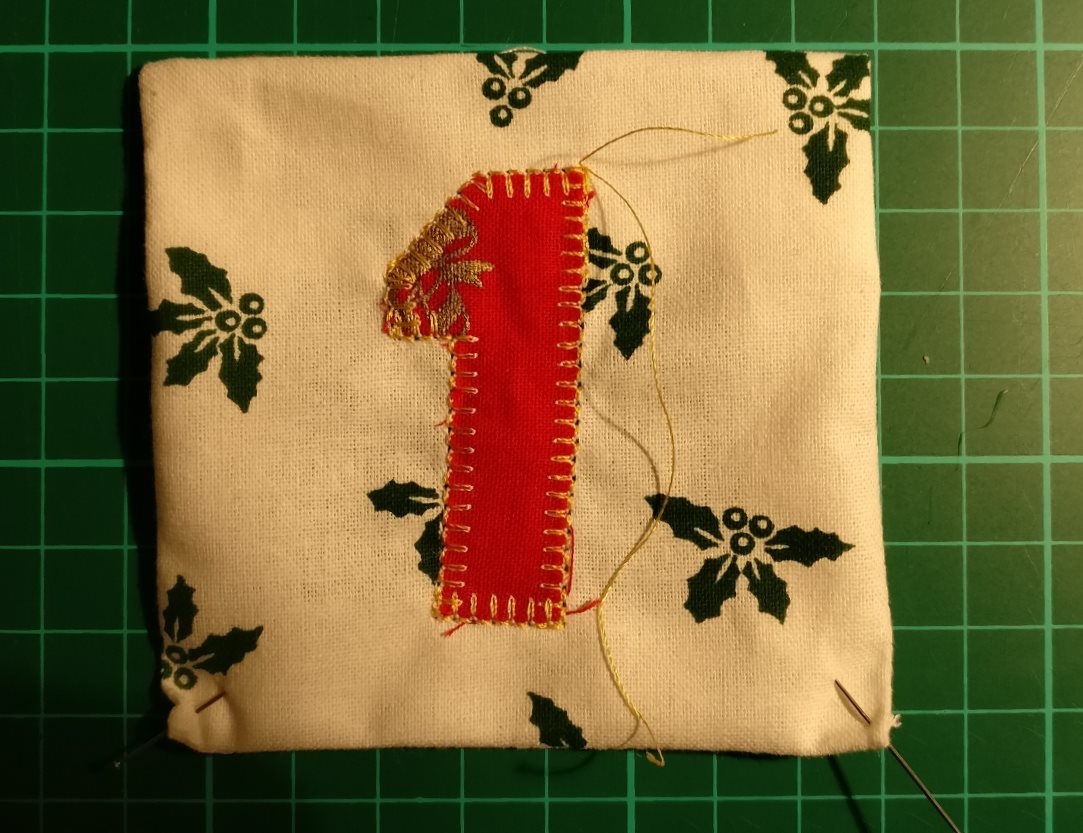
So, I had a rethink, and decided to use some fabric glue that I’d been bought a while back – I’d not really used it before, so it was a bit of a shot in the dark, but number 2 worked out much better than number 1 – so time to recut number 1!
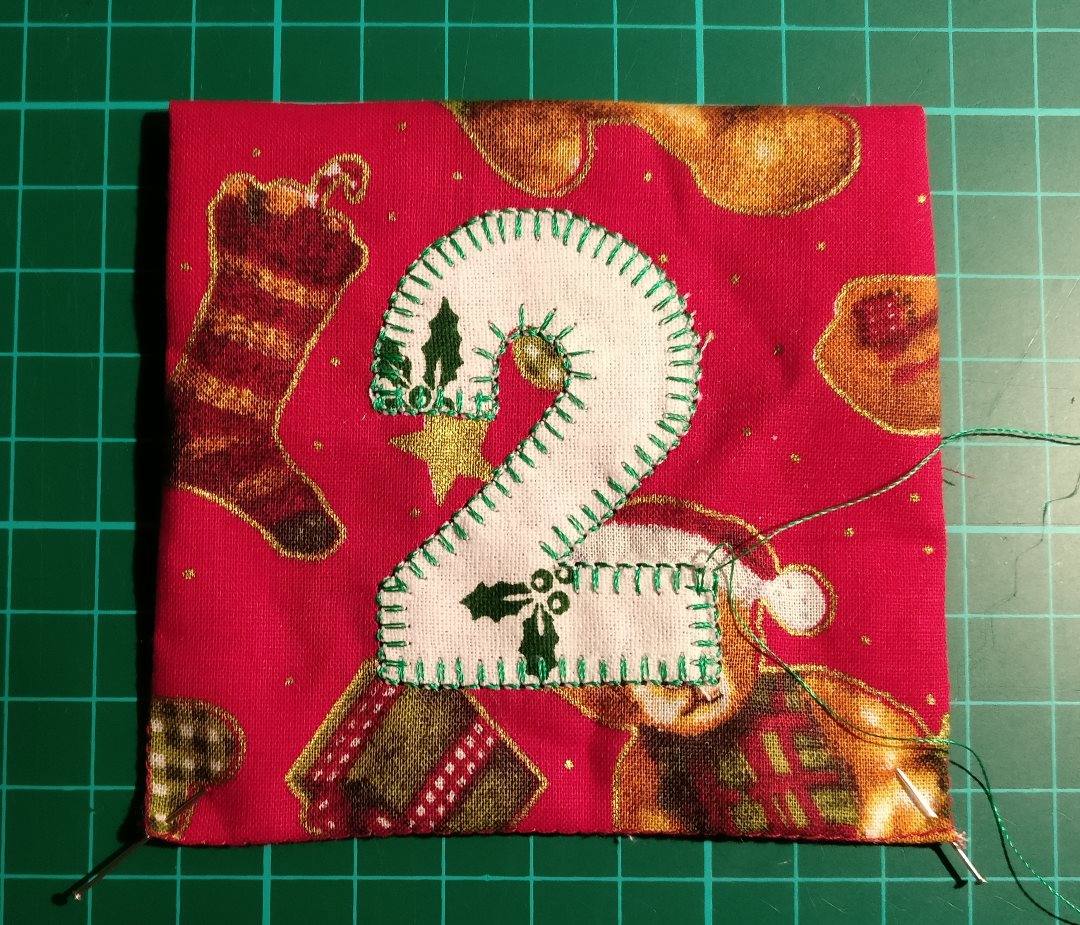
As you can see from the pictures, I used a blanket stitch on my sewing machine. For the straight lengths I left it at the standard length (2.5) and width (3.5) but for the curves I dropped the length down to 2.2. You can’t see the difference really, but it does help to match the curve better. I used three different colour silky embroidery threads. All were Gutermann Sulky threads, and all were bought about 10 years ago. For some reason the gold and green threads kept snapping, whereas the red didn’t snap once. You can see on the image below a couple of places where I had to stop sewing before the run was finished due to snapped threads. This became so annoying that by the end of the project I didn’t really want to sew any more with the gold thread, and I considered throwing it away!
After appliqueing all the numbers to all the pockets it was time to sew the pockets to the backing material. I had some brown material with subtle gold stripes that I used for the trunk, and I bought a metre of green Christmas tree material from a seller on Amazon. I had looked around several material shops and failed to find something quite right, so this was something of a shot in the dark, especially with the deadline of 1st December rapidly approaching. Unfortunately the first delivery was lost in the post, and as such, I popped out to the local market and found this silver on white snowflake gauzy material. I decided to use this as an overlay over some green cotton sateen (possibly?!) from my stash. The green didn’t quite match the green of the pockets, but with the gauze overlay you can’t tell and it looks, as I hoped, like a green conifer covered in snow. (It’s a bit hard to show this in a photo, the gauze reflects the light in a way that it doesn’t in real life.)
To attach the pockets to the backing I used my adjustable blind hem foot in order to keep the topstitching relatively even and straight. I also used the triple stitch on my machine in order to ensure the stitching was visible and strong. A short length of green ribbon attached to the top of the tree and I thought the calendar was done. Unfortunately however, I was wrong.
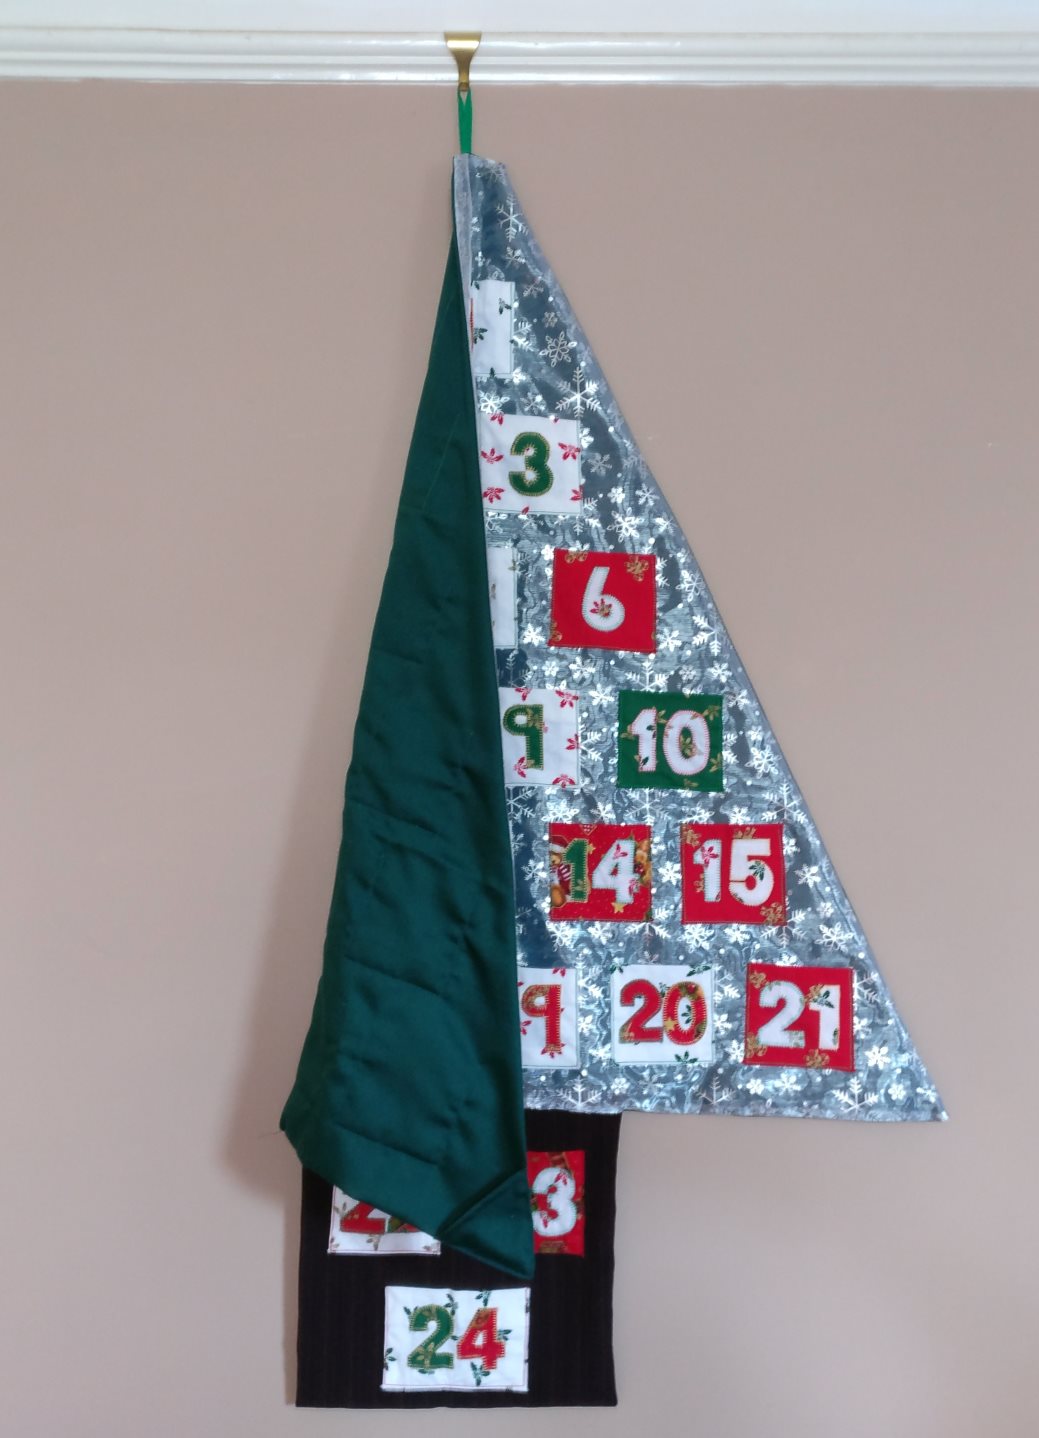
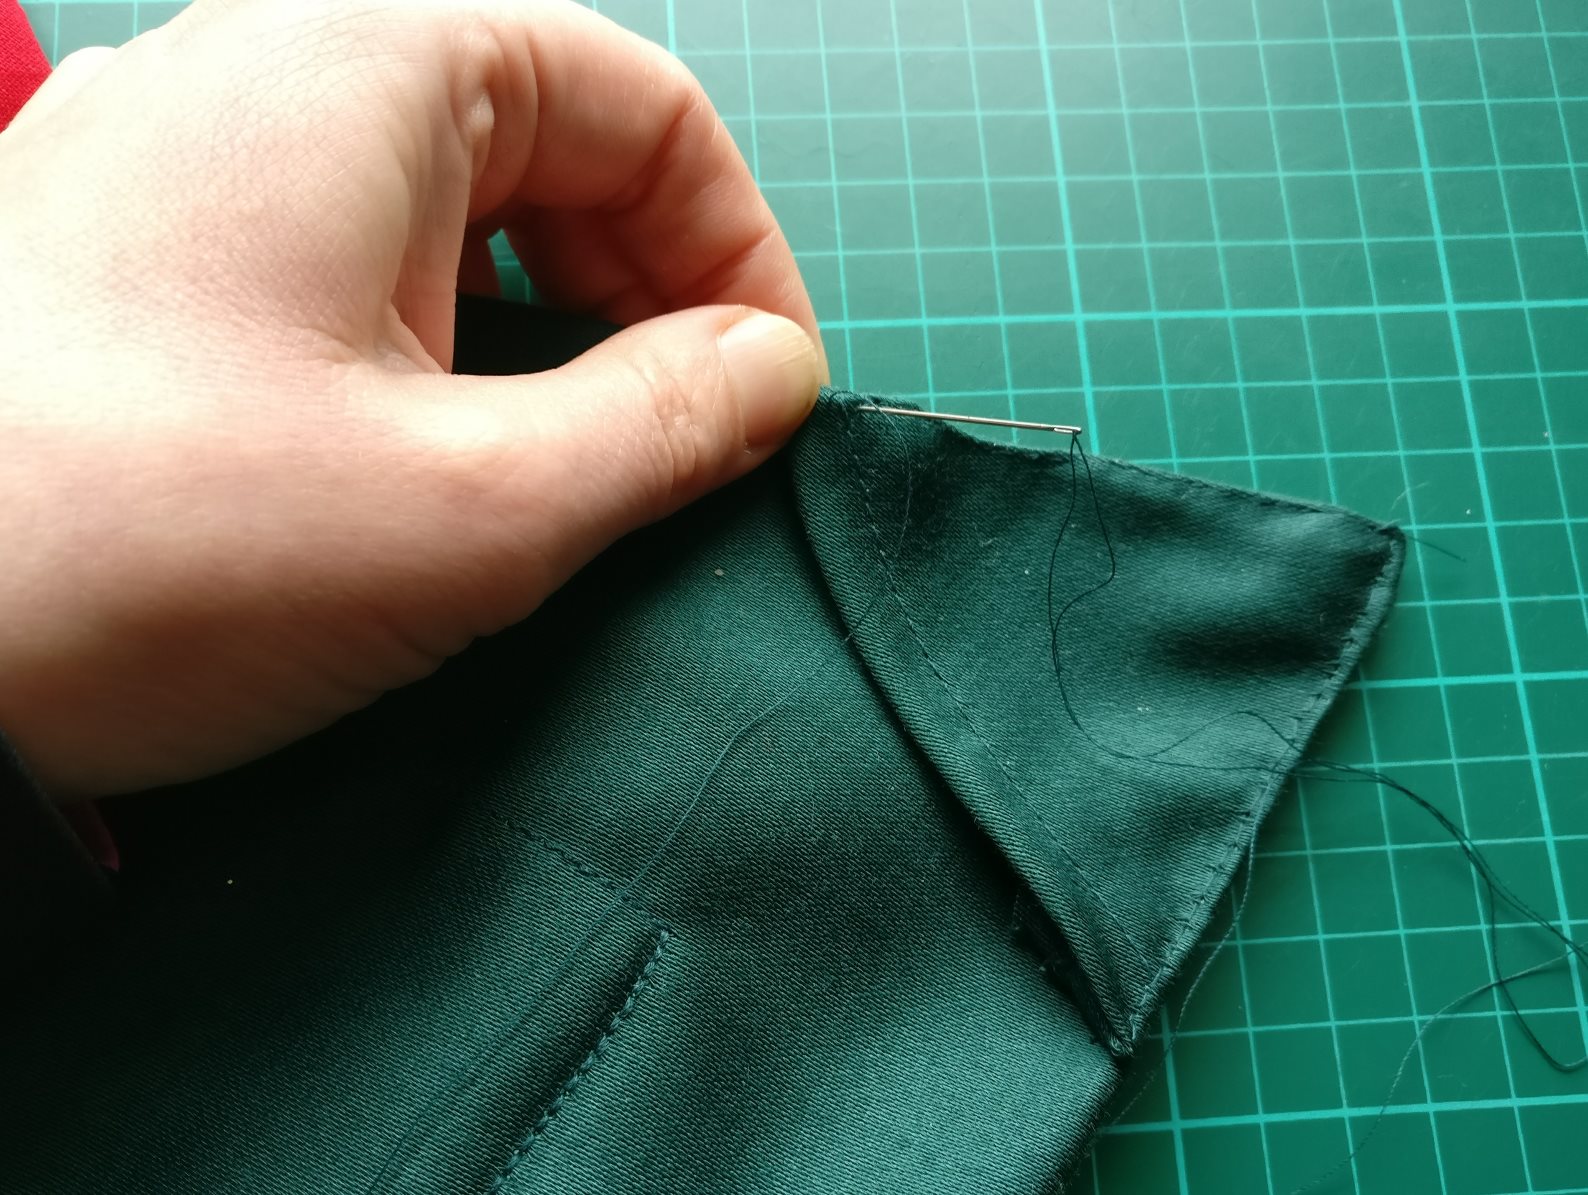
Hung up from the central point the tree curled around on itself such that you couldn’t see all my hard work – so I hand stitched some pockets at the corners at the back, so that reinforcing could be included by the addition of a net curtain rod!
All in all, much improved, and something that will hopefully be used by us for years to come 🙂 As a final note, after looking at it for some time, my son (4 years old) announced that it looked like a Christmas Tree – he seemed surprised, but I’m glad that my goal was eventually achieved – and all before December 🙂
