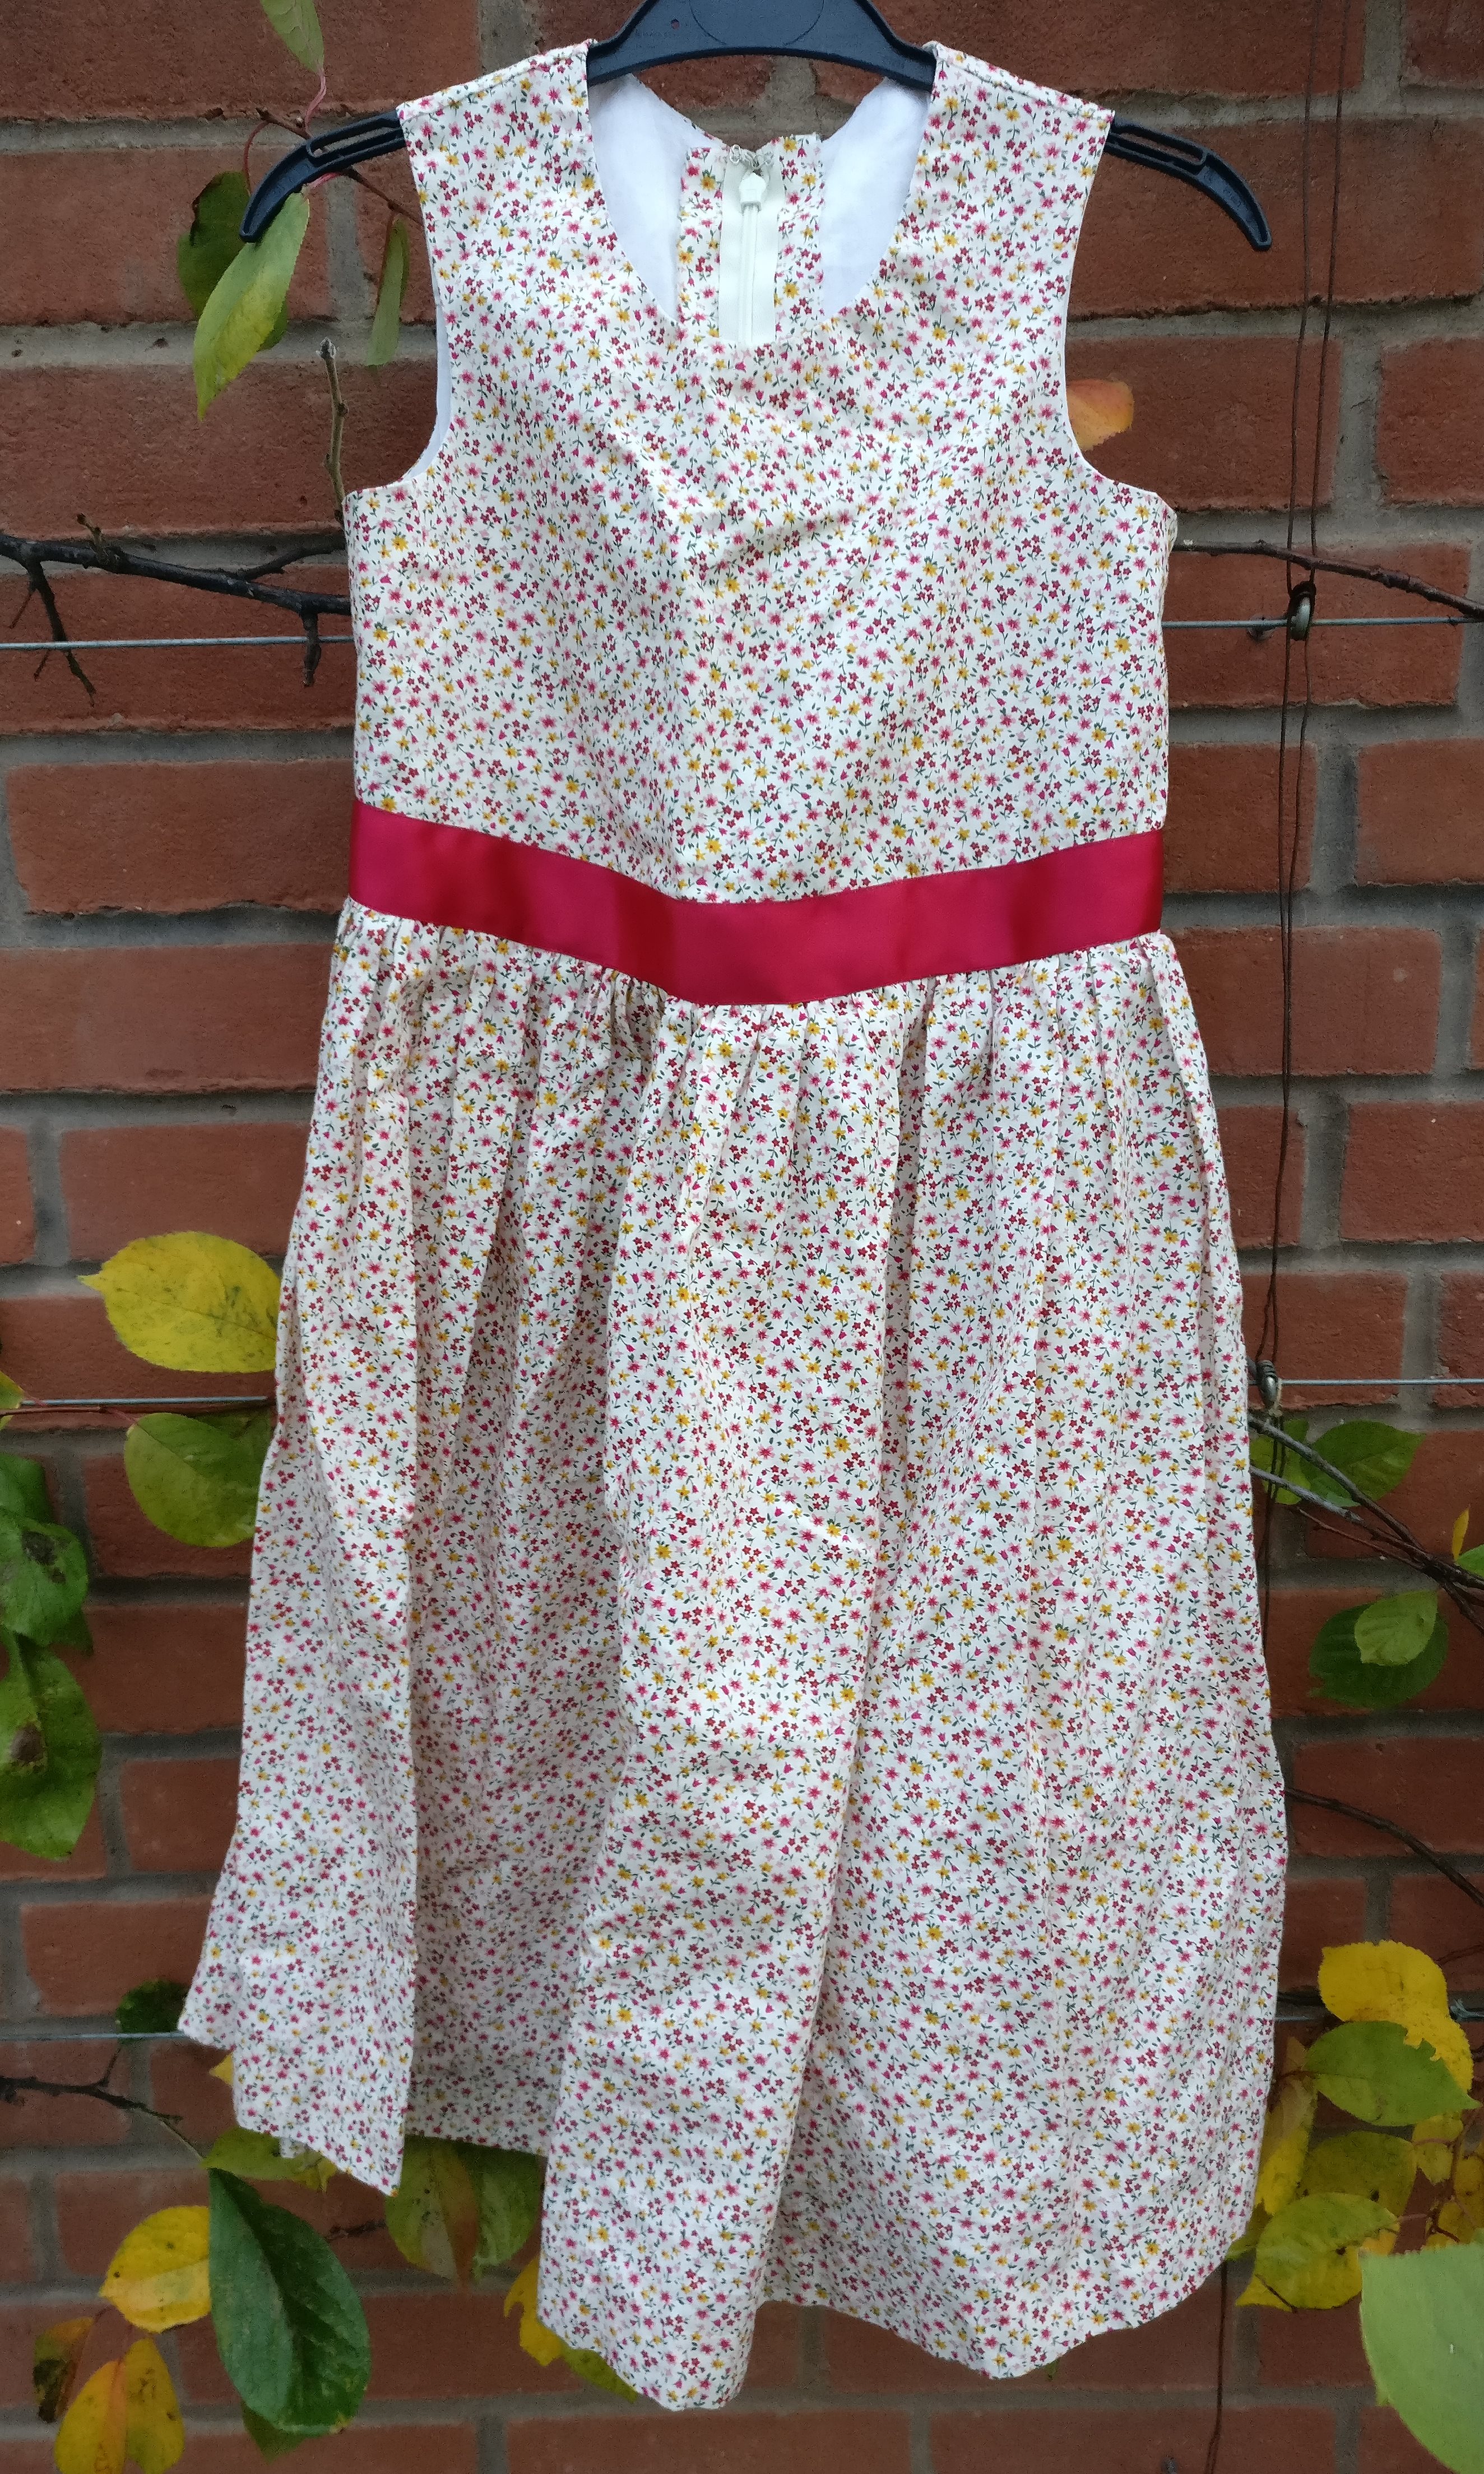
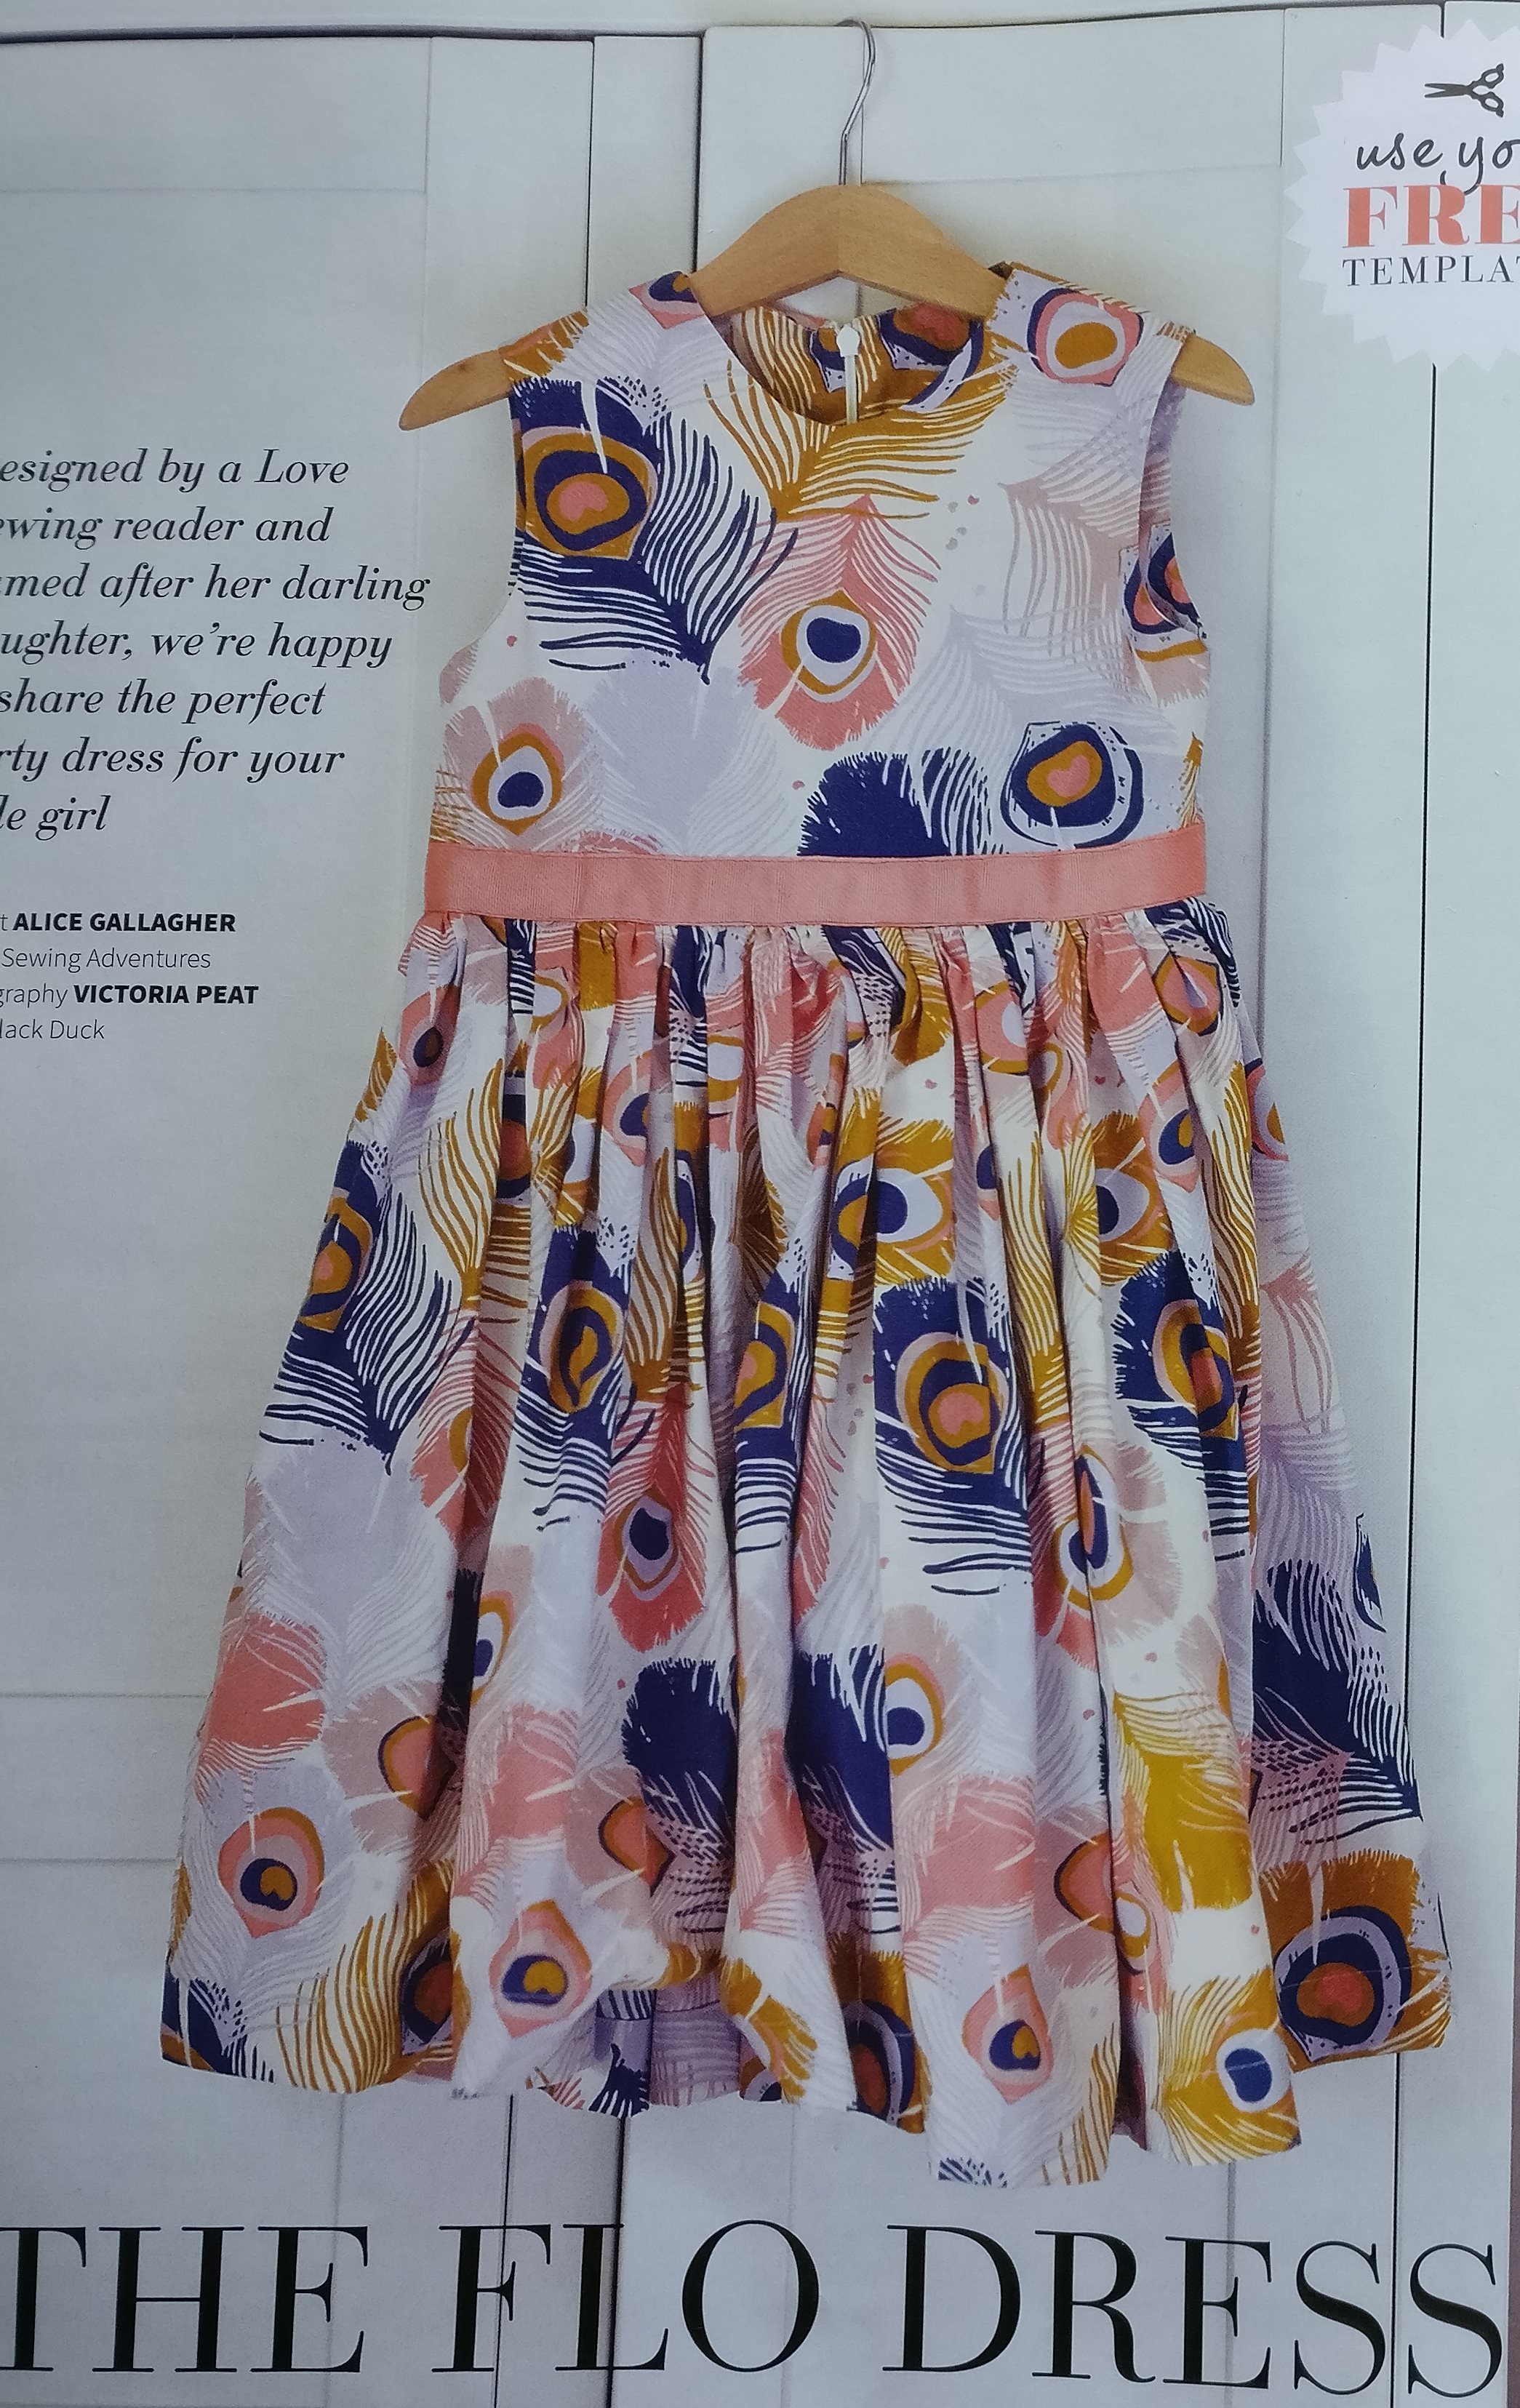
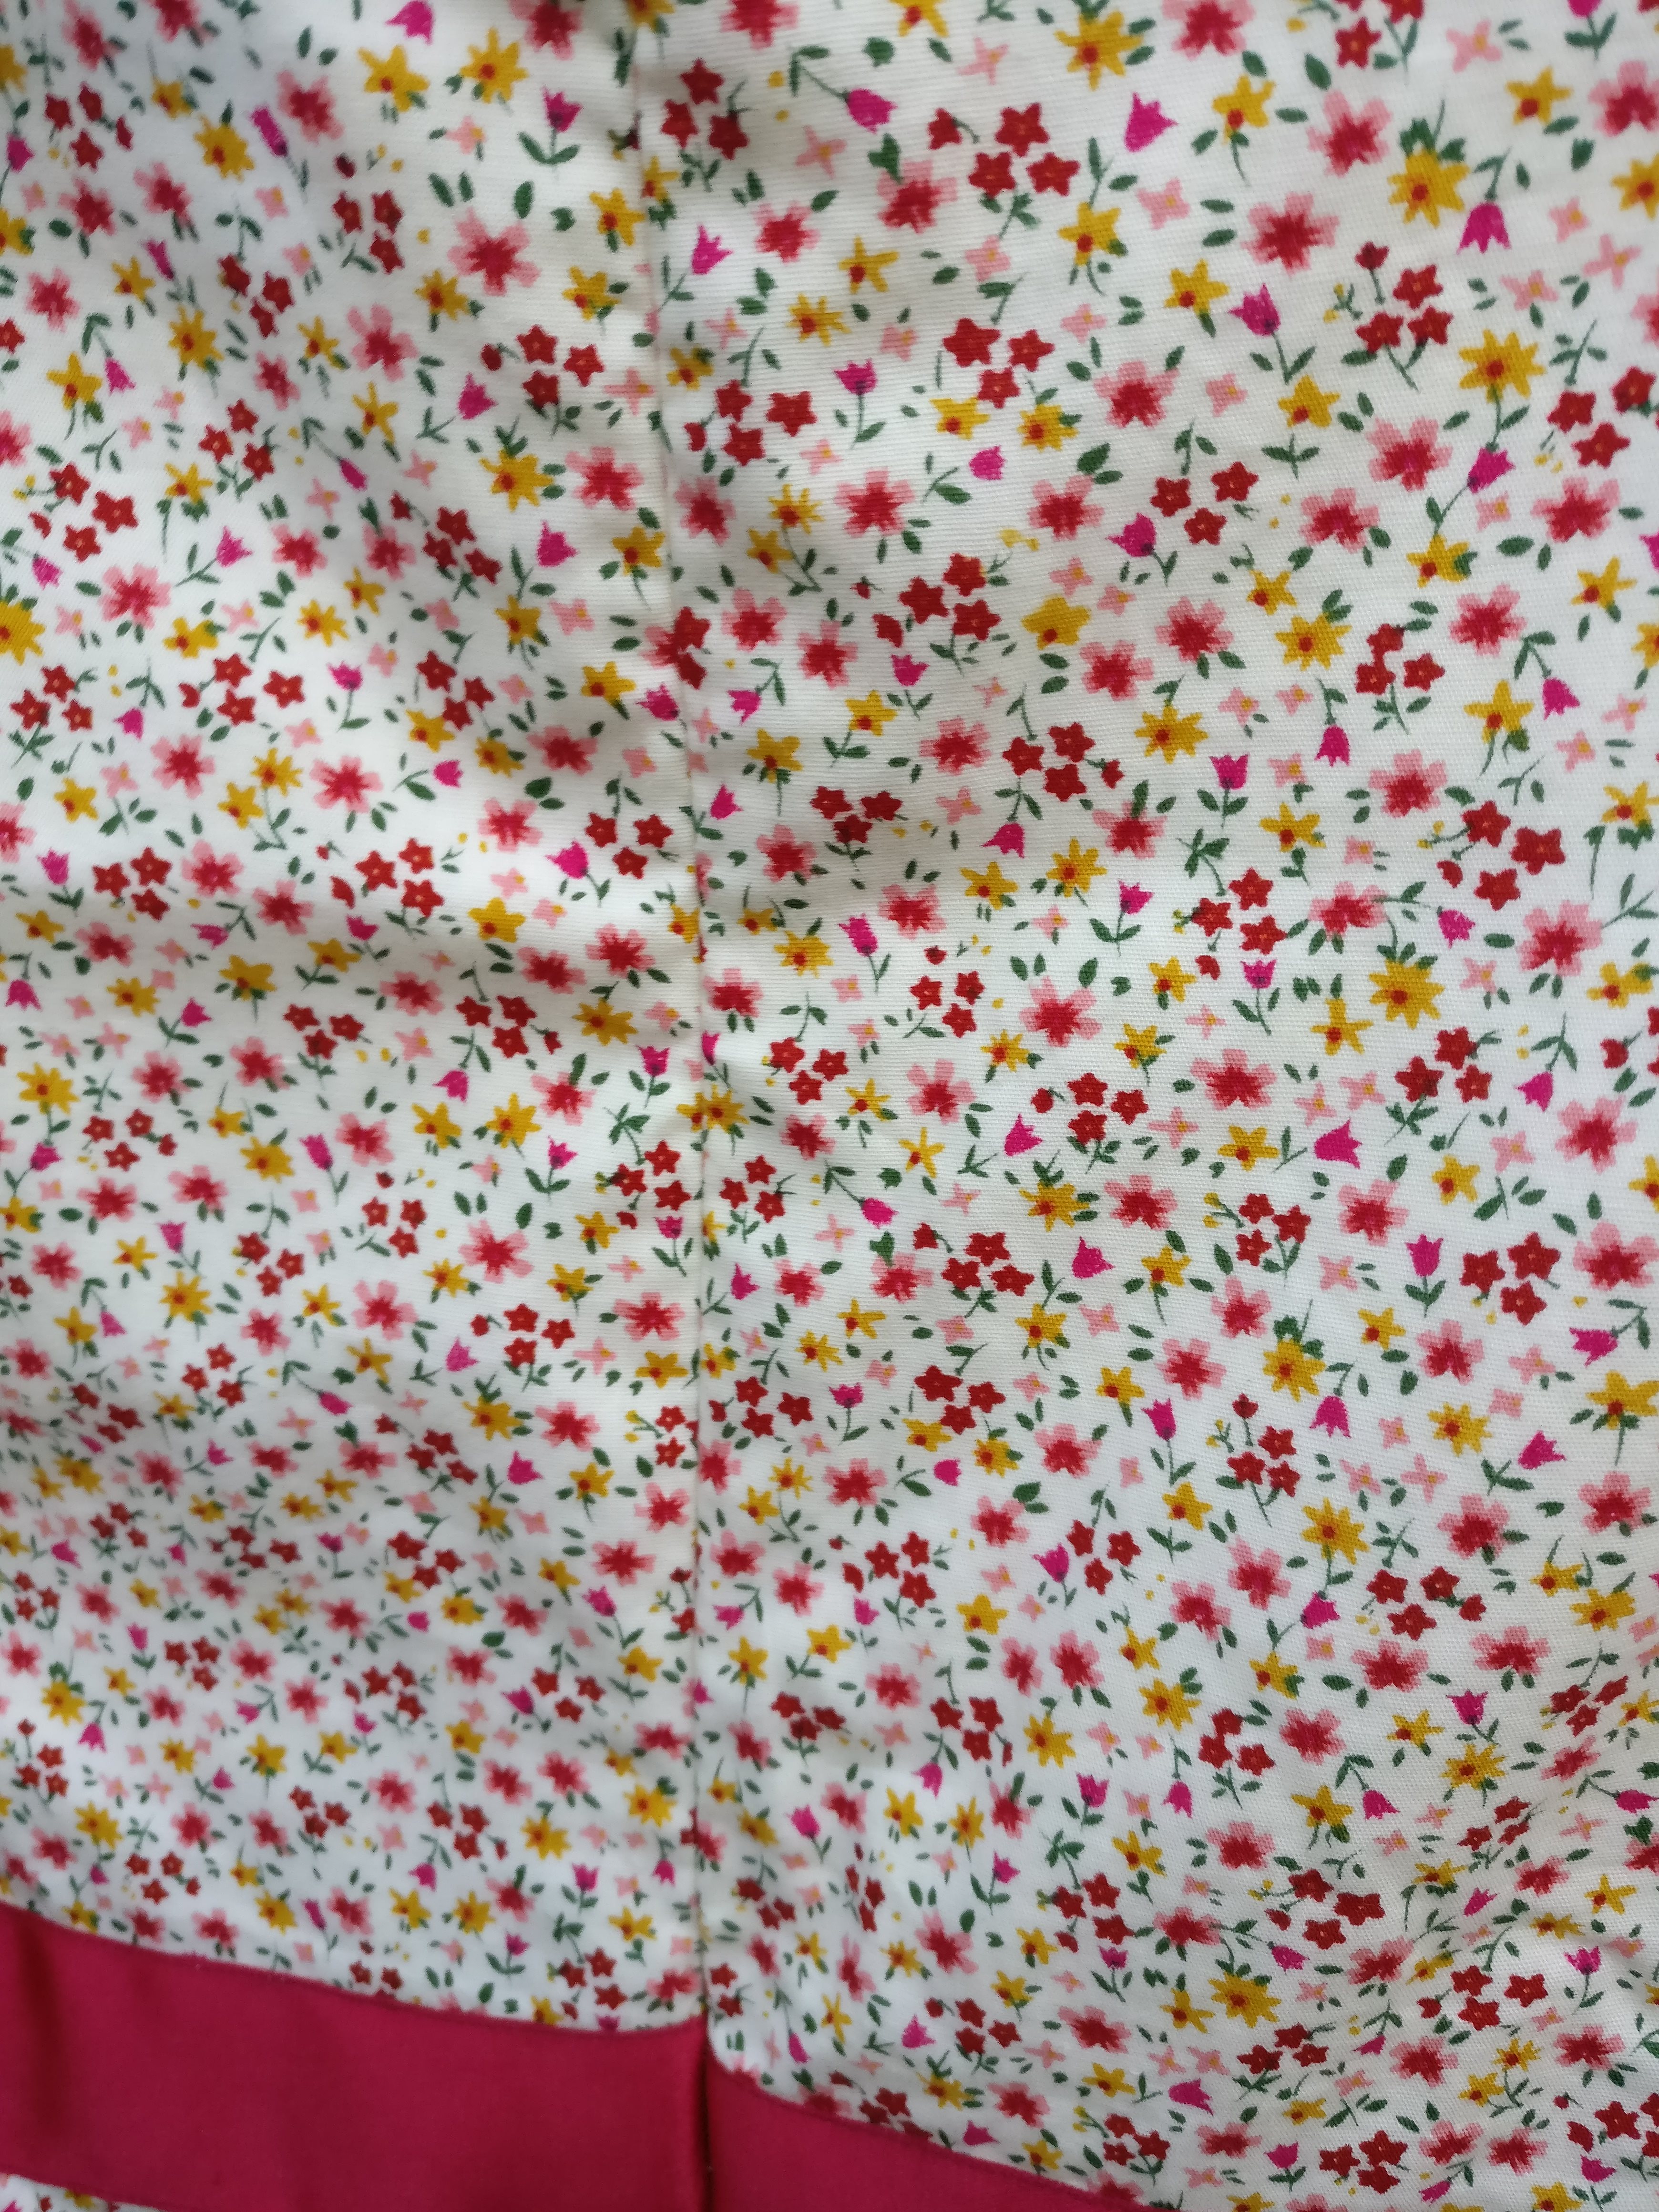
Last Christmas I requested as a present some material to make a dress for my little girl. My mother-in-law came up trumps with this material from her local fabric shop. It’s a beautiful soft drapey cotton with a delicate floral print.

Along with this, I was also given a white cotton lawn to use as a lining. With the start of summer coming up (yes, you did read that correctly!) I had to decide which of my girls dress patterns to make…I narrowed it down to a couple of patterns, but left the final choice up to the little girl in question. The pattern was then chosen as the Flo dress from Love Sewing magazine.
My daughter is rather small for her age, but against the measurement chart she came up as a year older than her age – the largest size, in fact. Well, I traced the pattern at that size, and then cut out the bodice lining in the lawn, using this as the toile for the final version. When she tried it on, we found the neckline to be too high for her – it is shown this high in the pattern image, but I hadn’t really realised just how high it was, and how uncomfortable my daughter would find it. In addition, my daughter has a bit of a tummy that needed to be accommodated and the armscye didn’t fit quite correctly either. It’s at this point that I left the dress sitting on the side for a while as I wasn’t quite sure how to tackle the required adjustments. With the end of summer looming, and a big birthday party coming up for her Grandad, I decided that I really ought to face my fears and finish the dress.
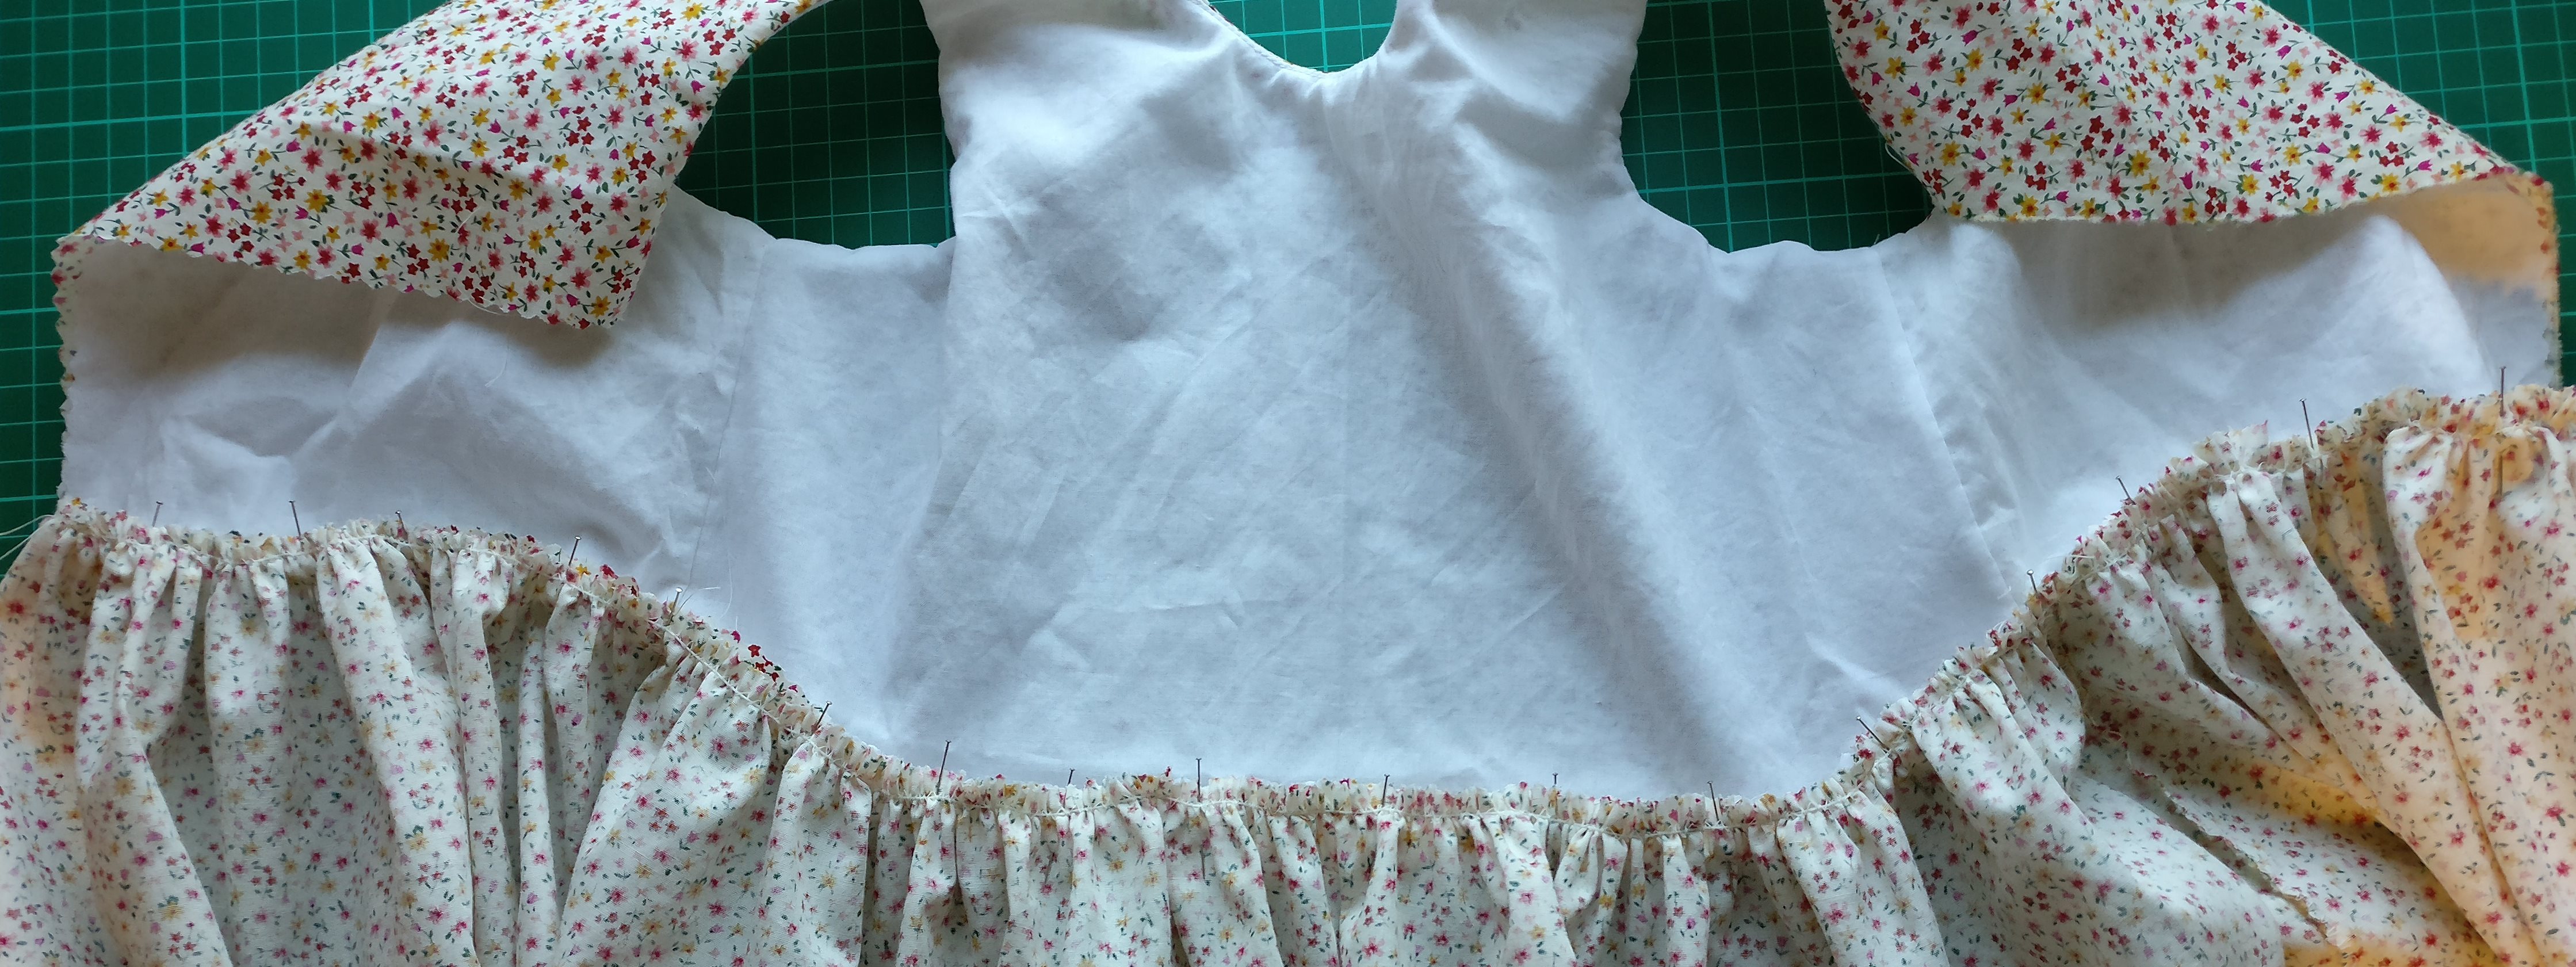
I put the lining back on my little girl, and drew a line where I thought I needed to remove fabric around the arms and neckline. I then cut up the centre front of the bodice, leaving a small pivot point attached at the neckline and spread the bodice to allow for her little tummy. I also at this stage lengthened the centre front of the bodice quite considerably, as the waist of the pattern wasn’t sitting at her natural waistline. As the back of the lining didn’t require any extra material, I used the original pieces following the neckline and armscye alteration.
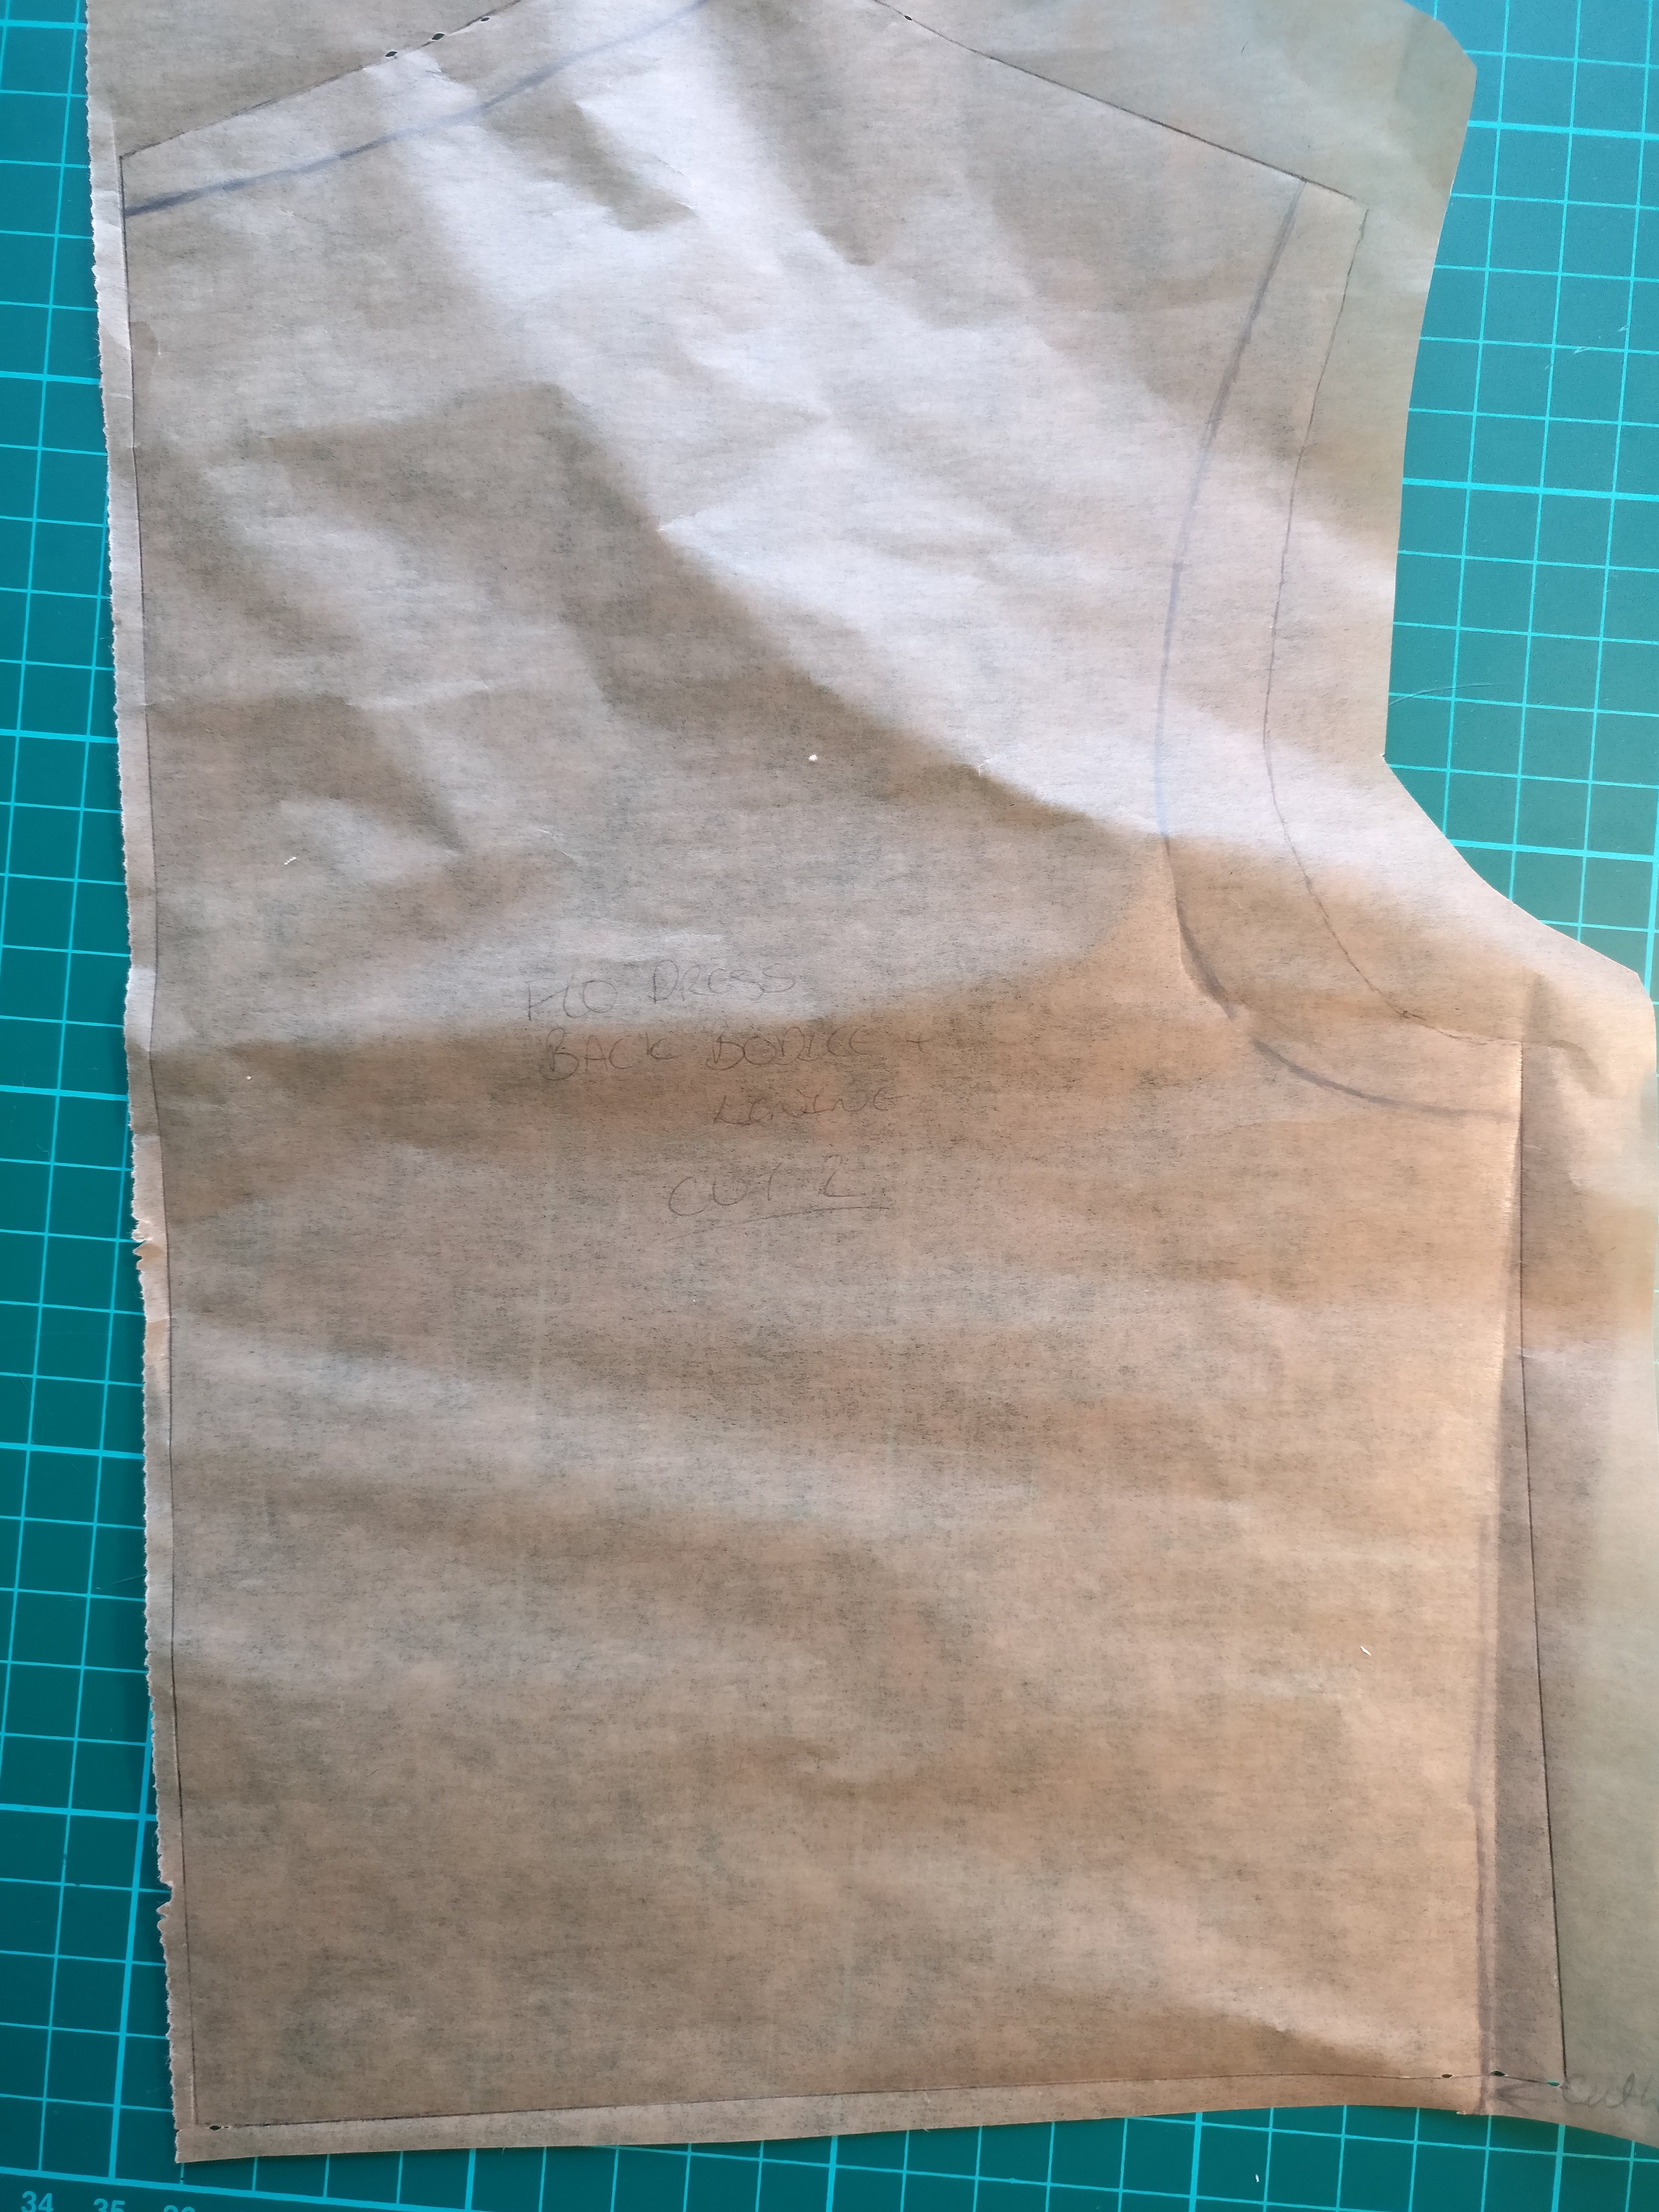
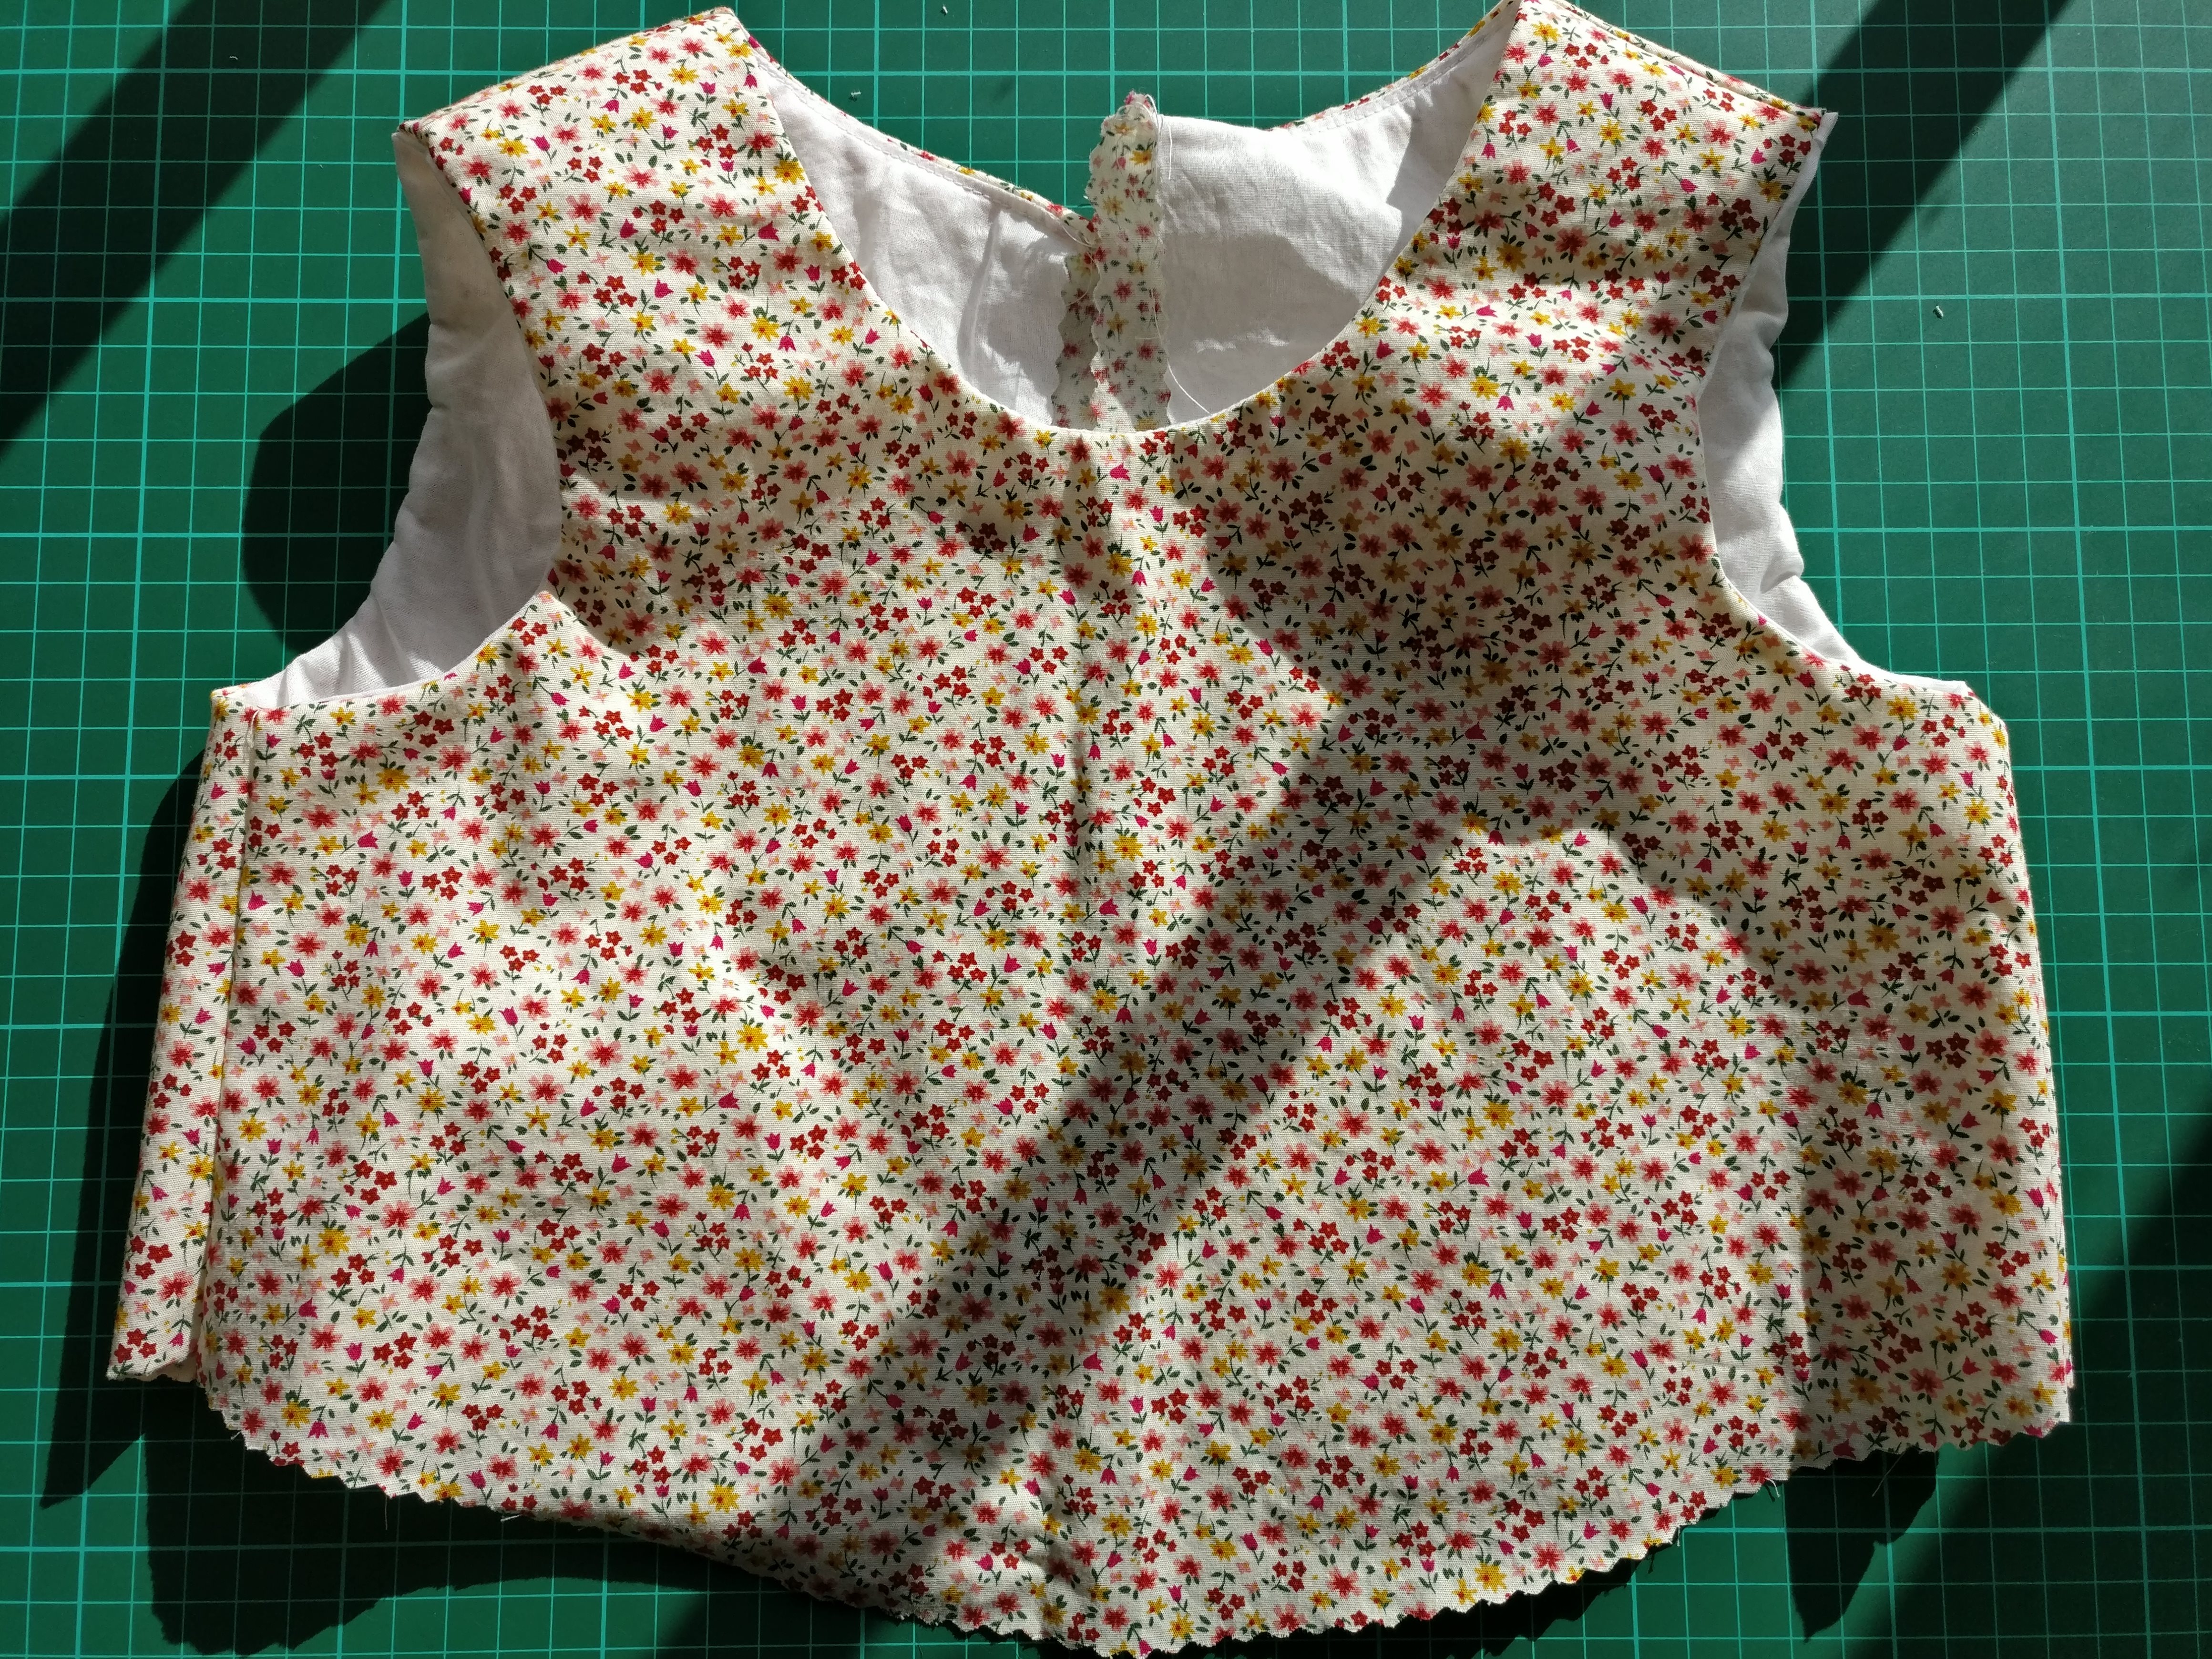
I cut the new bodice lining, and stitched the lining at the side seams before yet again trying it on my daughter. This time, the fit was rather better – a little bit more growing room than I had originally intended, but better too much than too little!
From that point on, I’d love to say that it was a simple make – it was pretty straightforward to sew the bodice, and attach the skirt. I used dental floss to gather the skirt. If you’ve not used this method for gathering, then take note – it’s fabulous…simply lay a piece of dental floss along the material to be gathered and then sew a large zigzag over the top of the floss, being sure not to catch the floss in the zigzag.
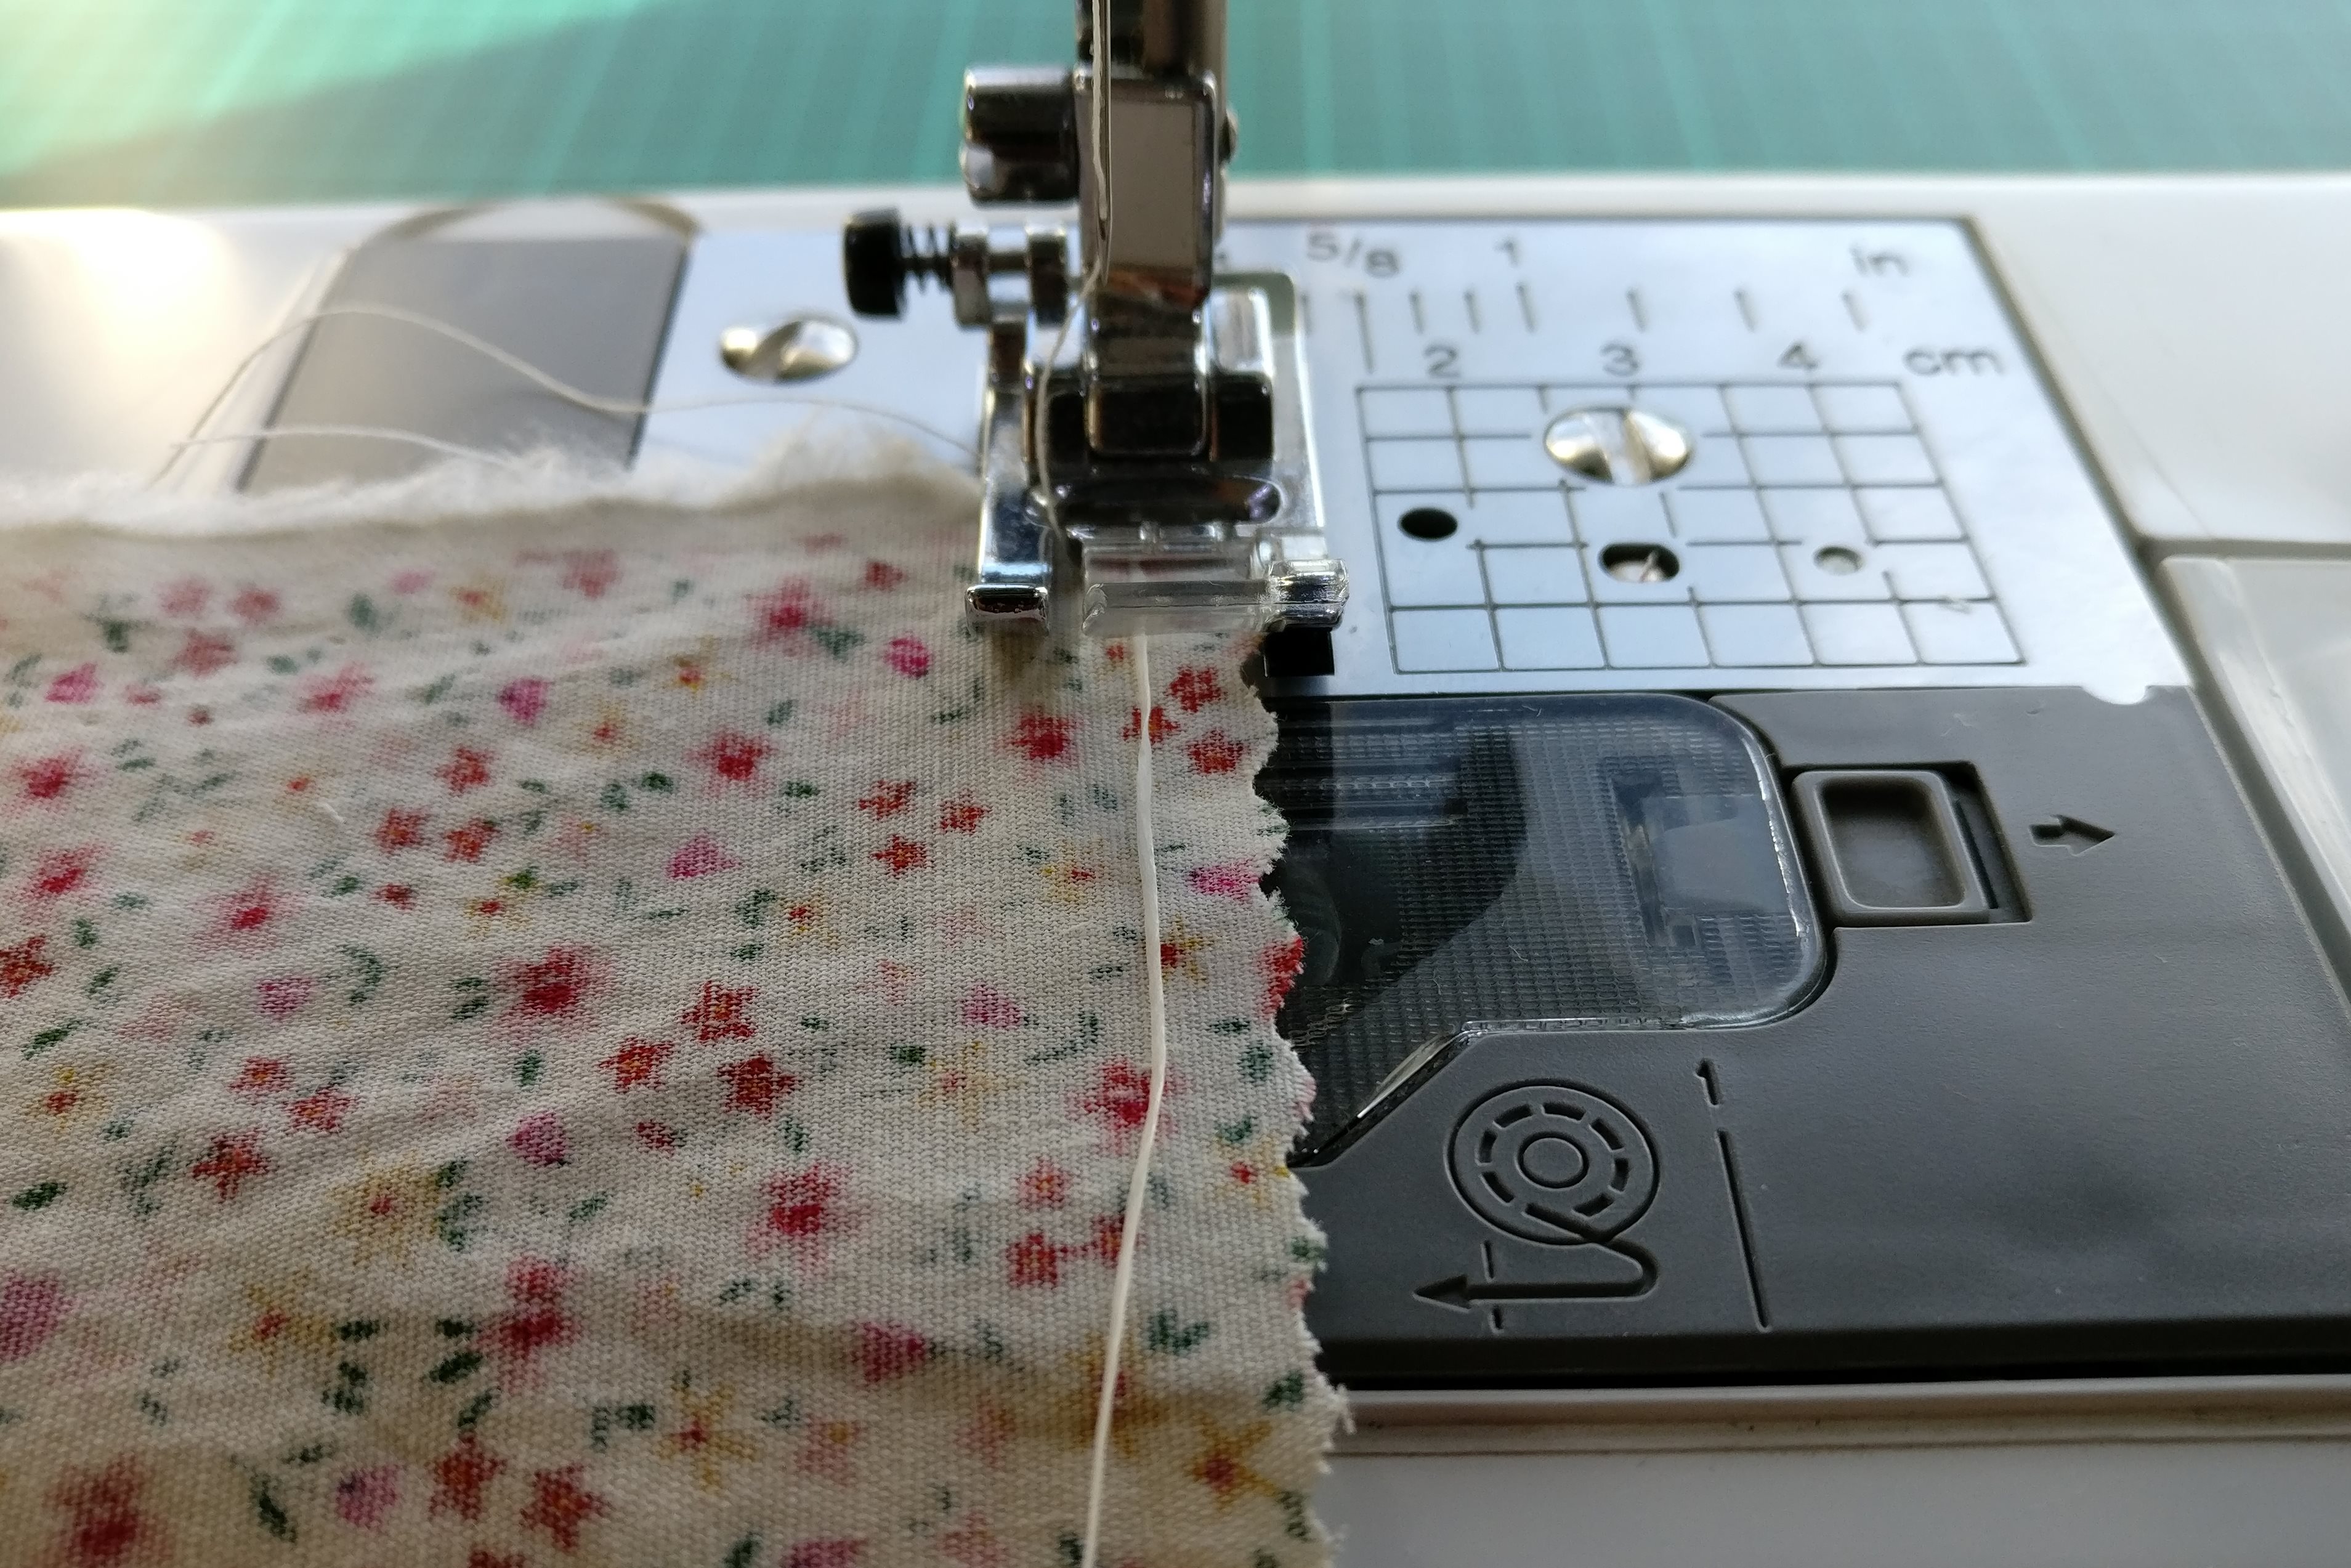
Once you’ve done this, hold either end of the floss, and gather the material along it to the correct amount. I matched my side seams and back seam, and then gathered so that each panel is evenly gathered. (Once again, lots of pins!)
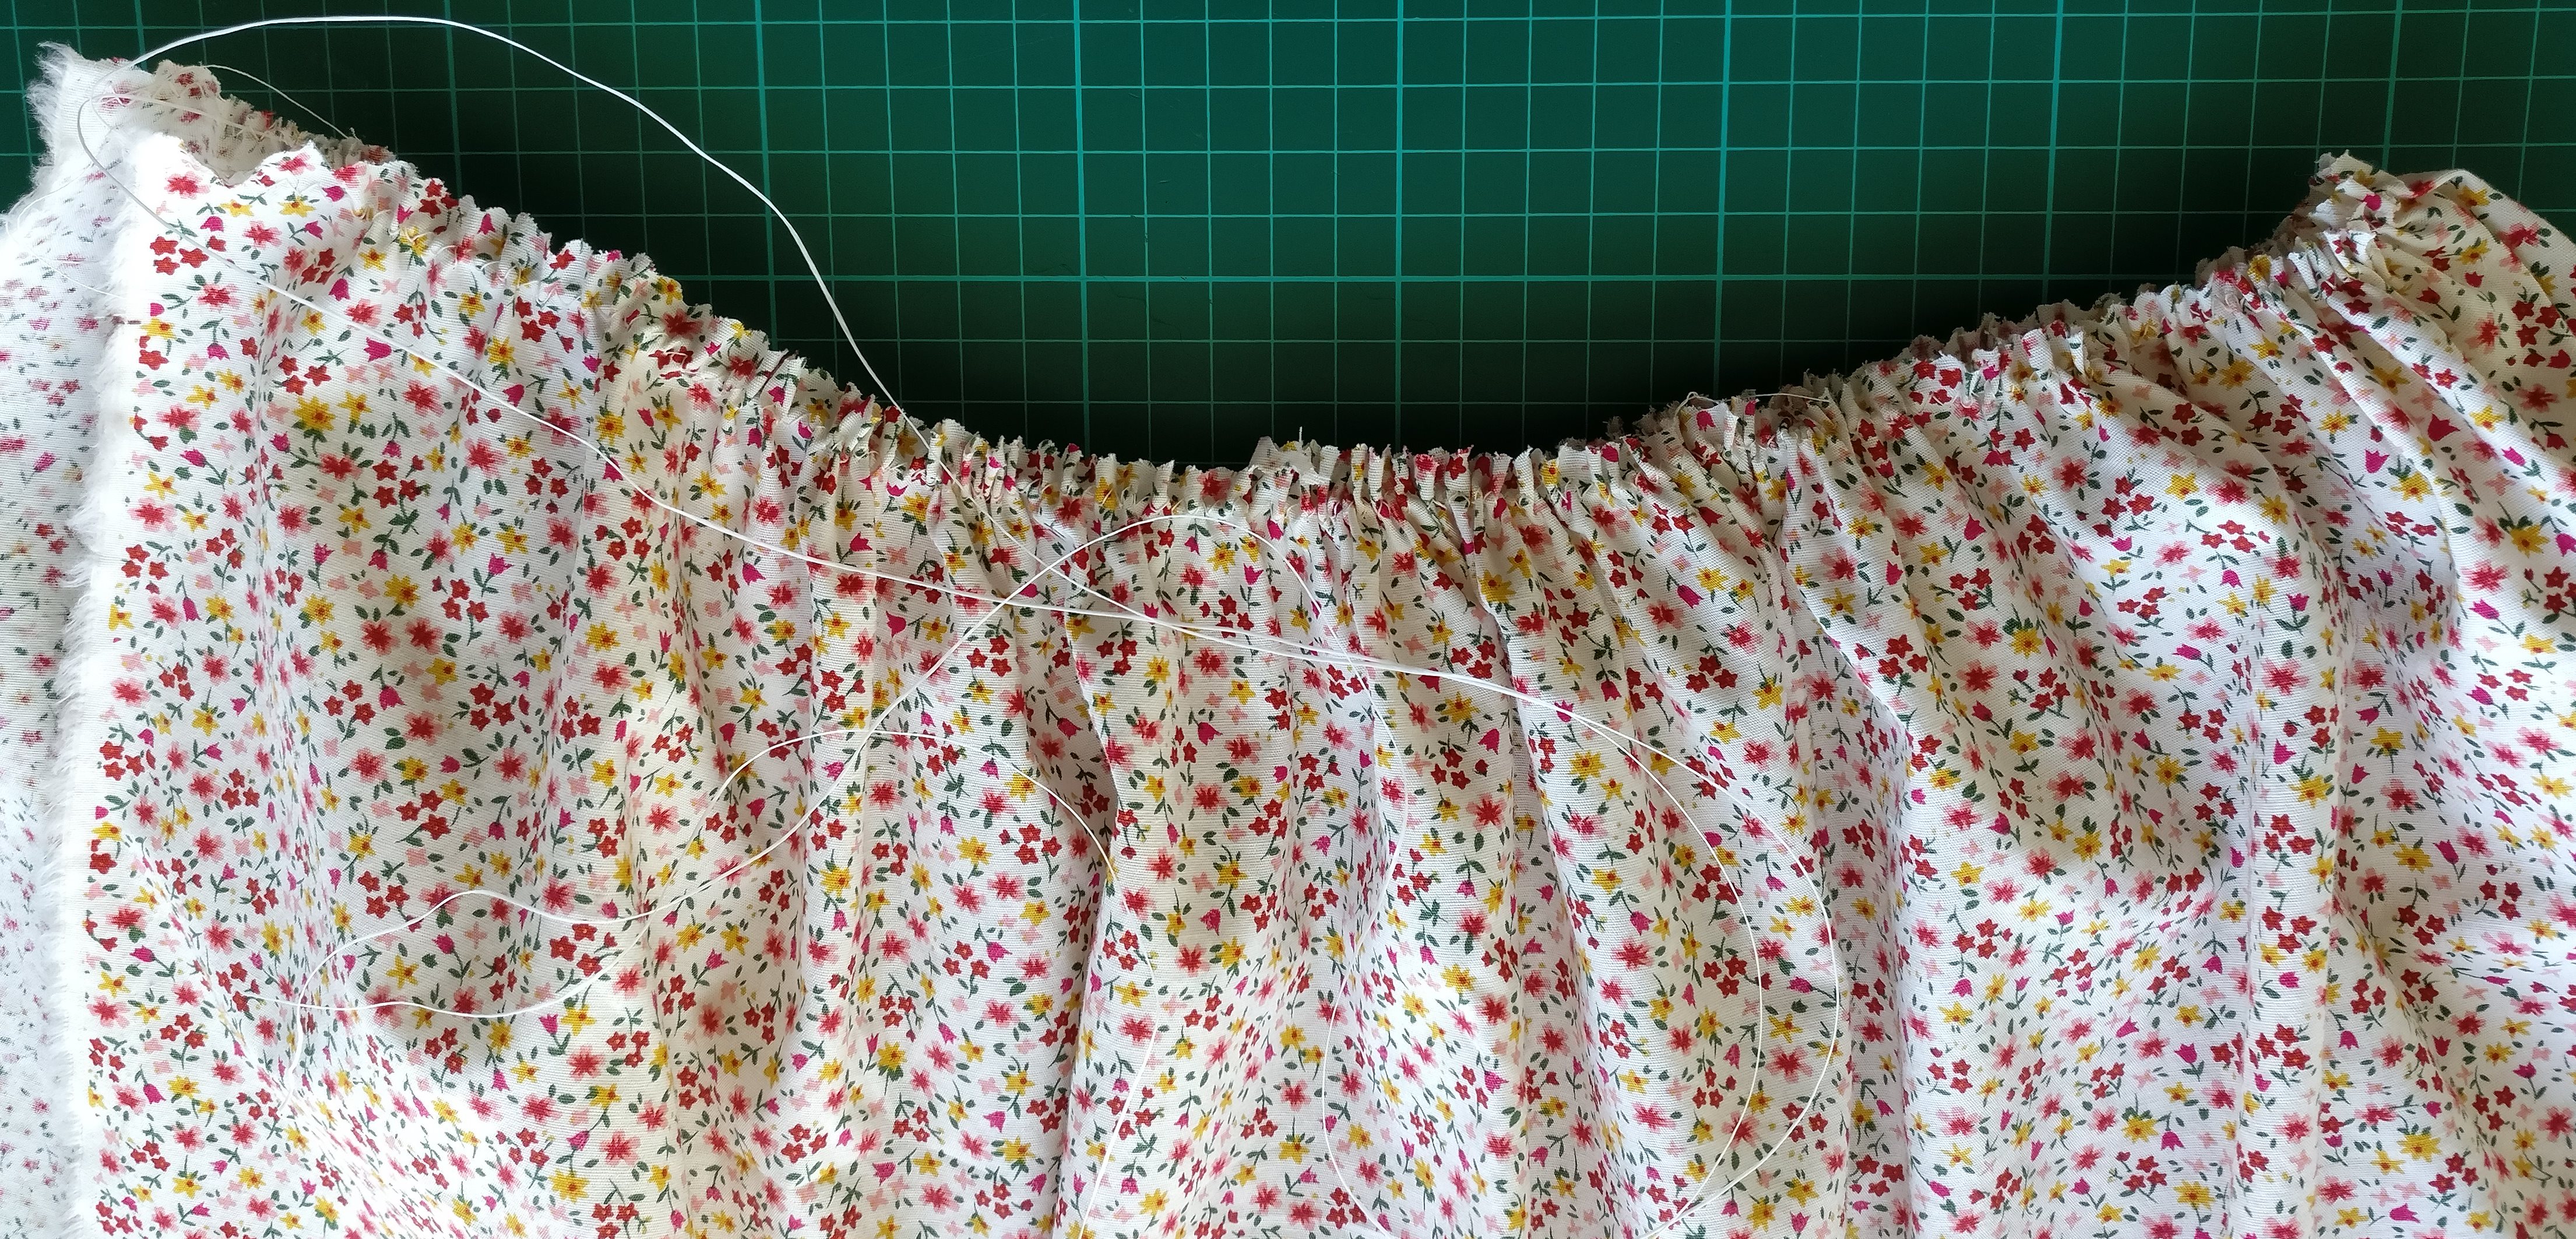
Because the floss is waxed and strong you can easily gather along it and remove it without it breaking, and it’s really easy to tell apart from your normal thread 🙂
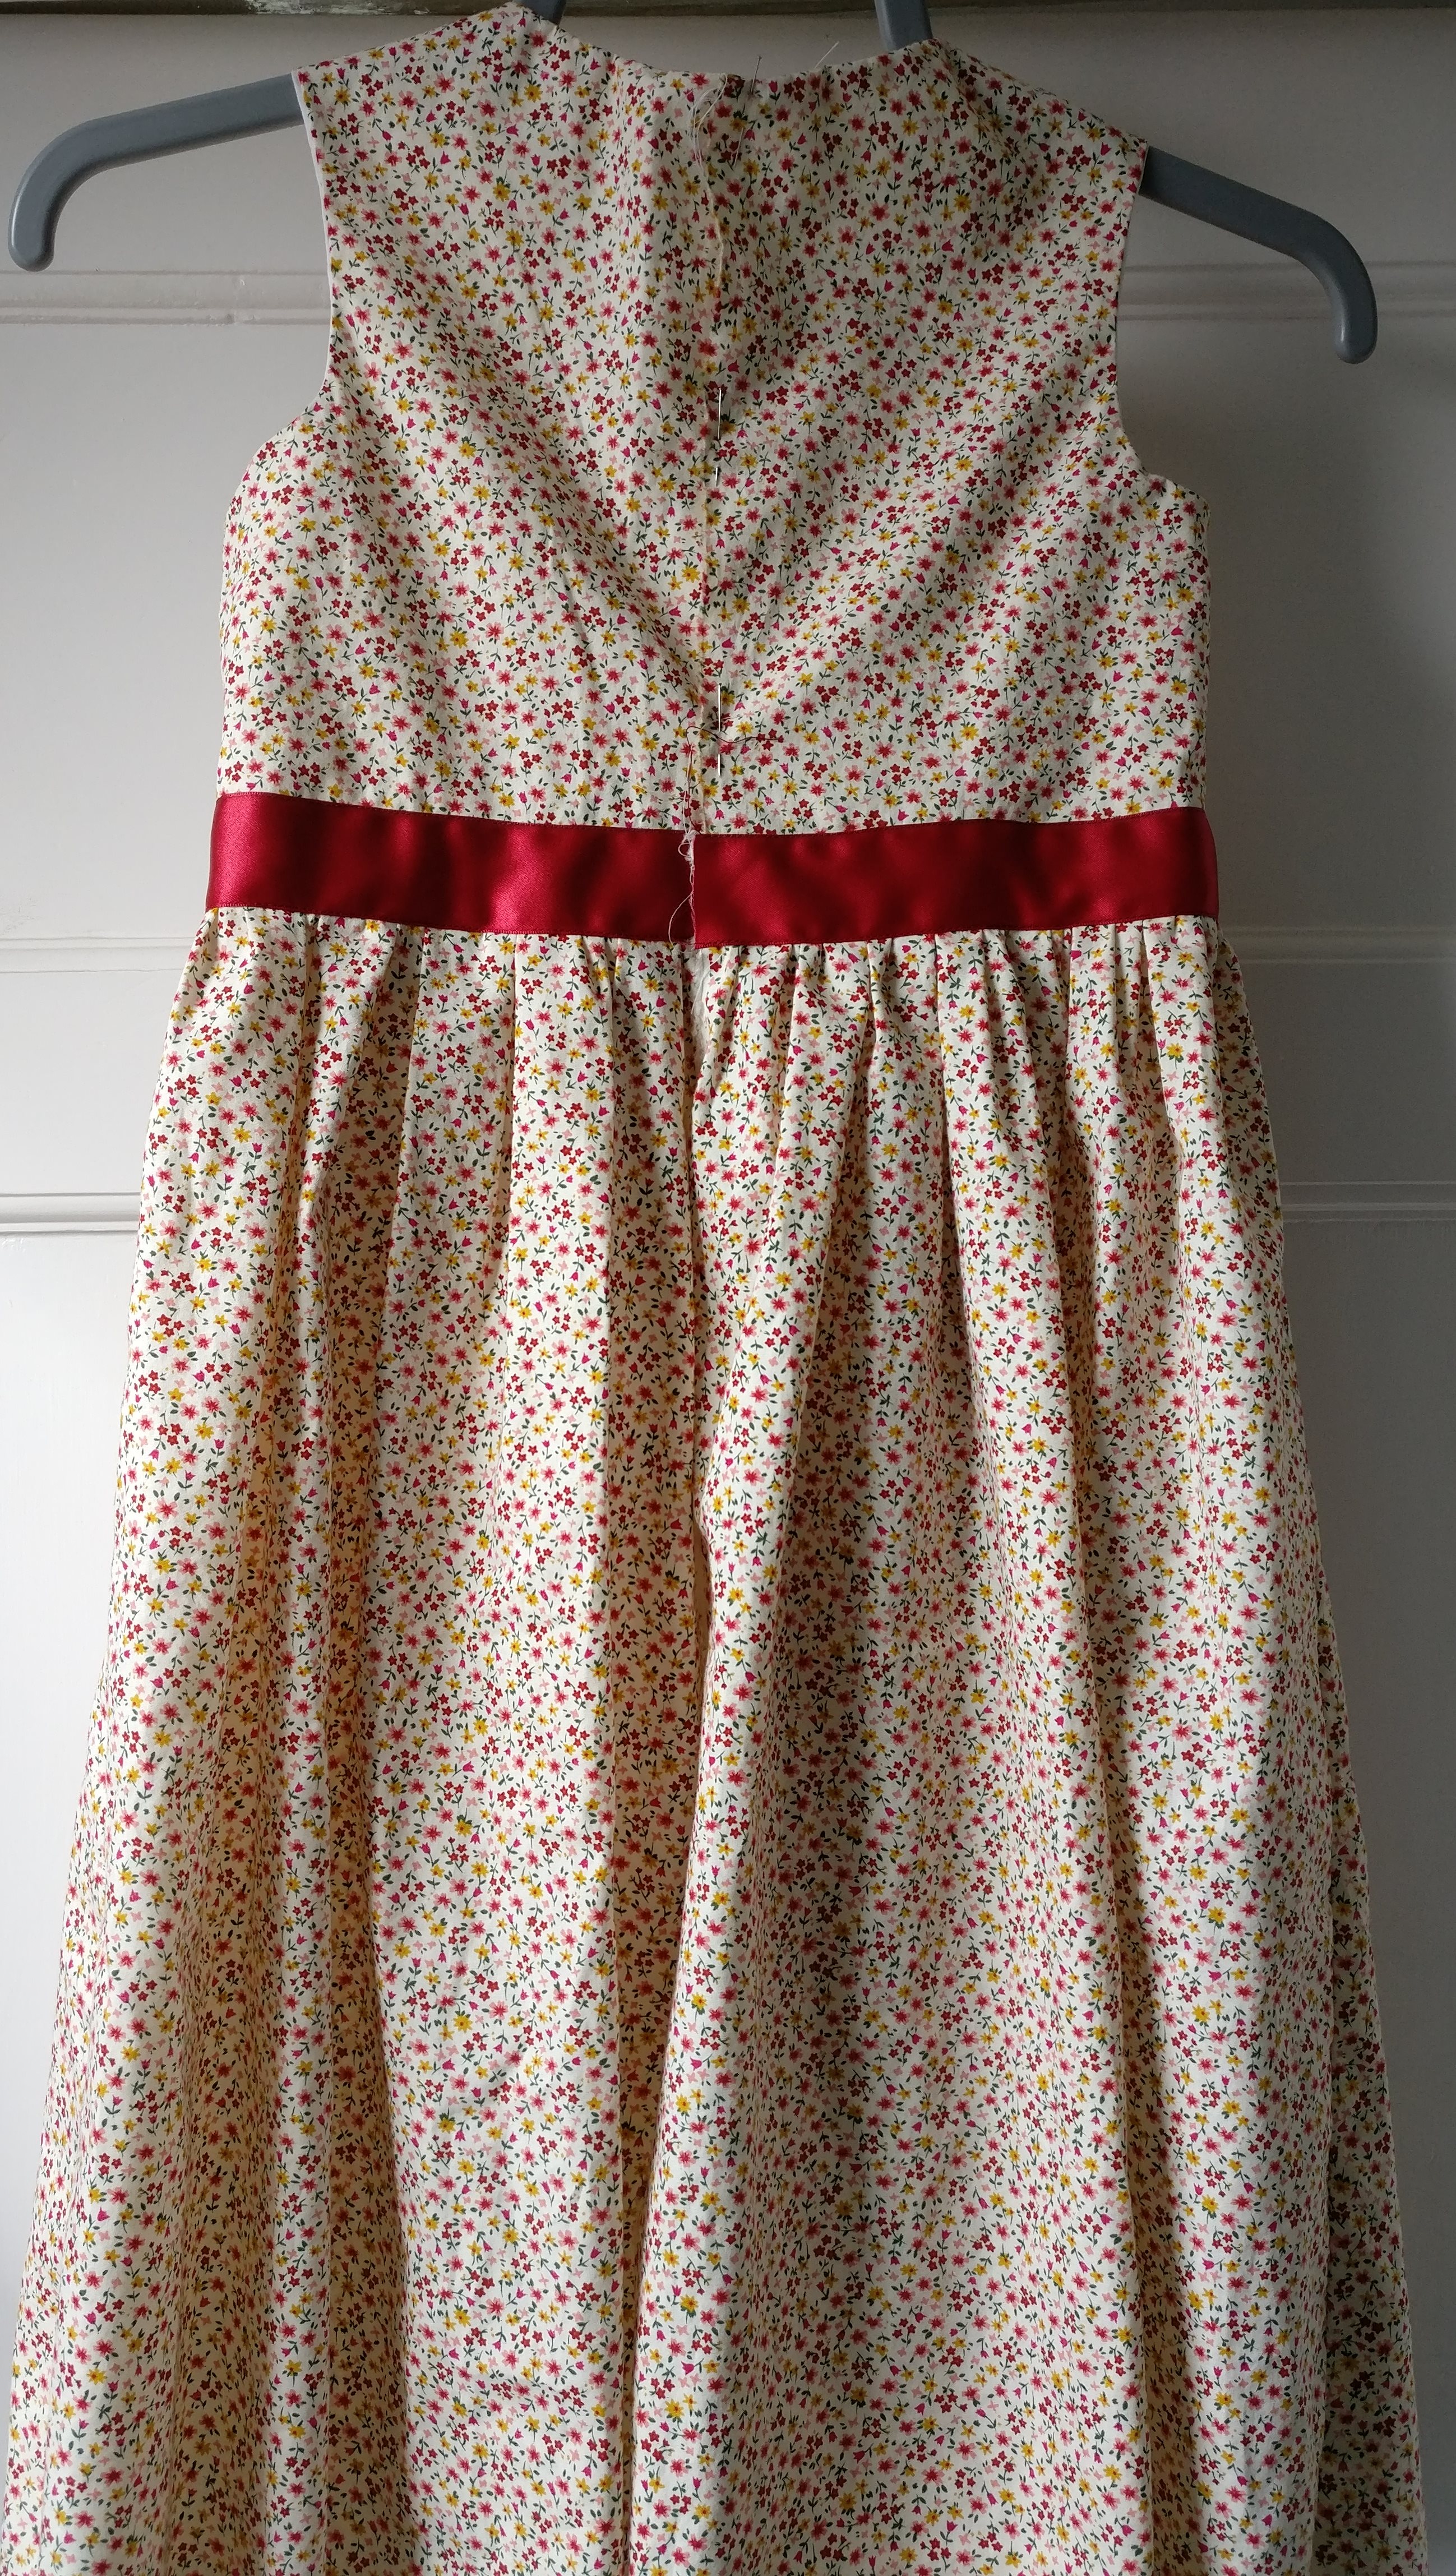
I then sewed the ribbon over the waist seam of the dress, at this stage it was starting to come to life – I had wondered whether to bother with the ribbon but I’m really glad I did.
The problem came when I attempted to insert the invisible zip into the bodice. I’ve not made a lined dress with an invisible zip, but i’m pretty certain that you should be able to hide the zip tape between the lining and the top fabric. Unfortunately I couldn’t work out how to make this happen – the zip was longer than the bodice, and so wouldn’t fit in between the two layers above where the bodice and lining had been sewn together by attaching the skirt.
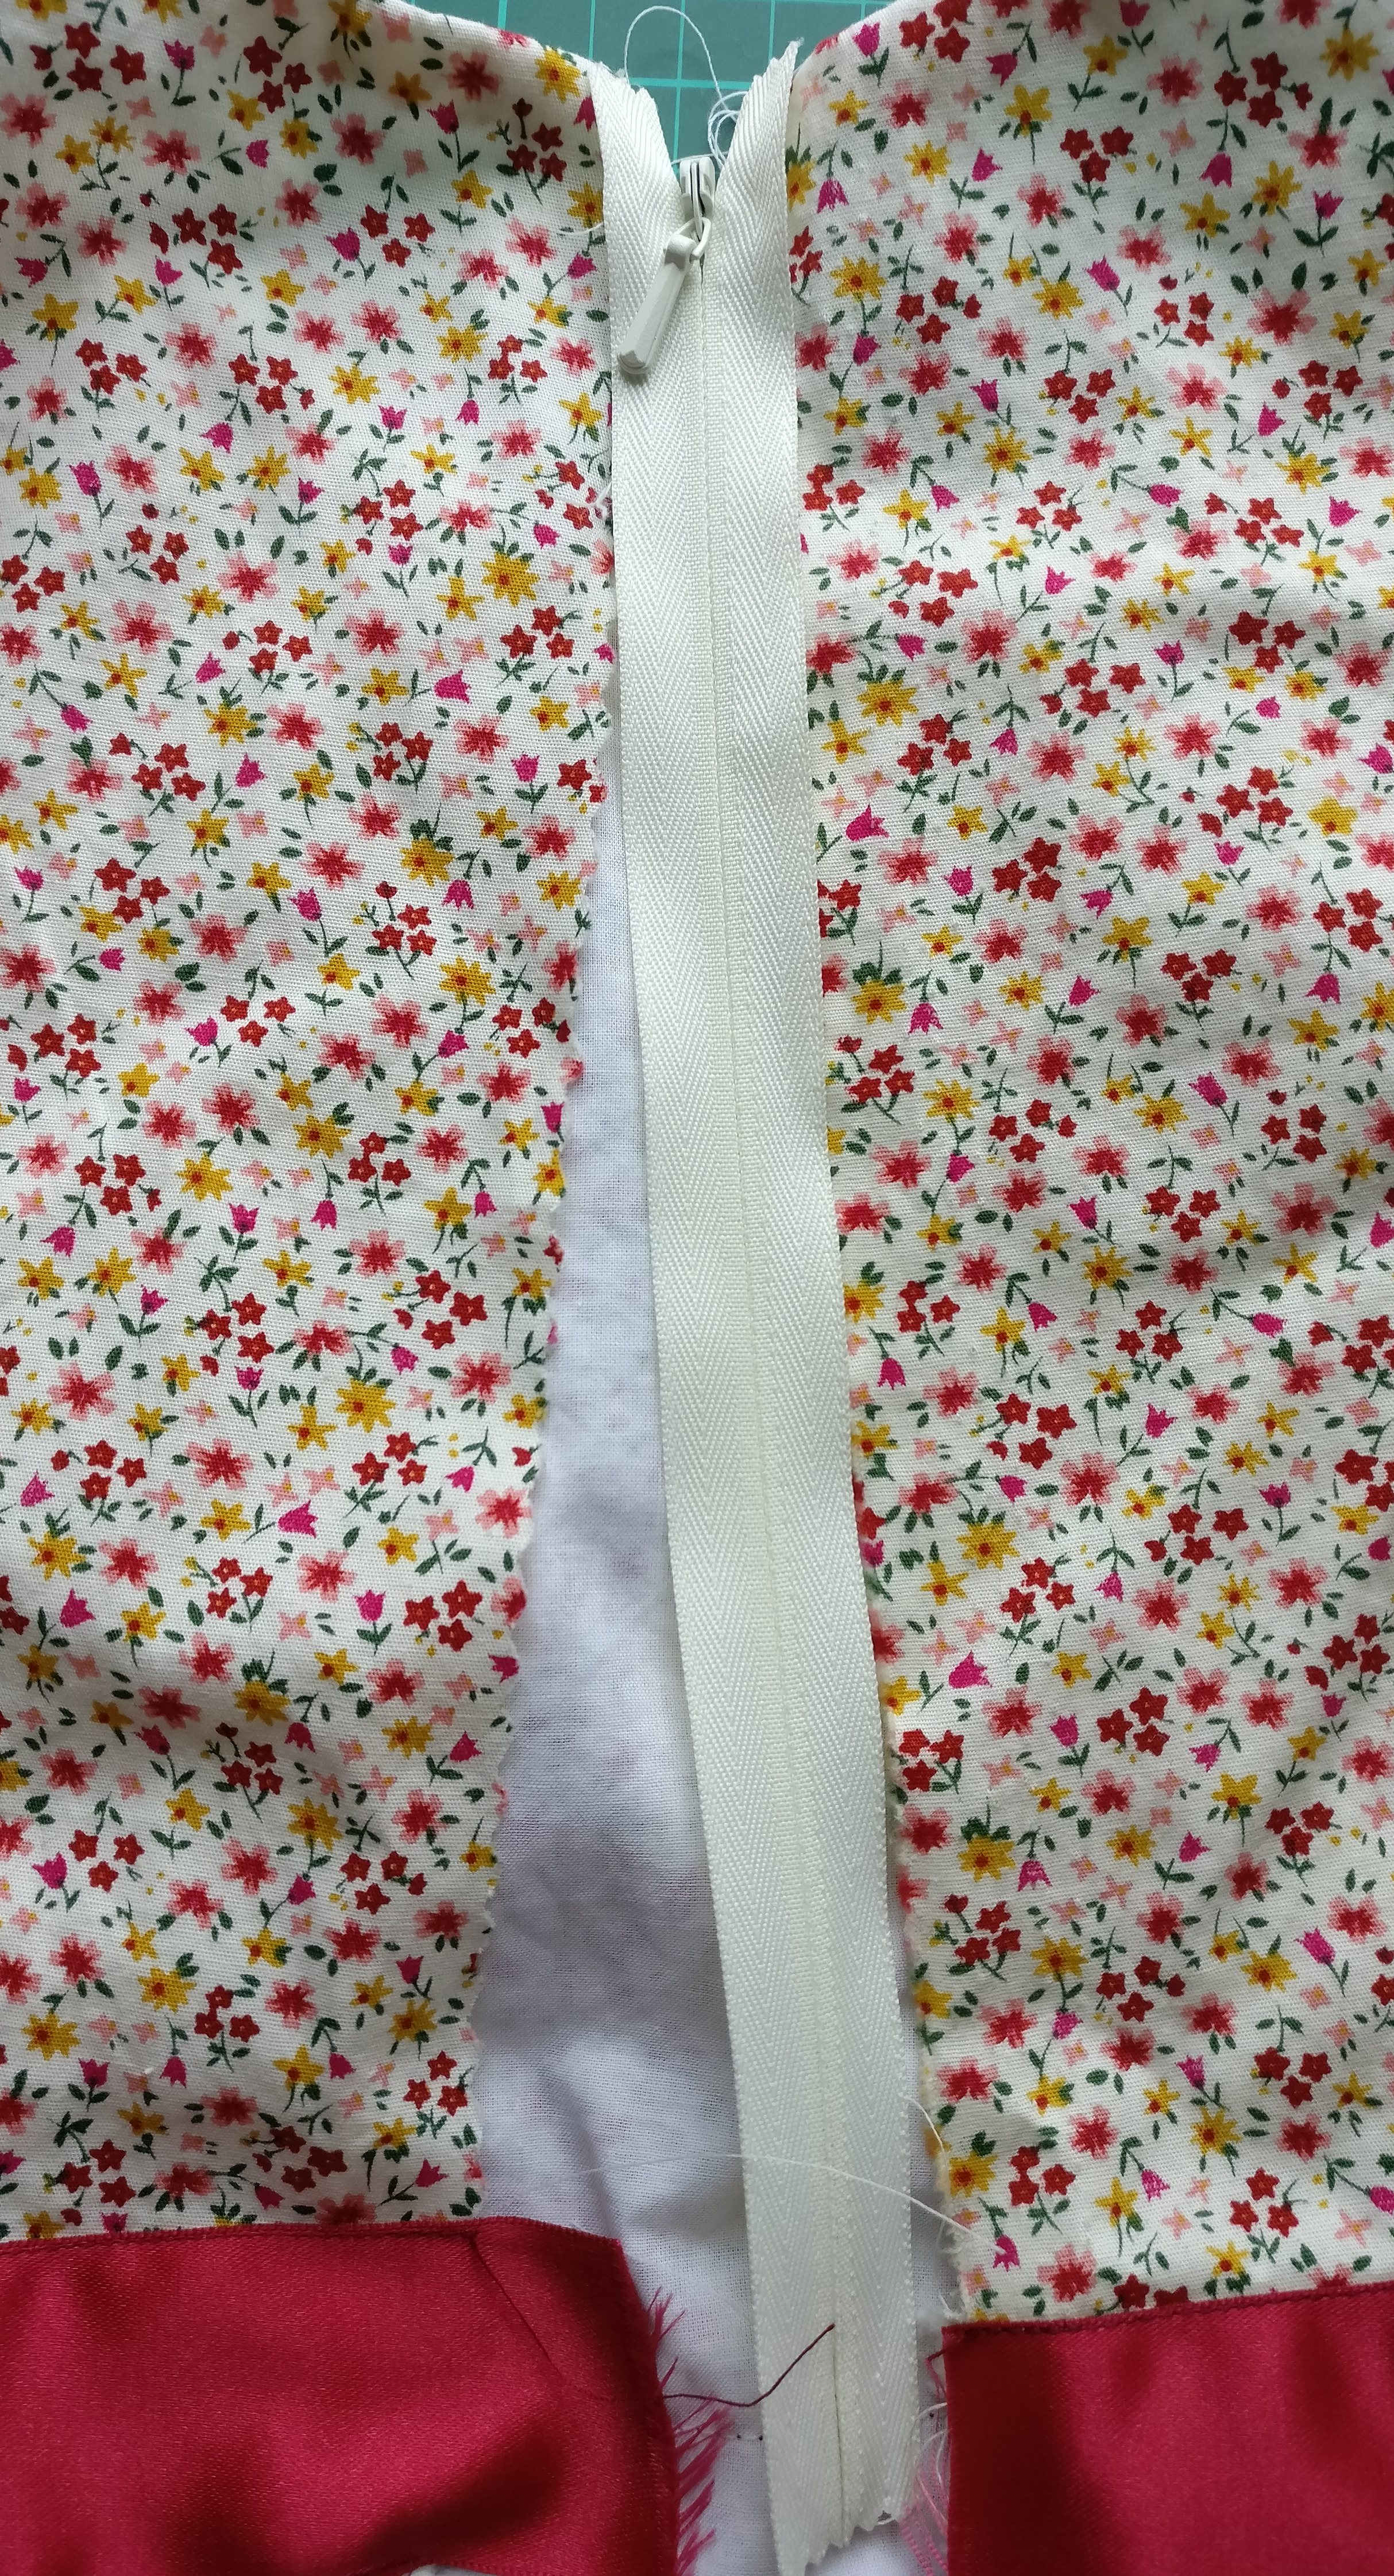
I did consider taking the skirt off the bodice, but this would have entailed removing the ribbon as well as undoing the gathering, so I just decided that the zip would have to be imperfect on the inside of the dress! On the outside of the dress however, the zip is perfect – I am so proud of the invisibleness of this invisible zip!
A hook and eye, and a quick blind hem on the machine (I did try doing the hem by hand, but life is just too short I’m afraid!) and the dress was complete.
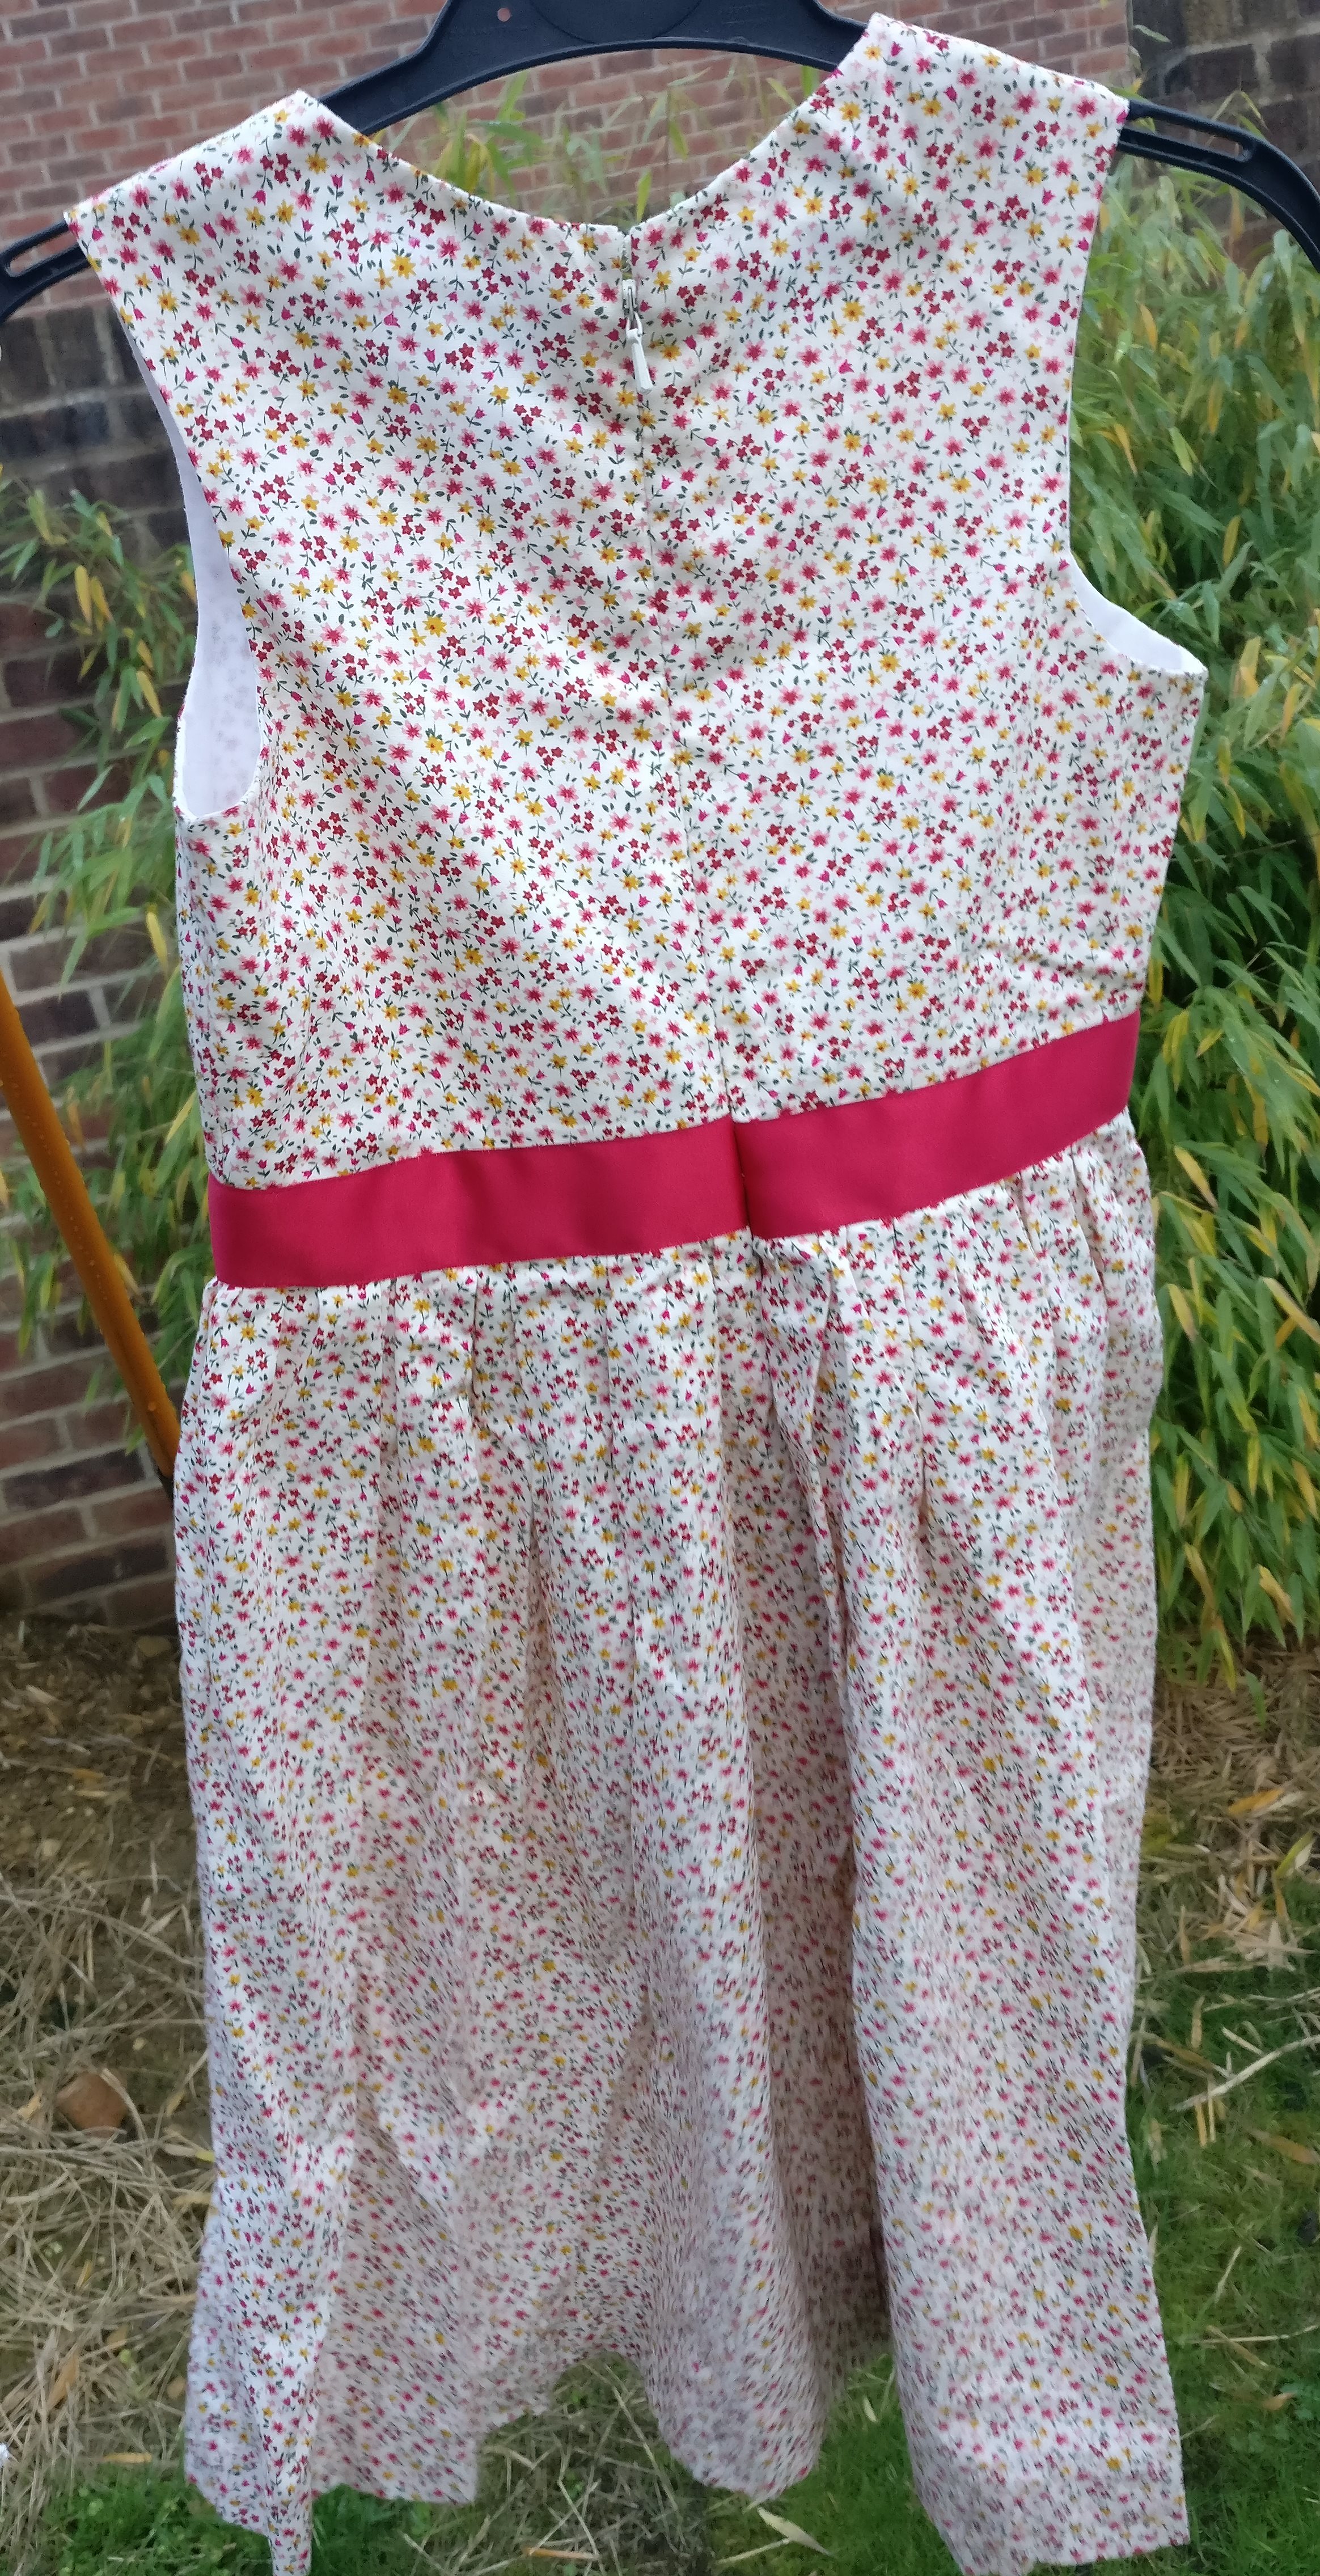
Both myself and my daughter love this dress – it has been worn to various birthday parties, and if I’m honest, I don’t get to iron it, as as soon as it is clean again, she is wearing it 🙂