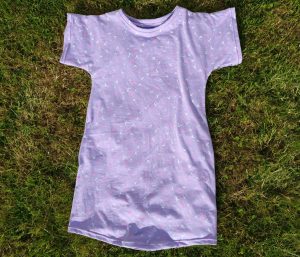
A couple of years ago my mother-in-law gifted me some beautiful cotton polkadot jersey to make a dress for my daughter. This fabric is so beautiful that I was scared to cut into it, hence it became one of my Use 5 2017 fabrics. I’ve got a couple of knit dress patterns in my stash, but both looked to be more wintery dresses, with long sleeves etc. I could have taken the sleeves off and adjusted the armscye, but I decided that probably the easier route was to copy a much worn RTW dress. I also thought the multi-coloured polkadots on white was rather summery and so a summer dress would be much more appropriate.
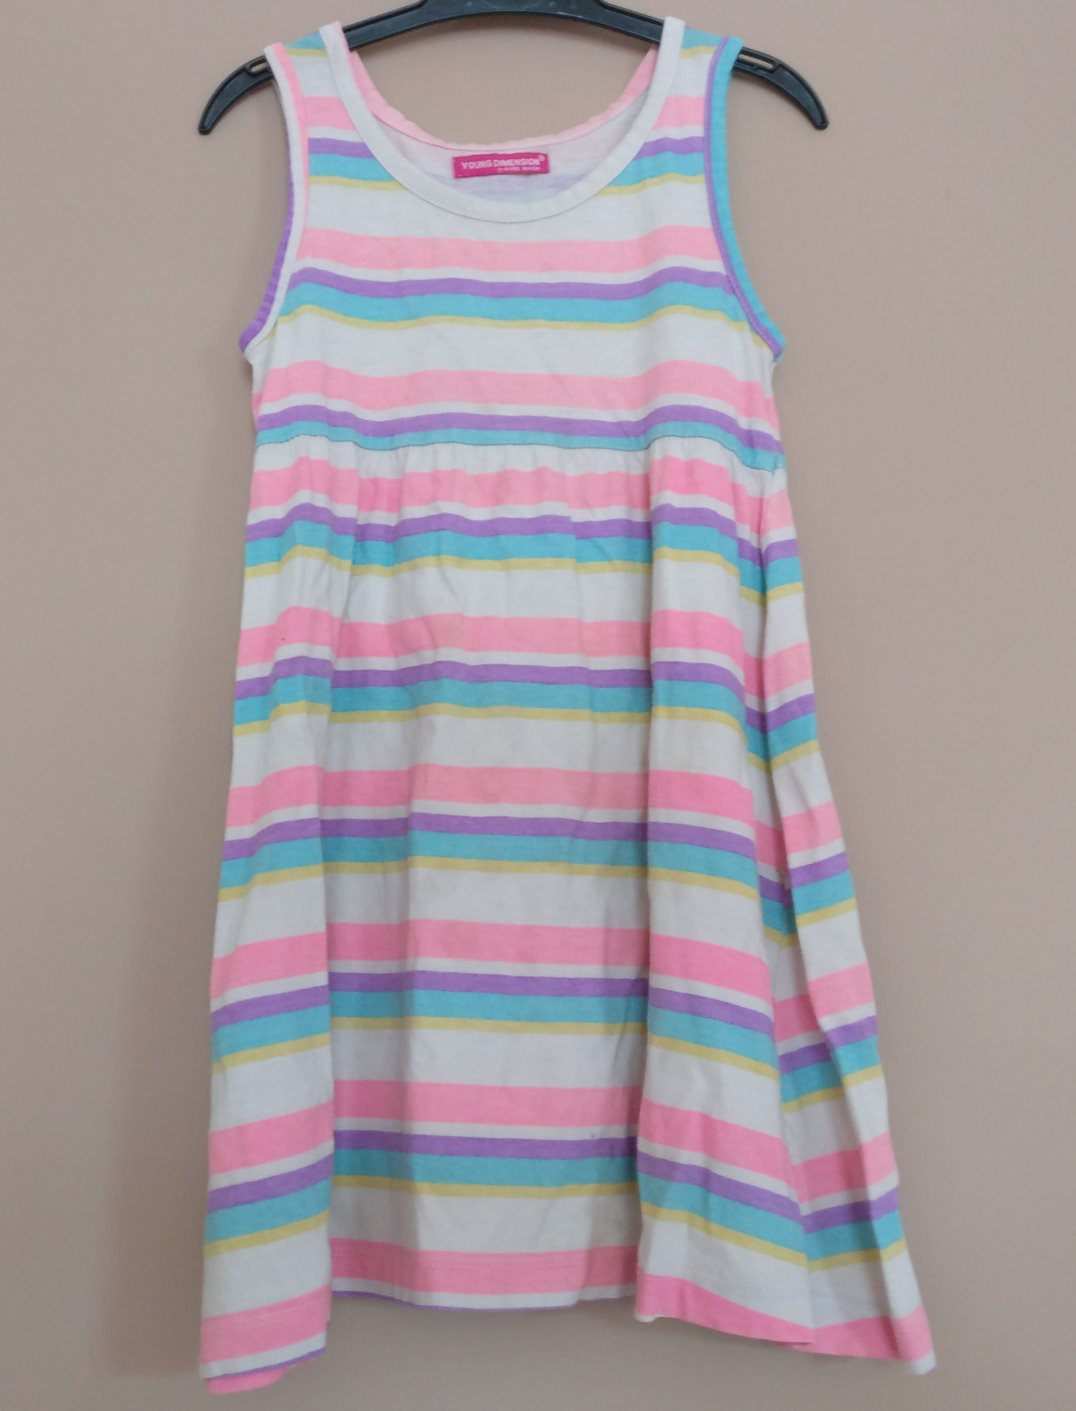
The inspiration dress is now on the small side for my daughter, and so I needed to grade it up a little. I didn’t bother to add seam allowance as I was going to overcast the seams, meaning that I could just use the original seam allowances. In addition, the neckline on this dress fitted nicely so I didn’t bother altering the neckline or the armscye. In fact the only fitting issue that really needed to be changed was to add a little more width to the bodice and to lengthen both the bodice (a lot) and the skirt (a little). My children both seem to have long bodies and short legs. I added width to the bodice by the simple expedient of laying the pattern pieces for the front and back bodice slightly away from the fold, thus giving an extra 1.5 cm width on both pieces. As my daughter likes a gathered skirt, I just cut two rectangles as wide as I could to the correct length.
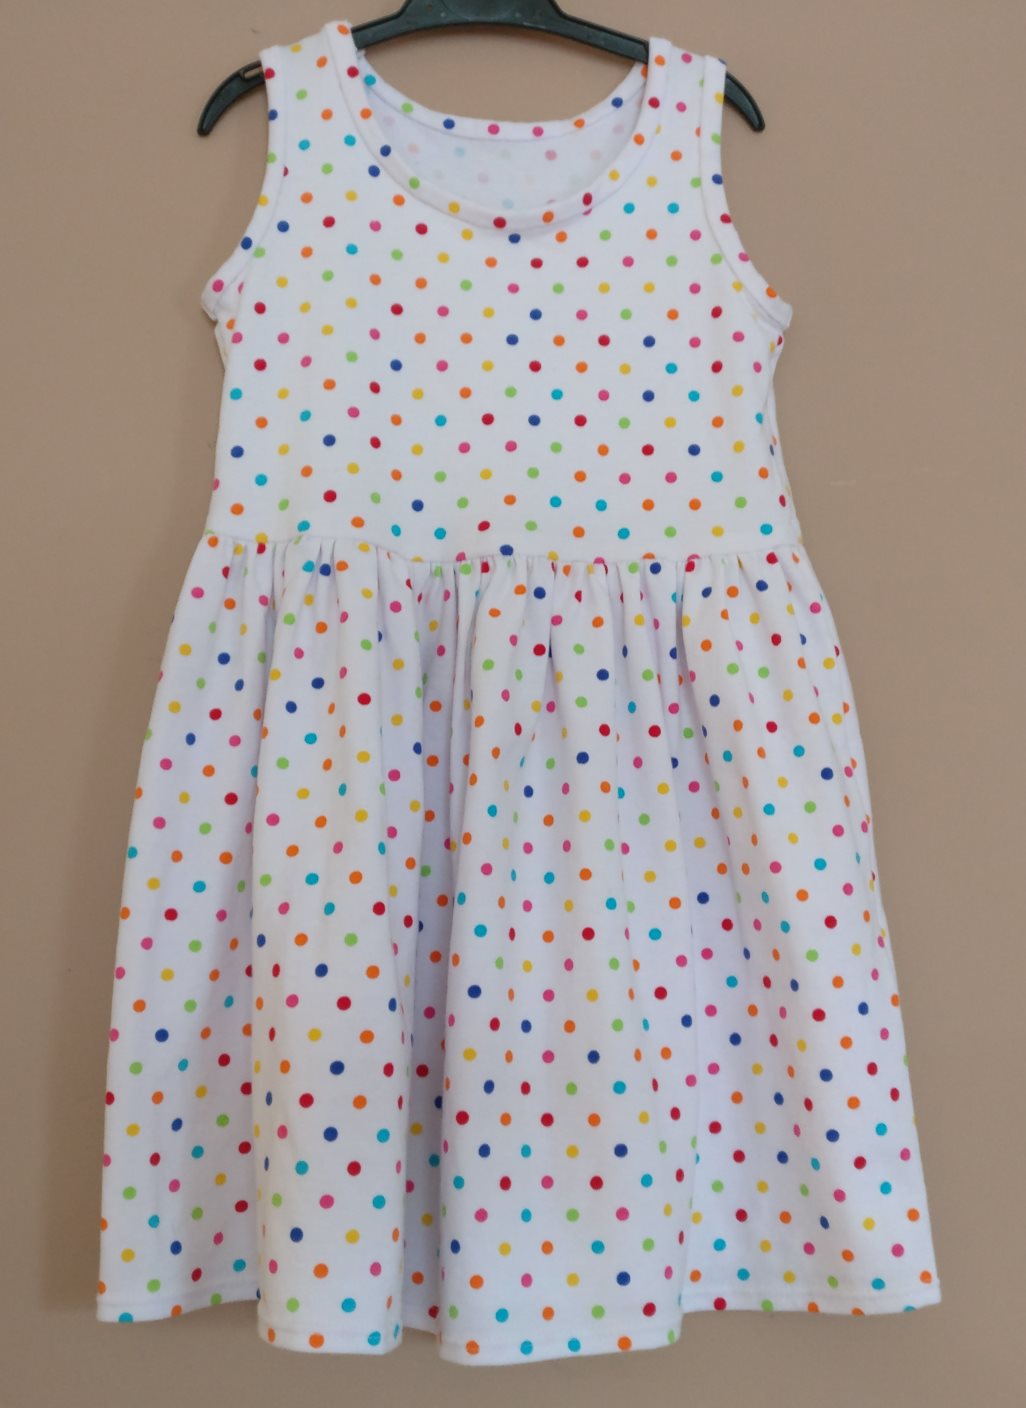
Construction-wise this dress was relatively simple, I used the selvedge from a woven cotton to support the shoulder seams, and some clear elastic to support the waist seam. I did learn one lesson here – I started off using a ball-point needle as I was sewing jersey, however, the elastic responded much better to a normal needle as it was sharp enough to pierce the elastic and didn’t just try and push it through the jersey.
I then used dental floss and a zigzag stitch to gather the skirt waist seam, and then stitched the bodice to the skirt and both front and back. At this stage I hadn’t sewn the side seams.
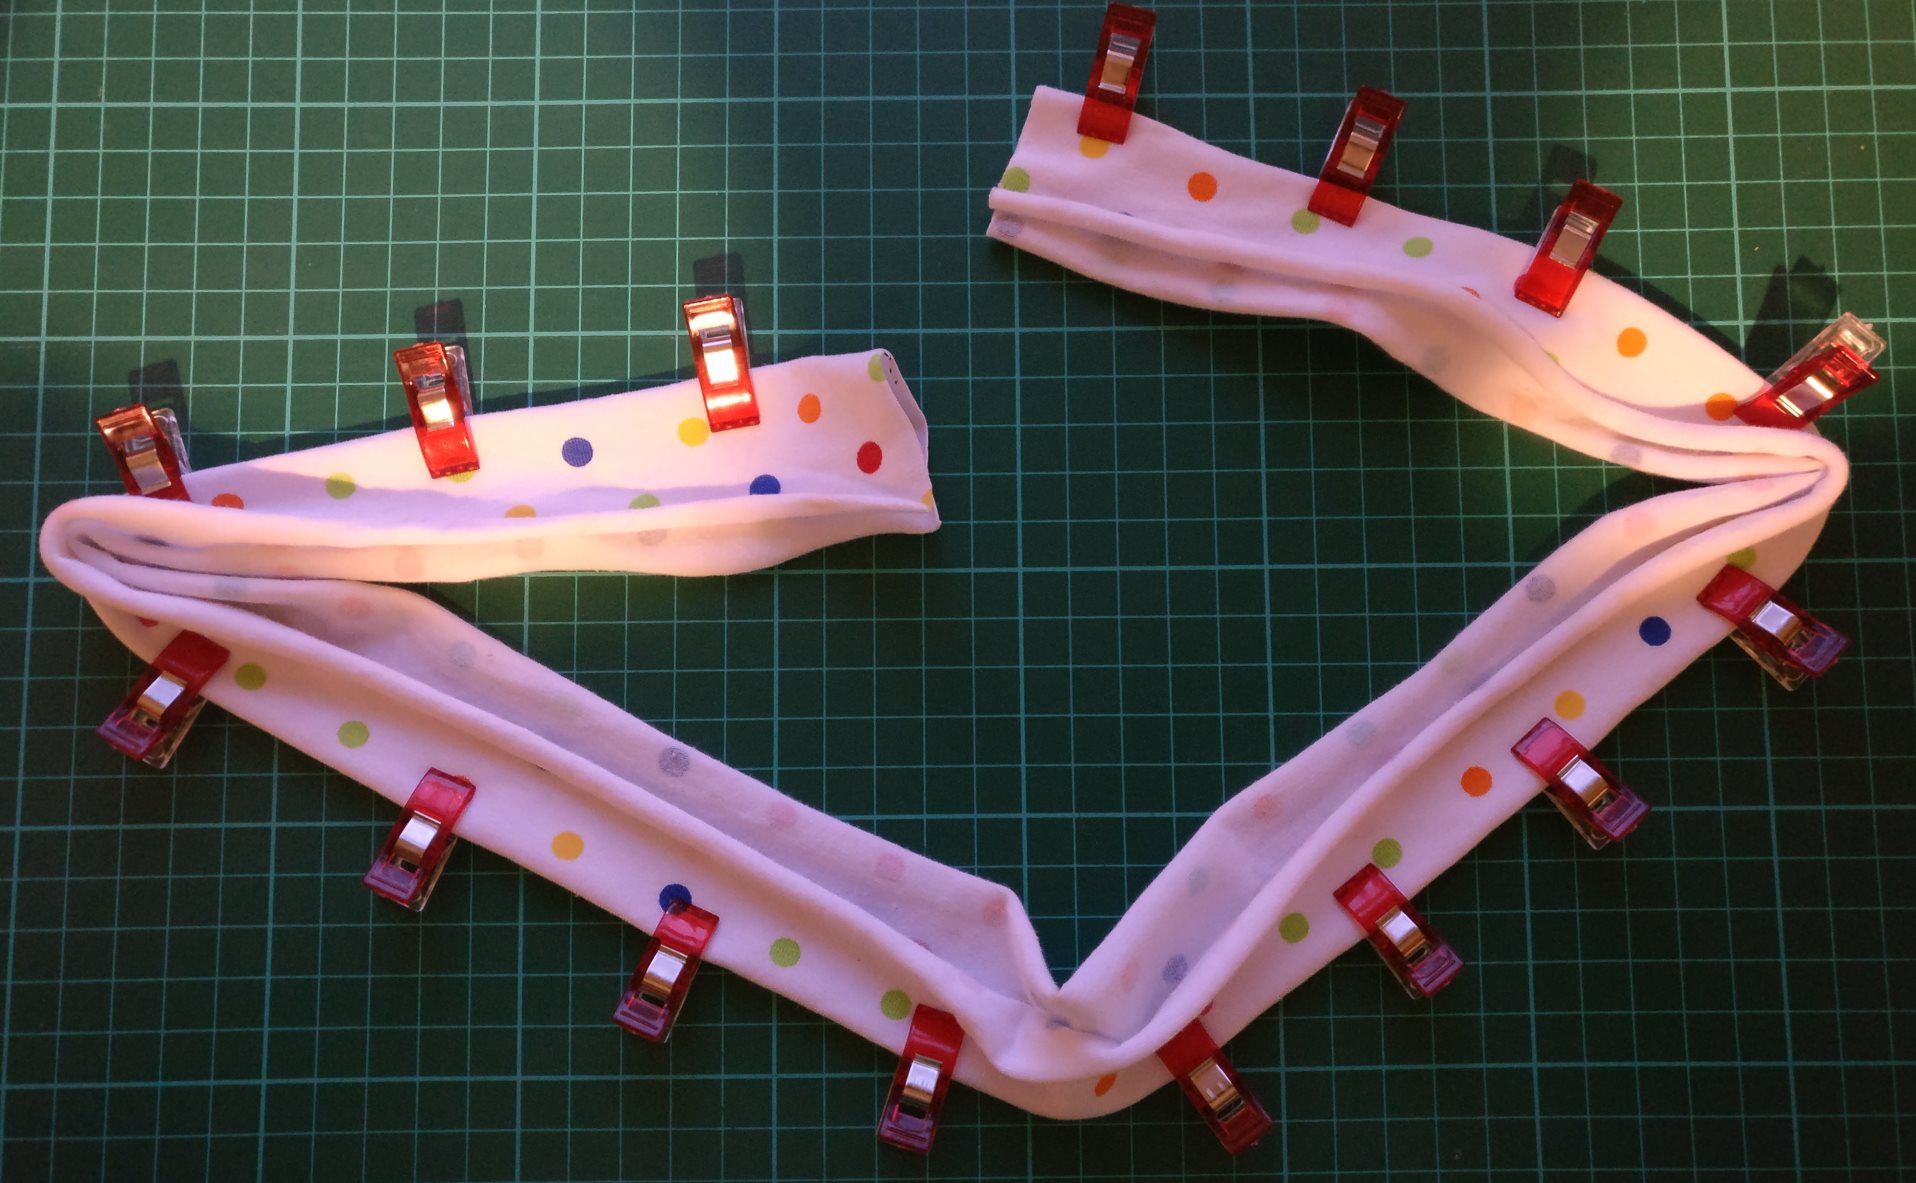
I used self made binding for the armscyes and neckline – sew one shoulder seam, bind neckline, then sew the other shoulder seam, bind the armscyes, then sew the side seams. I was very good and for once I actually got the iron out to press the binding (not bias as the jersey already has stretch) but this material does not want to hold a crease, I ended up just clipping it in place hoping that it was approximately the same width all the way around. The neckline did end up slightly wavier than I wanted, but it’s much better than I anticipated 🙂
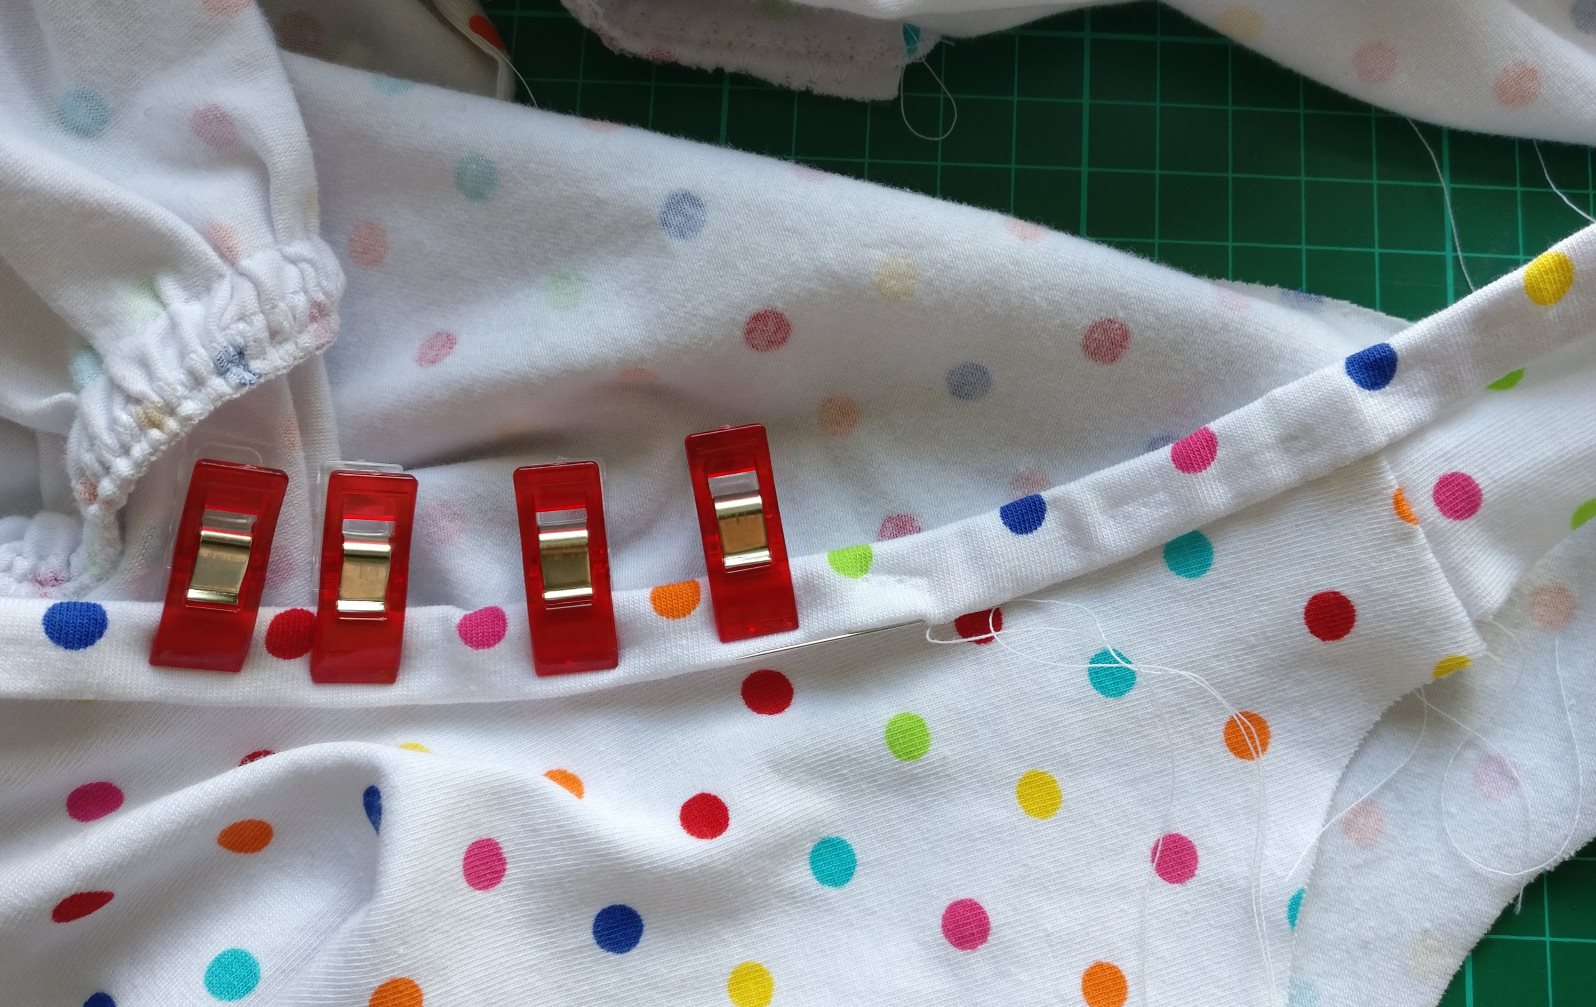
I machined the binding on to the pattern pieces and then I started off trying to machine topstitch the binding down. As you can see this wasn’t very successful. I think it’s because the pressure of the foot was too great, but I don’t think it’s adjustable on my machine 🙁

Following some unpicking and curses, I decided that my best approach was to do some hand-stitching.
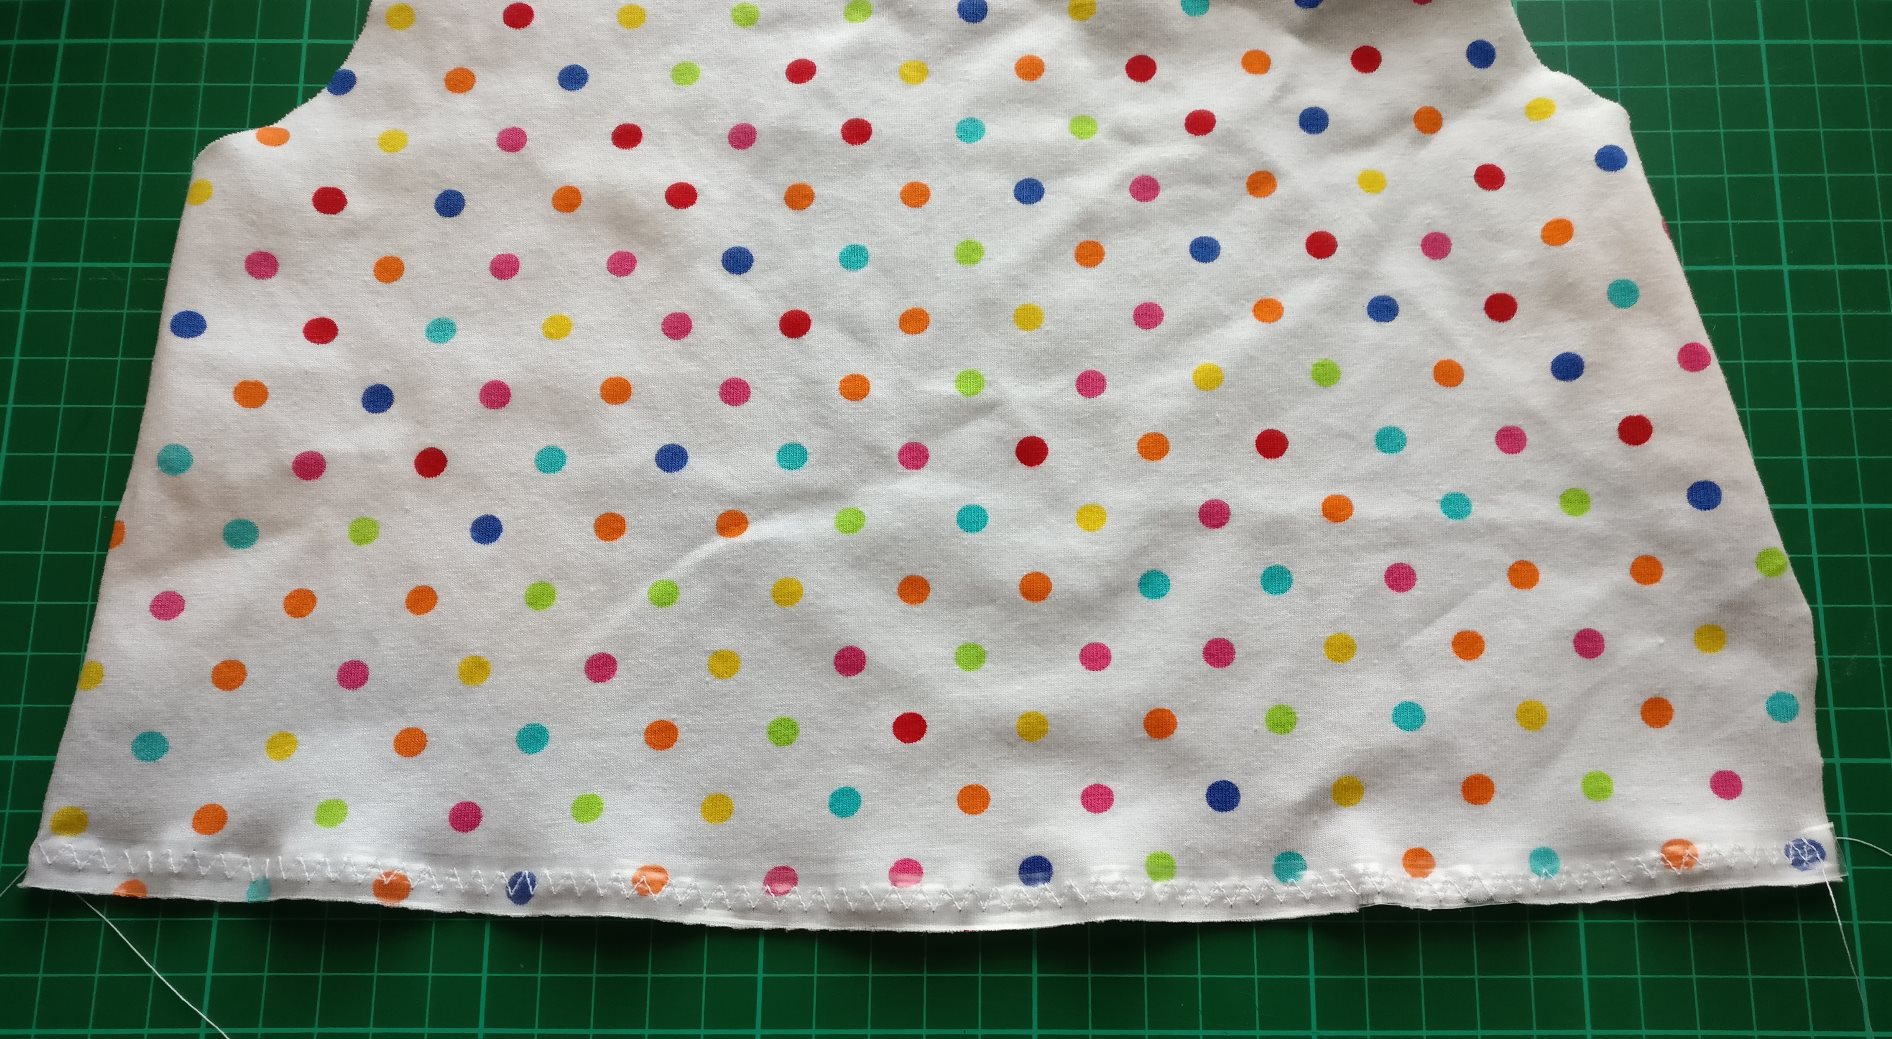
Once the binding was stitched down, the only things left to do were sew up the side seams, which was very straightforward, although I did end up having to do some hand stitching under the armscye on both sides, as 10 layers of this material was too much to fit under the presser foot. For the hem I simply used the double ball-point needle, and all went smoothly.
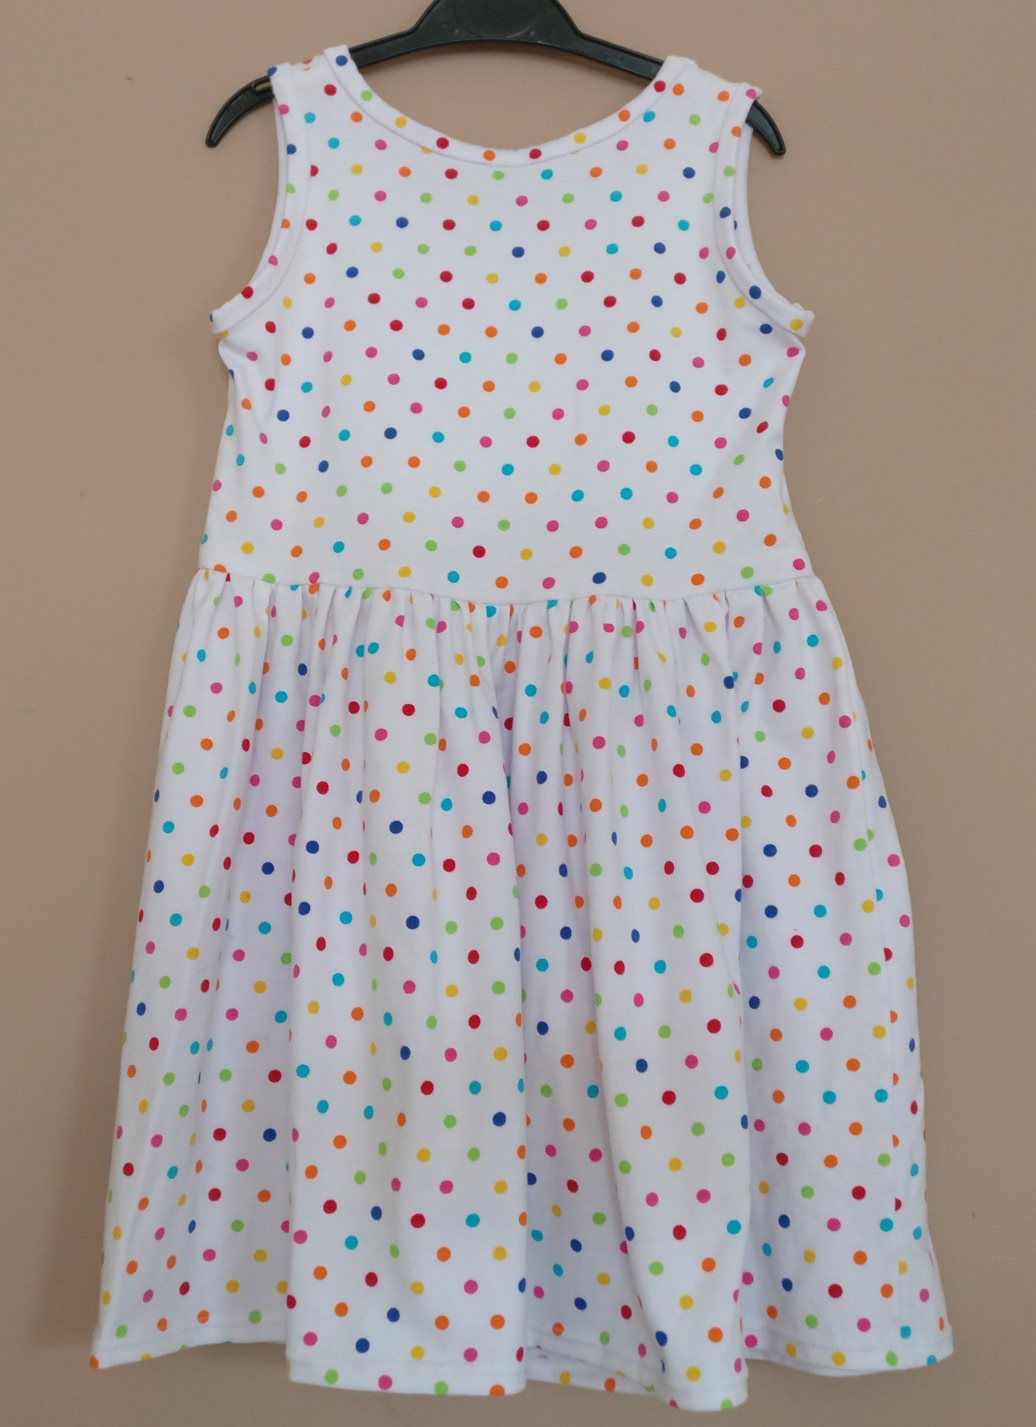
With only 4 main pattern pieces, this is a really simple dress design, but it’s also really comfortable and as such, it will get worn and worn and worn. I was really quite nervous about cutting in to this fabric, I just love it, and it’s perfect for my daughter, so I really wanted it to go well. There were a couple of points where I was cursing, but all in all I’m so pleased with the finished item and glad I braved the special fabric (even if to most people it’s not that special!)