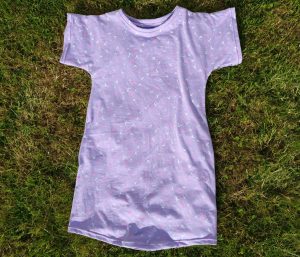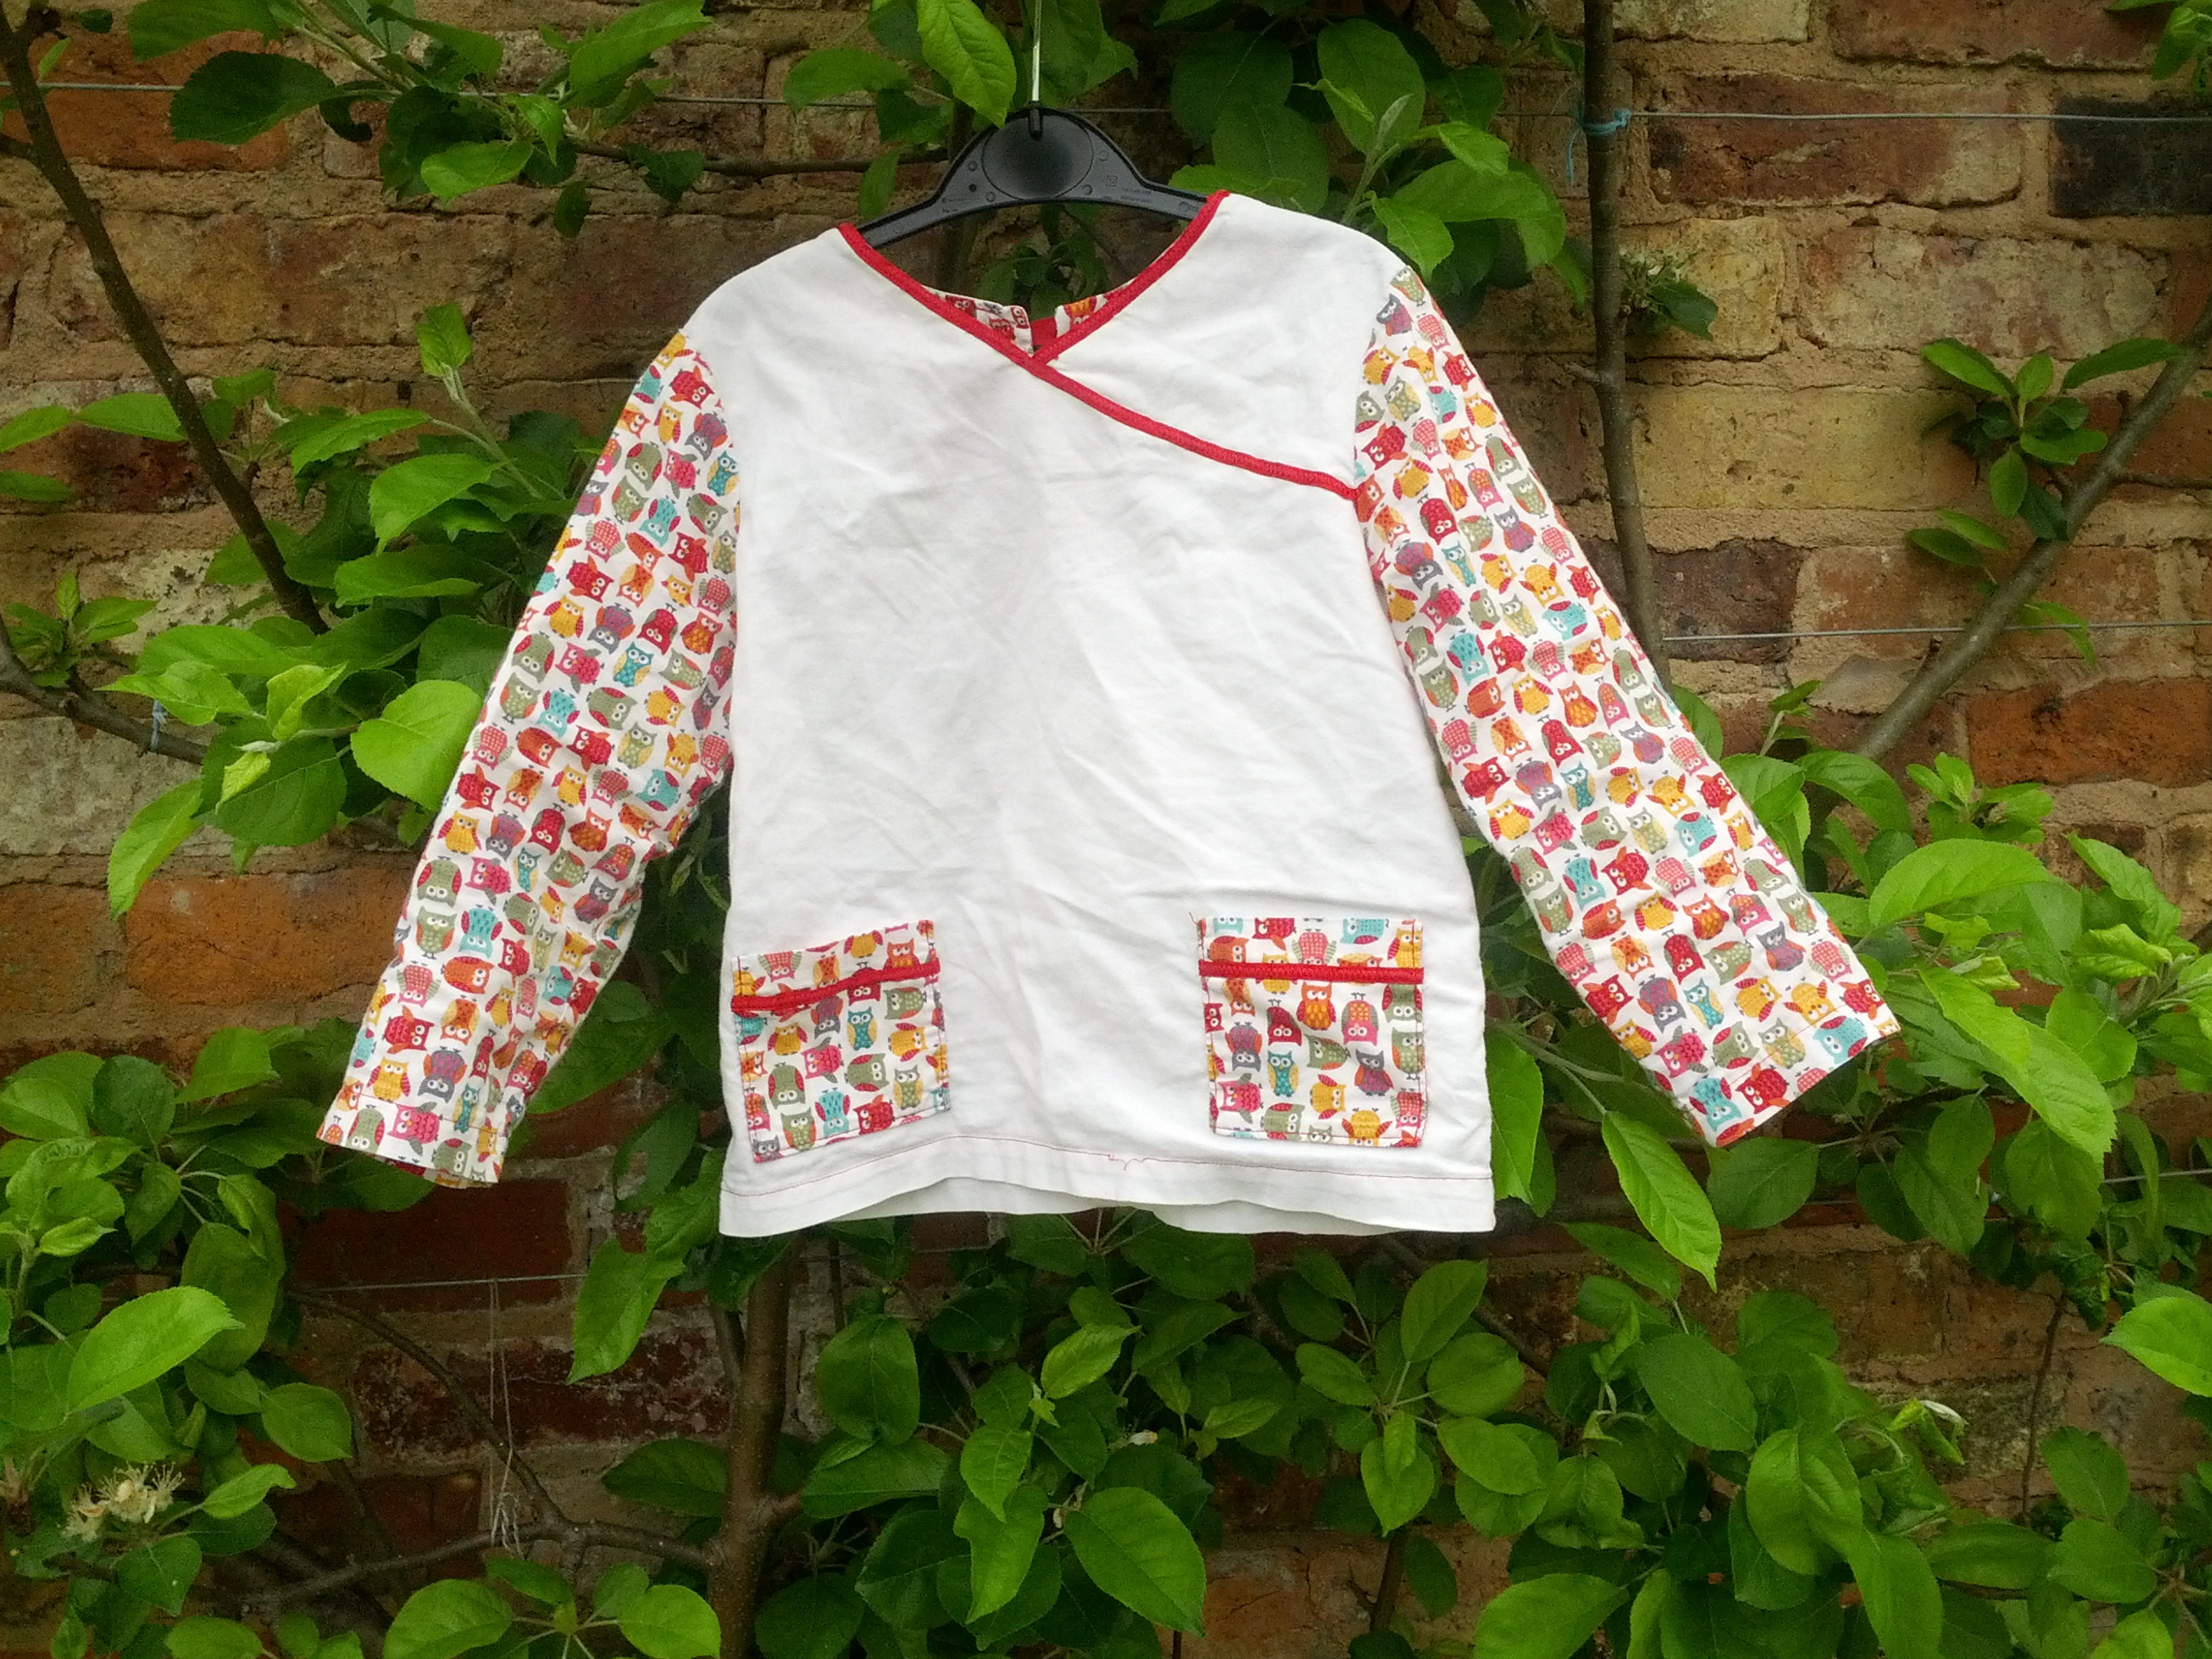
Having successfully completed the pyjama bottoms, I set my sights on the New Look Pyjama 6090 top. Fearing that all over owls would be a bit much, I used some plain cream cotton of similar weight to the owl material for the body pieces, and used the owl material for the facings and arms. Again, I opted for French seams, for the straight seams (side seams for the bodice, and seams down the arms.)
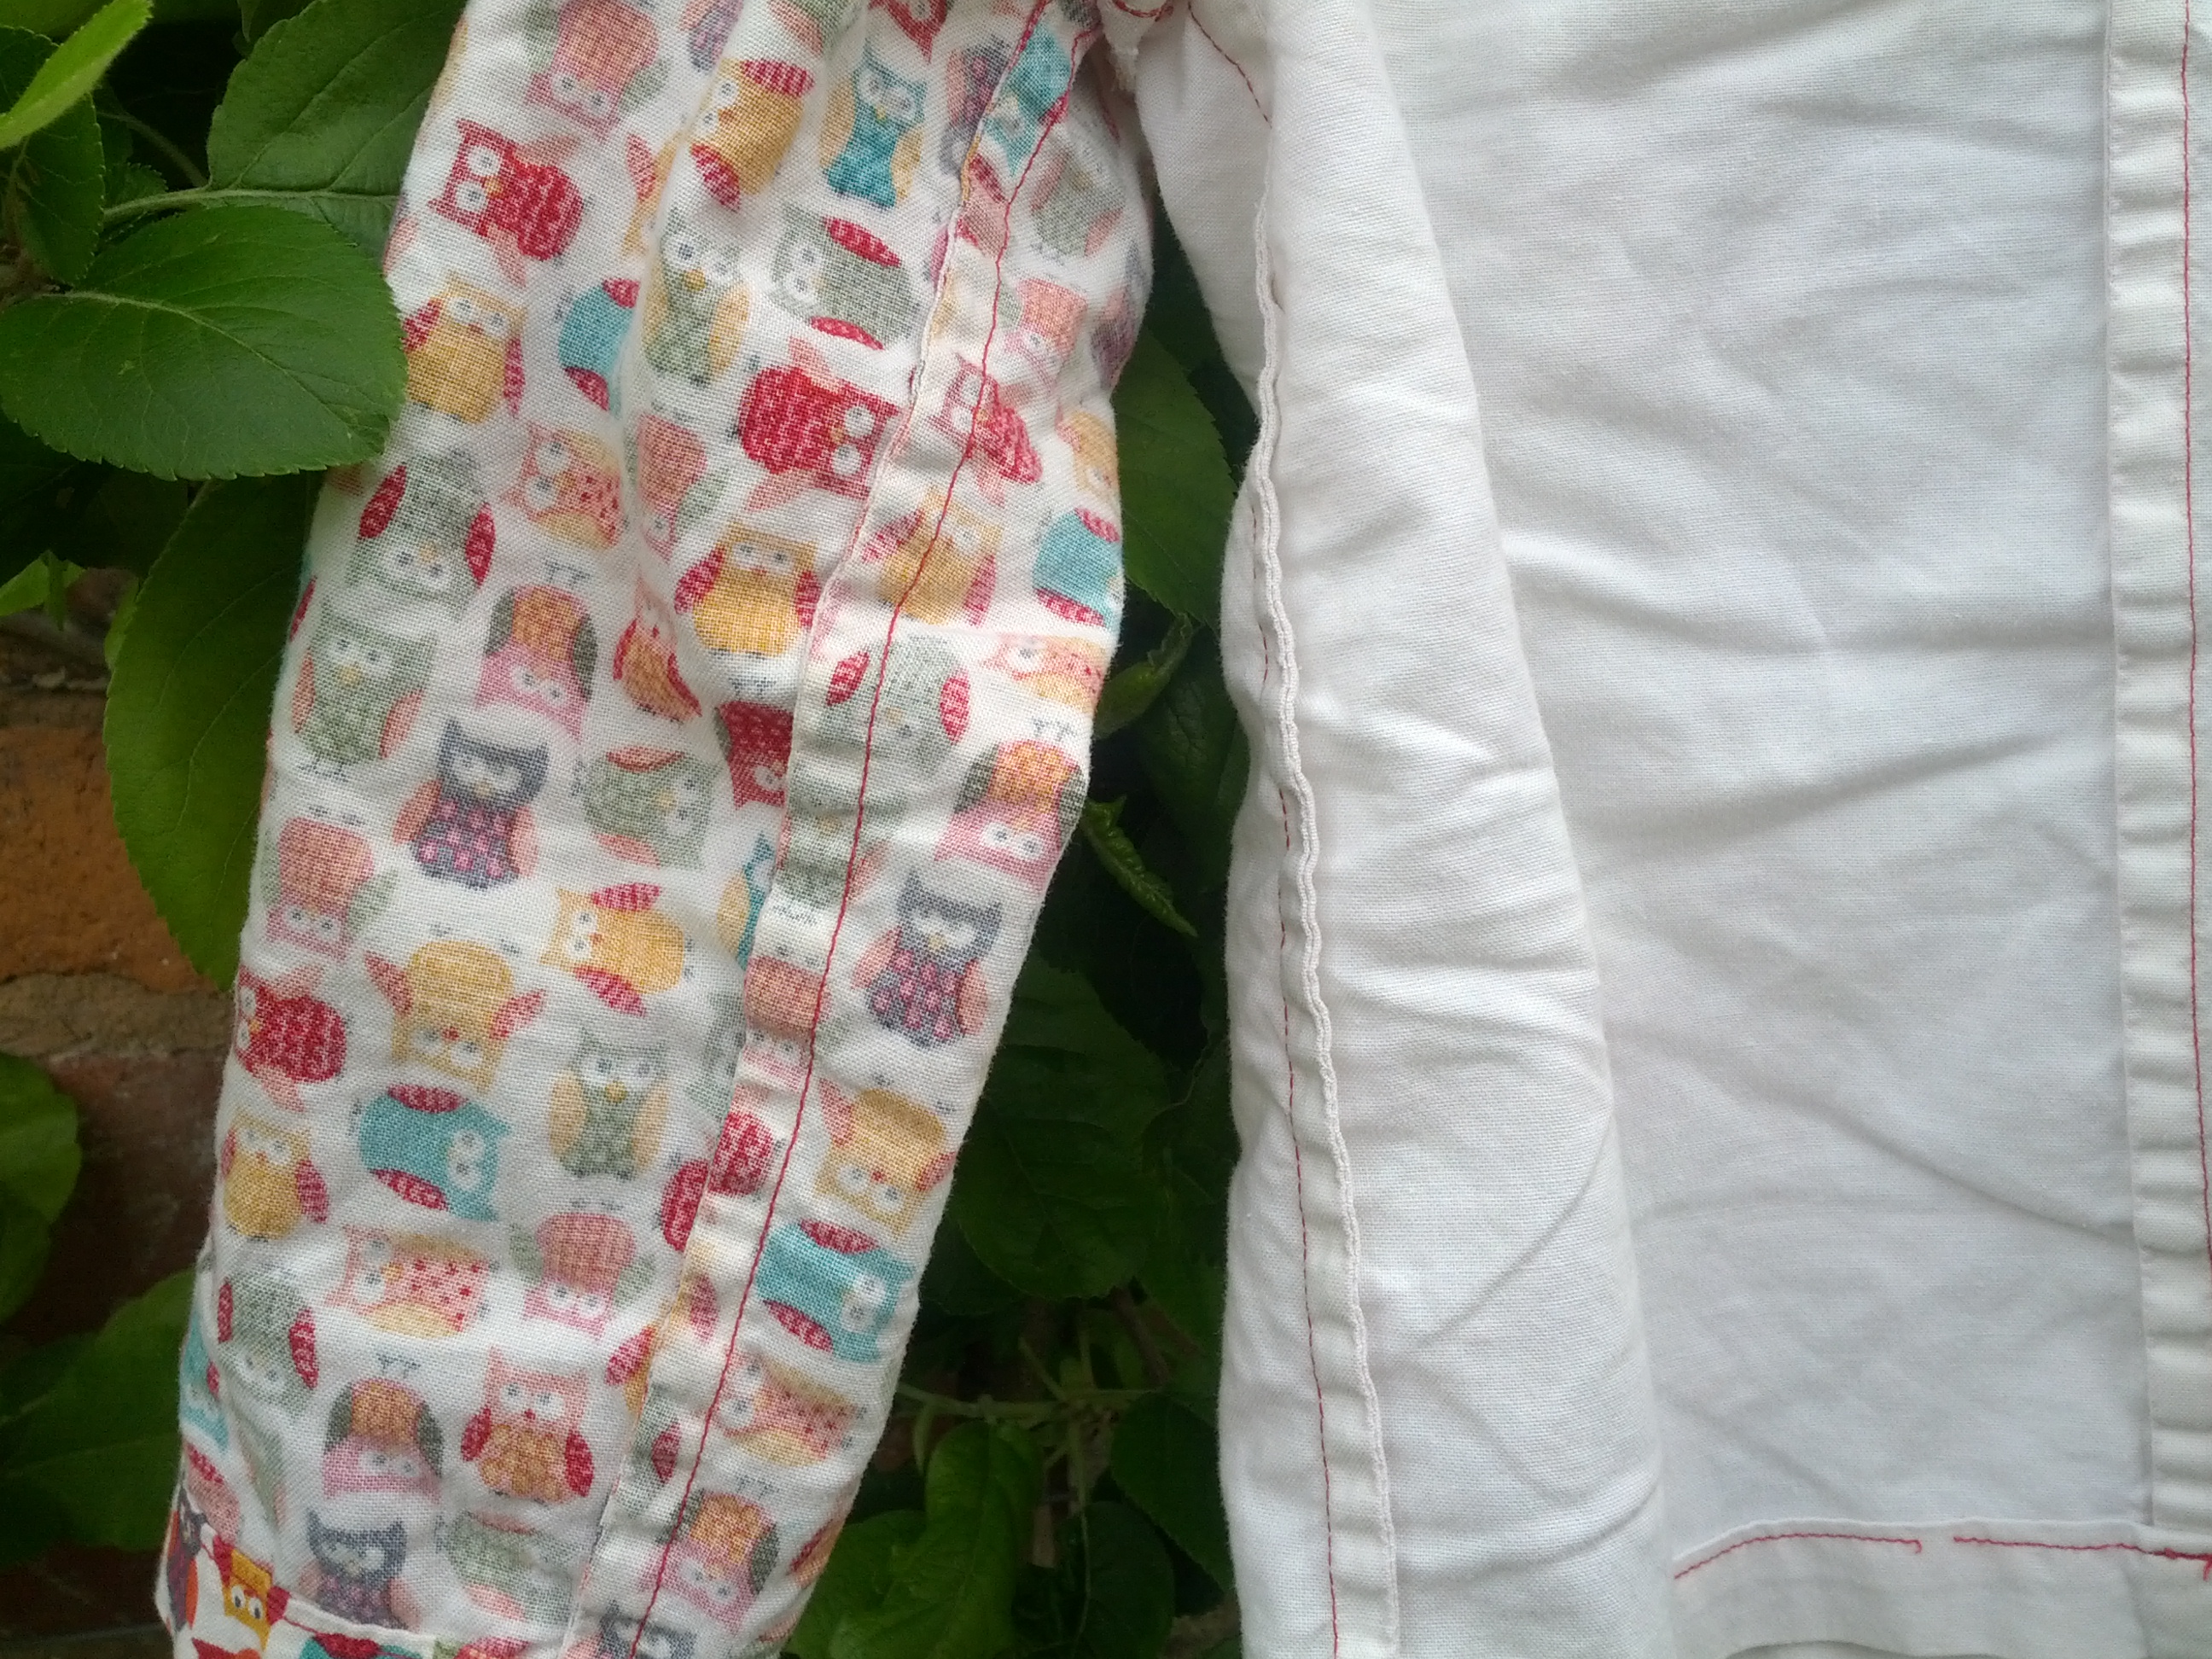
Again, this led to a lot of bulk needing to be removed under the armscye (armhole, to people like me), but this was manageable, and I do like the soft feeling that the French seams give, so overall, it was probably worth it, but I wouldn’t use French seams with anything thicker than this, and I would definitely give second thoughts to using them on material as thick as this again. There are plenty of French seam tutorials out there, but in essence, you sew the wrong sides of the material together, using up about 1/3 of the seam allowance (0.5cm usually) then you fold the material along the seam, and sew the right sides together using the remaining 2/3 of the seam allowance so that the raw edges of the material are encased in a little tube.
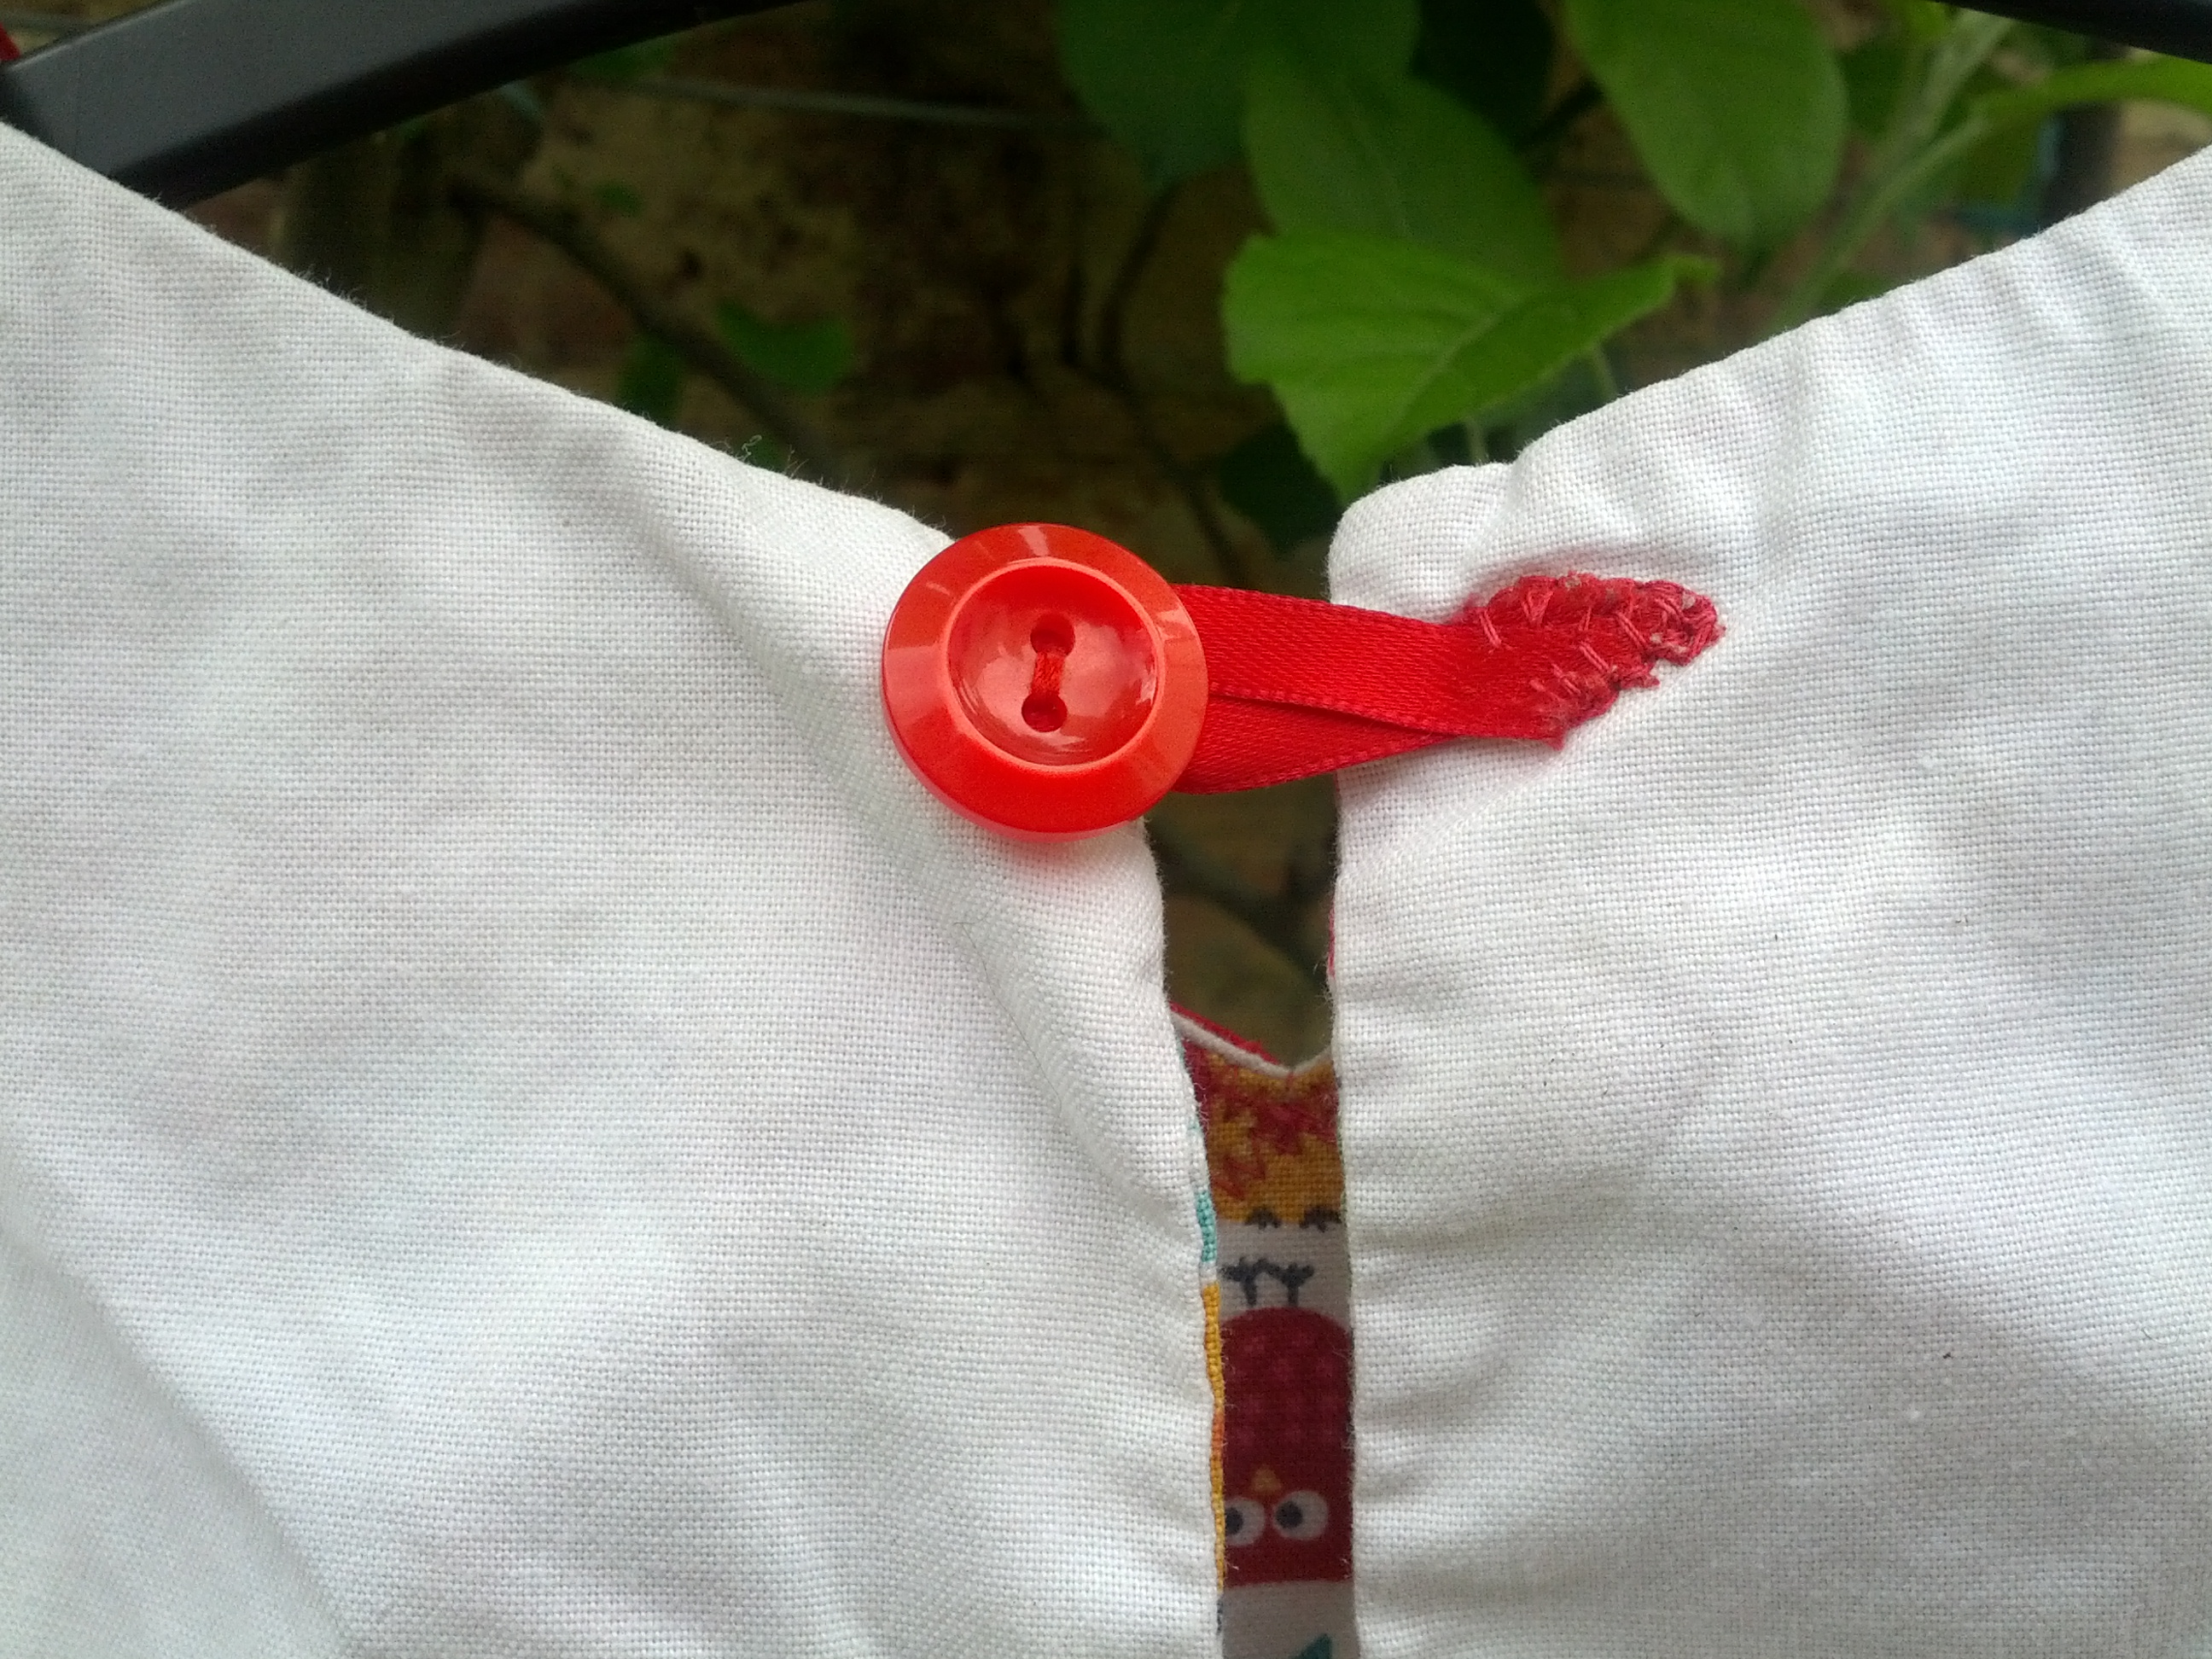
The pattern indicates that the top is a mock-wrap top, with ribbon defining the top of the “wrap”, but this is just an illusion, and the ribbon is just stitched on to the single front bodice piece. I used a zigzag stitch to secure the ribbon as it was rather narrower than the pattern recommended, and it meant that i only had to do one run of stitching rather than two.
I also used the ribbon for the button-loop. I’ve never made a button-loop, and although I promised myself I would follow the pattern, I decided it would be better to use up a bit of the ribbon. I don’t really know why I bothered though, as we never do up the button, so there’s no point it being there!
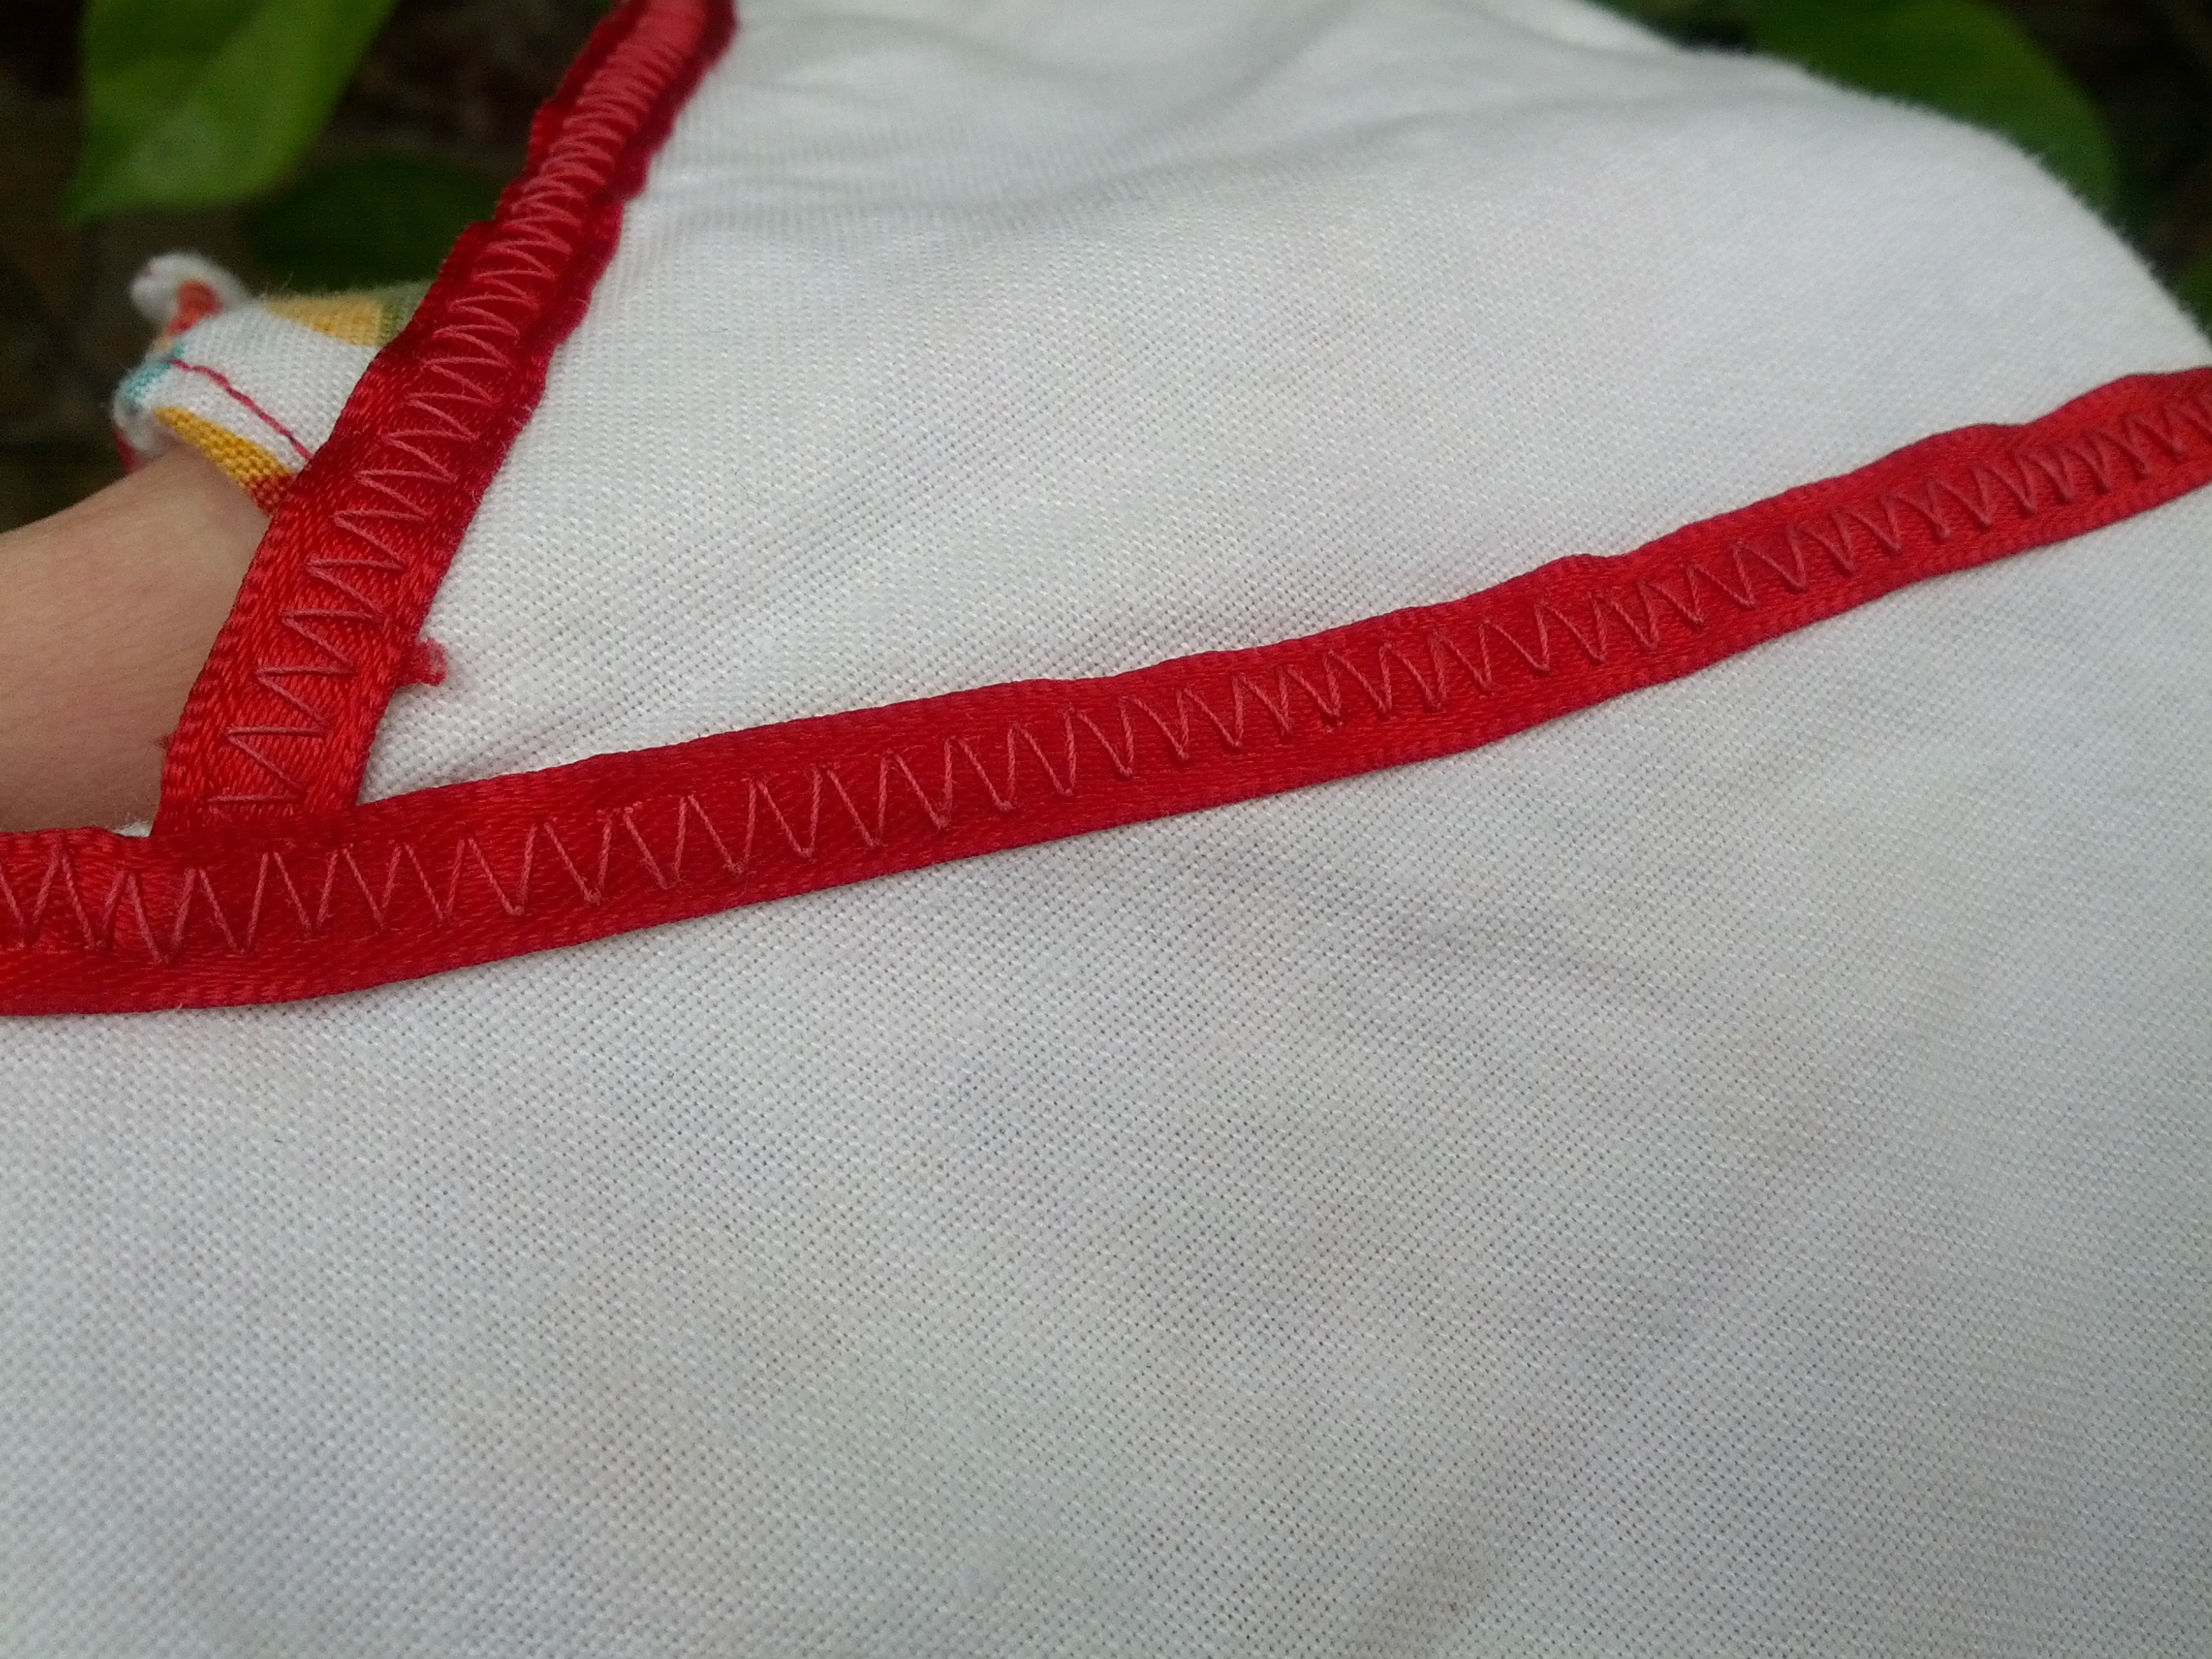
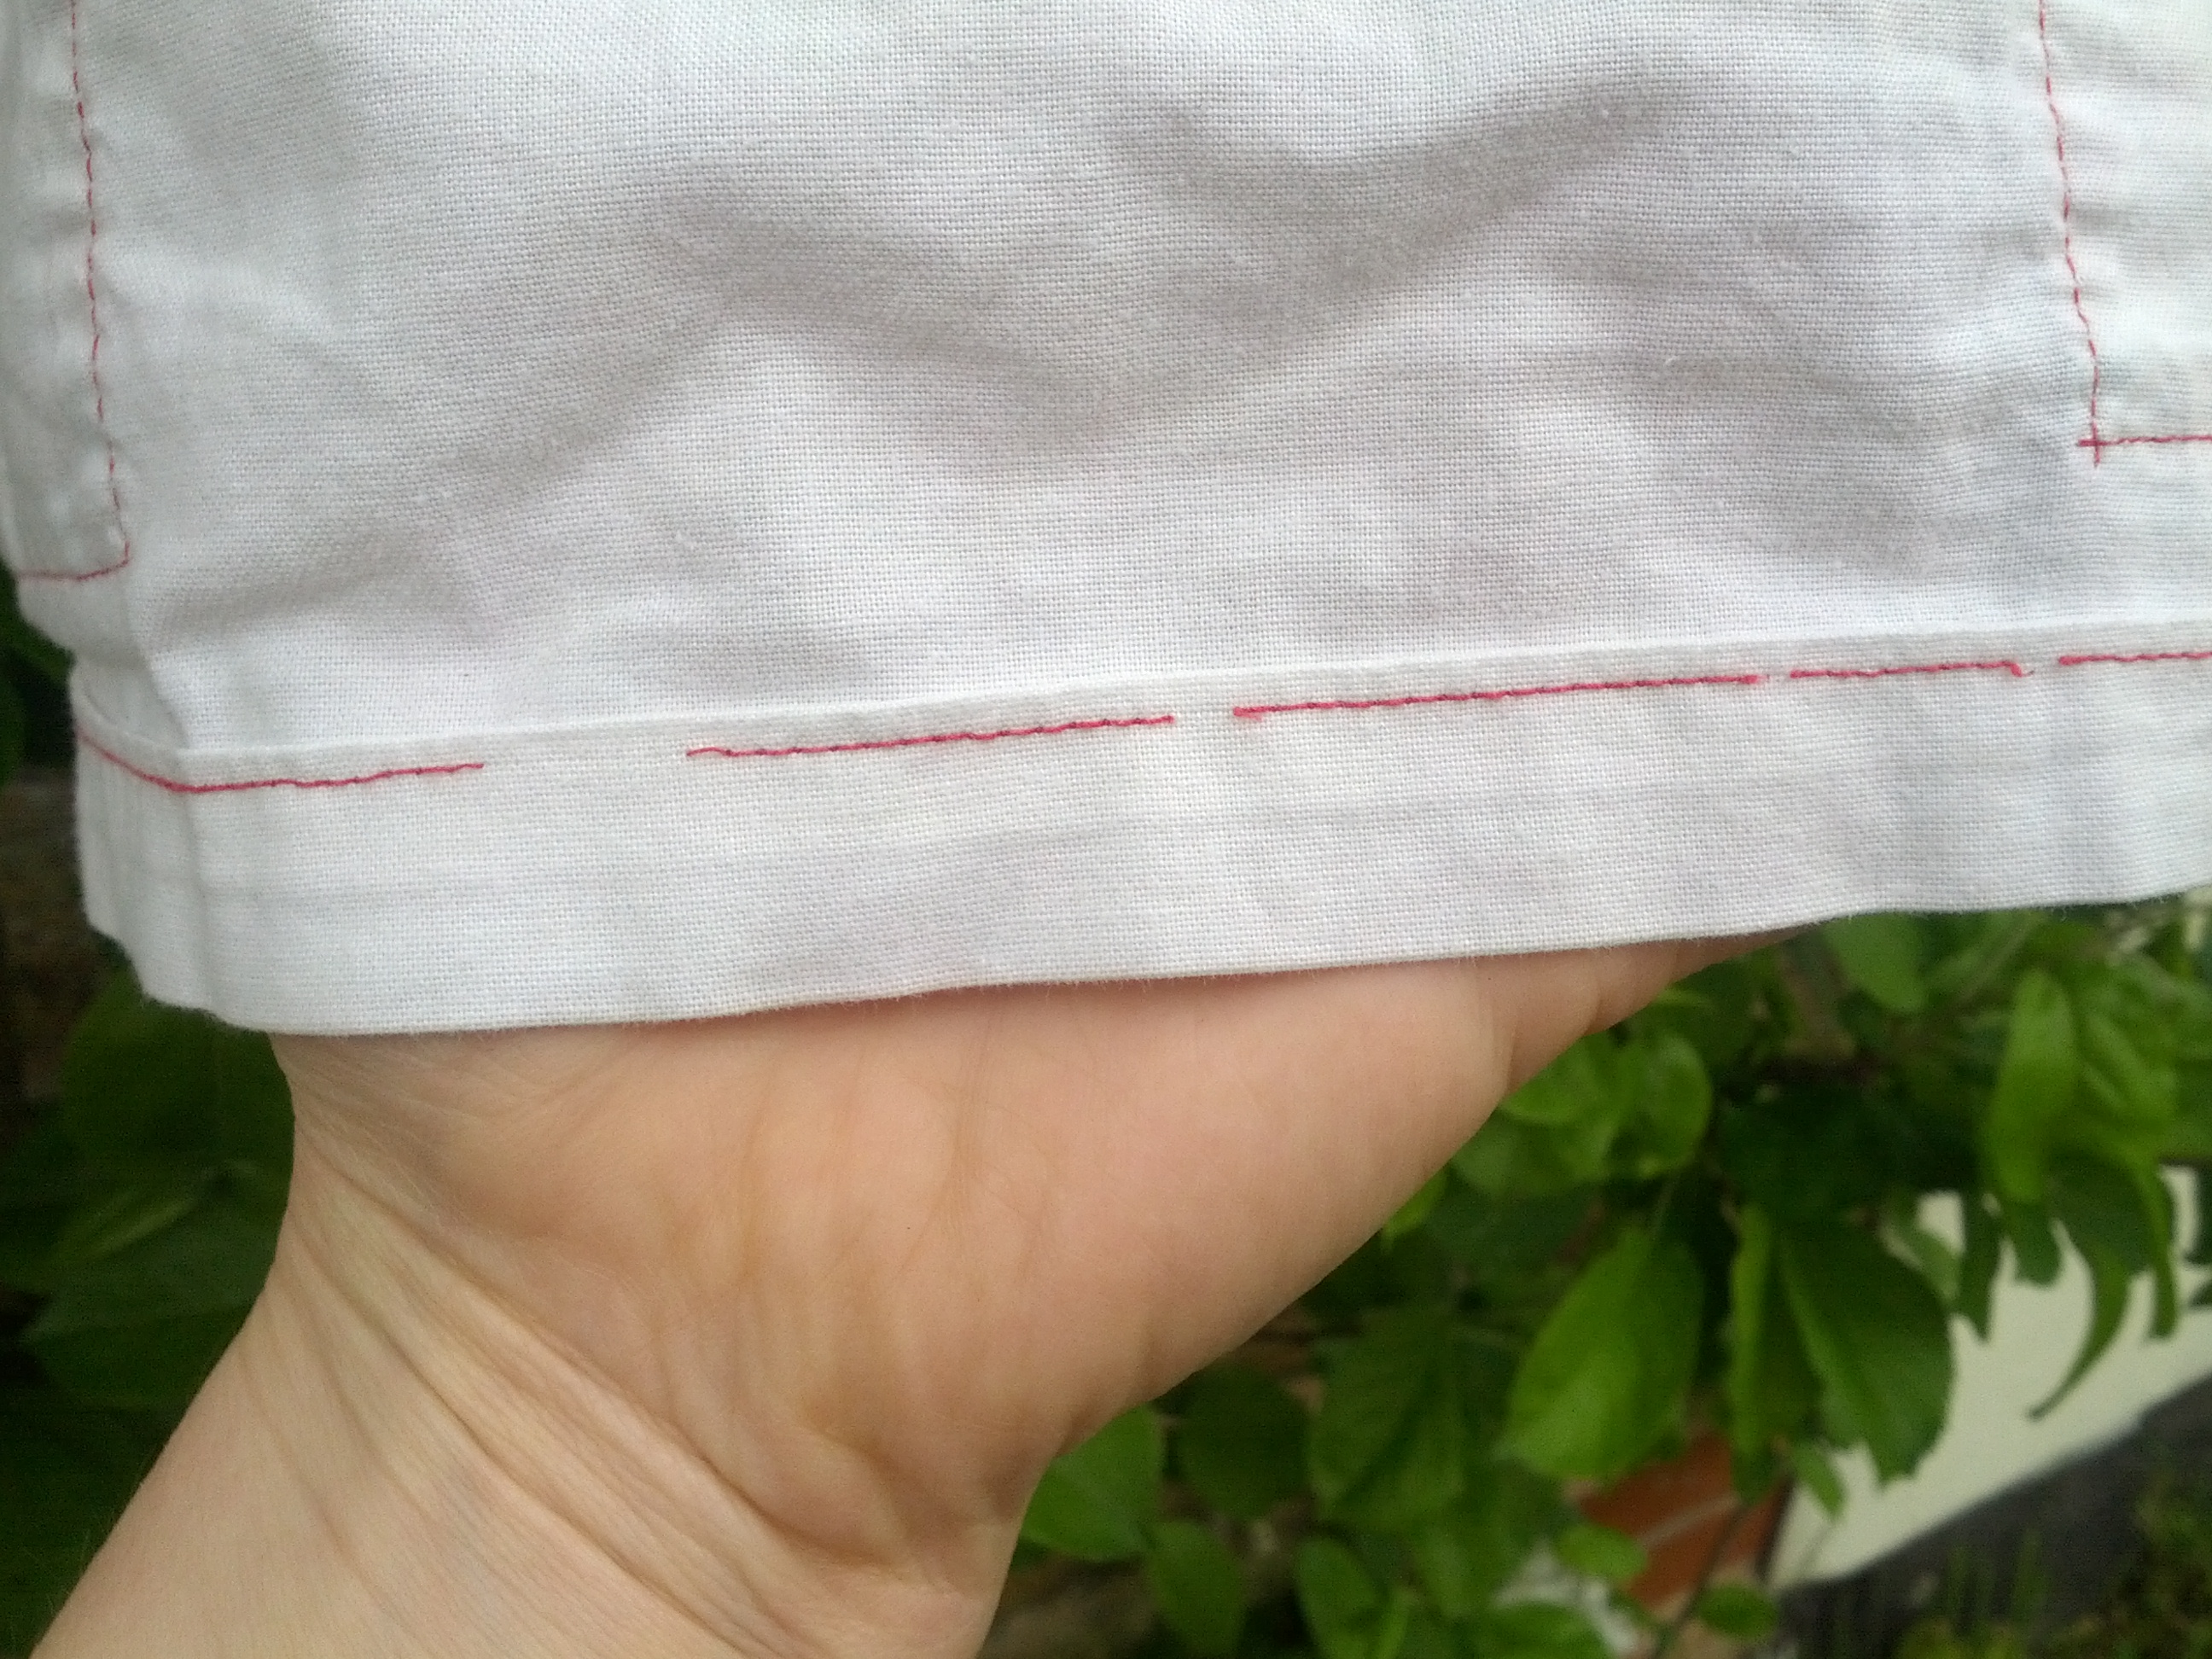
The top was rather more complex than the pyjama bottoms – there is a facing piece, and sewing this required me to do understitching for the first time. If I’m honest, this is one of the stages that I have always missed out before – honestly, is there a point? Well, yes, I can now conclusively say there is, and I won’t ever be missing out the understitching stage again. The facing lies beautifully behind the material, the seam is clean, and thanks to the clipping and notching of the seam allowance, everything is flat and smooth.
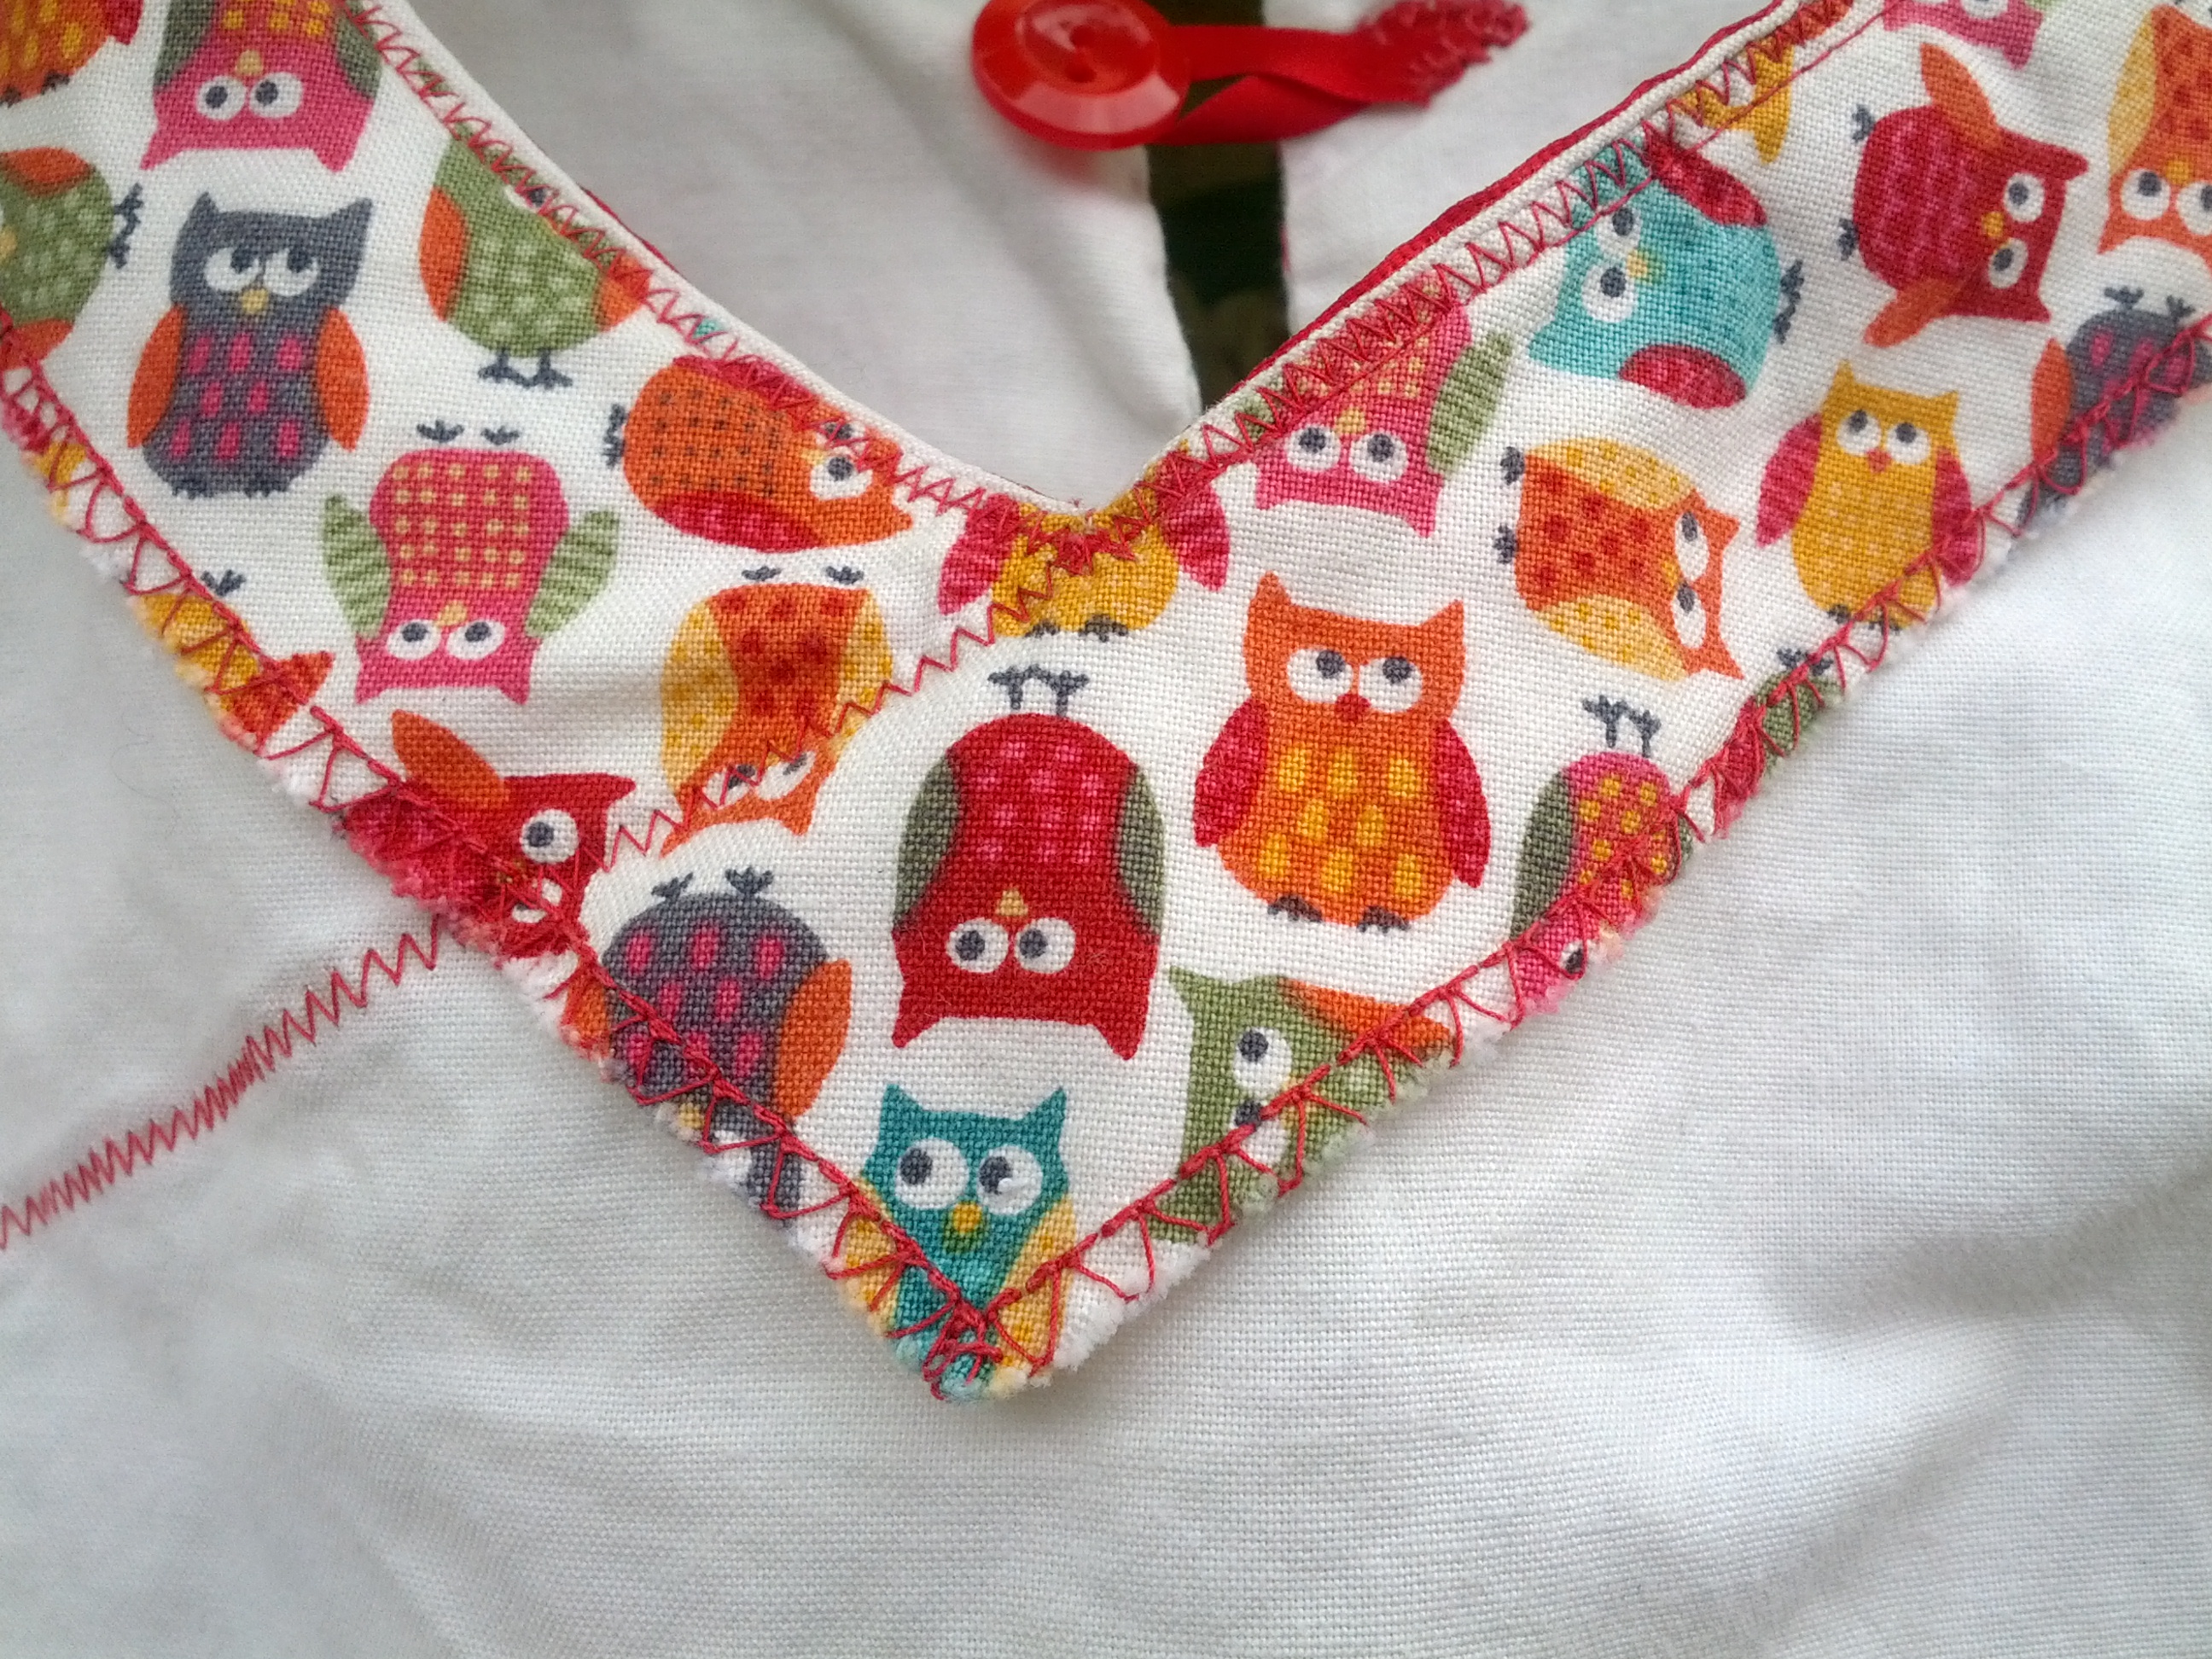
To understitch, essentially you sew the facing to the outer layer as normal, then press along the seam, so that the outer material is flat (3 layers of material on one side, just one on the other side of the seam). Once pressed, you sew a second line of stitching just to the “3-layer” side of the seam. Press the facing and outer material together such that they appear as they would in the finished garment. That’s it – that’s all there is to it – I spent ages looking that up, and it probably took no longer than 5 minutes to do! This is, without question, the most beautiful neckline I’ve ever made.
In addition to the neckline, there was the idea of set-in sleeves to contend with. This lead to several sleepless nights, and many hours hunched over videos, tutorials and sewing books trying to figure out how to do this in real life. (OK, yes, I made a real mountain out of a molehill with this one, but I didn’t know how to tackle it!) Set-in sleeves are not as complex as they can appear. The sleeve doesn’t fit into the armscye, but I did as instructed, sewed two rows of gathering stitches, gathered up the sleeve until it fitted into the armscye, and then used lots and lots and lots of pins (no, really, I used loads.) Then I braved it, and actually sewed the arms in. On the first sleeve, it all went really well, and there are no puckers. On the second, I did pucker it up slightly. I ended up unpicking a few stitches, using a few more pins, and then resewing the seam. The second attempt was most definitely better – no puckers.
Then there was the whole issue of stopping it fraying – cutting and clipping so that it didn’t act like a seal on the arm as you pushed your arm in, as the seam allowance basically reduced the diameter of the sleeve. Looking at tutorials and videos was pretty unhelpful, as they all talked about attaching the sleeve, but then stopped once the sleeve was attached. How did you finish those seams and stop them fraying? Cue more sleepless nights! Eventually I found the solution – the second row of stitching within the seam allowance.
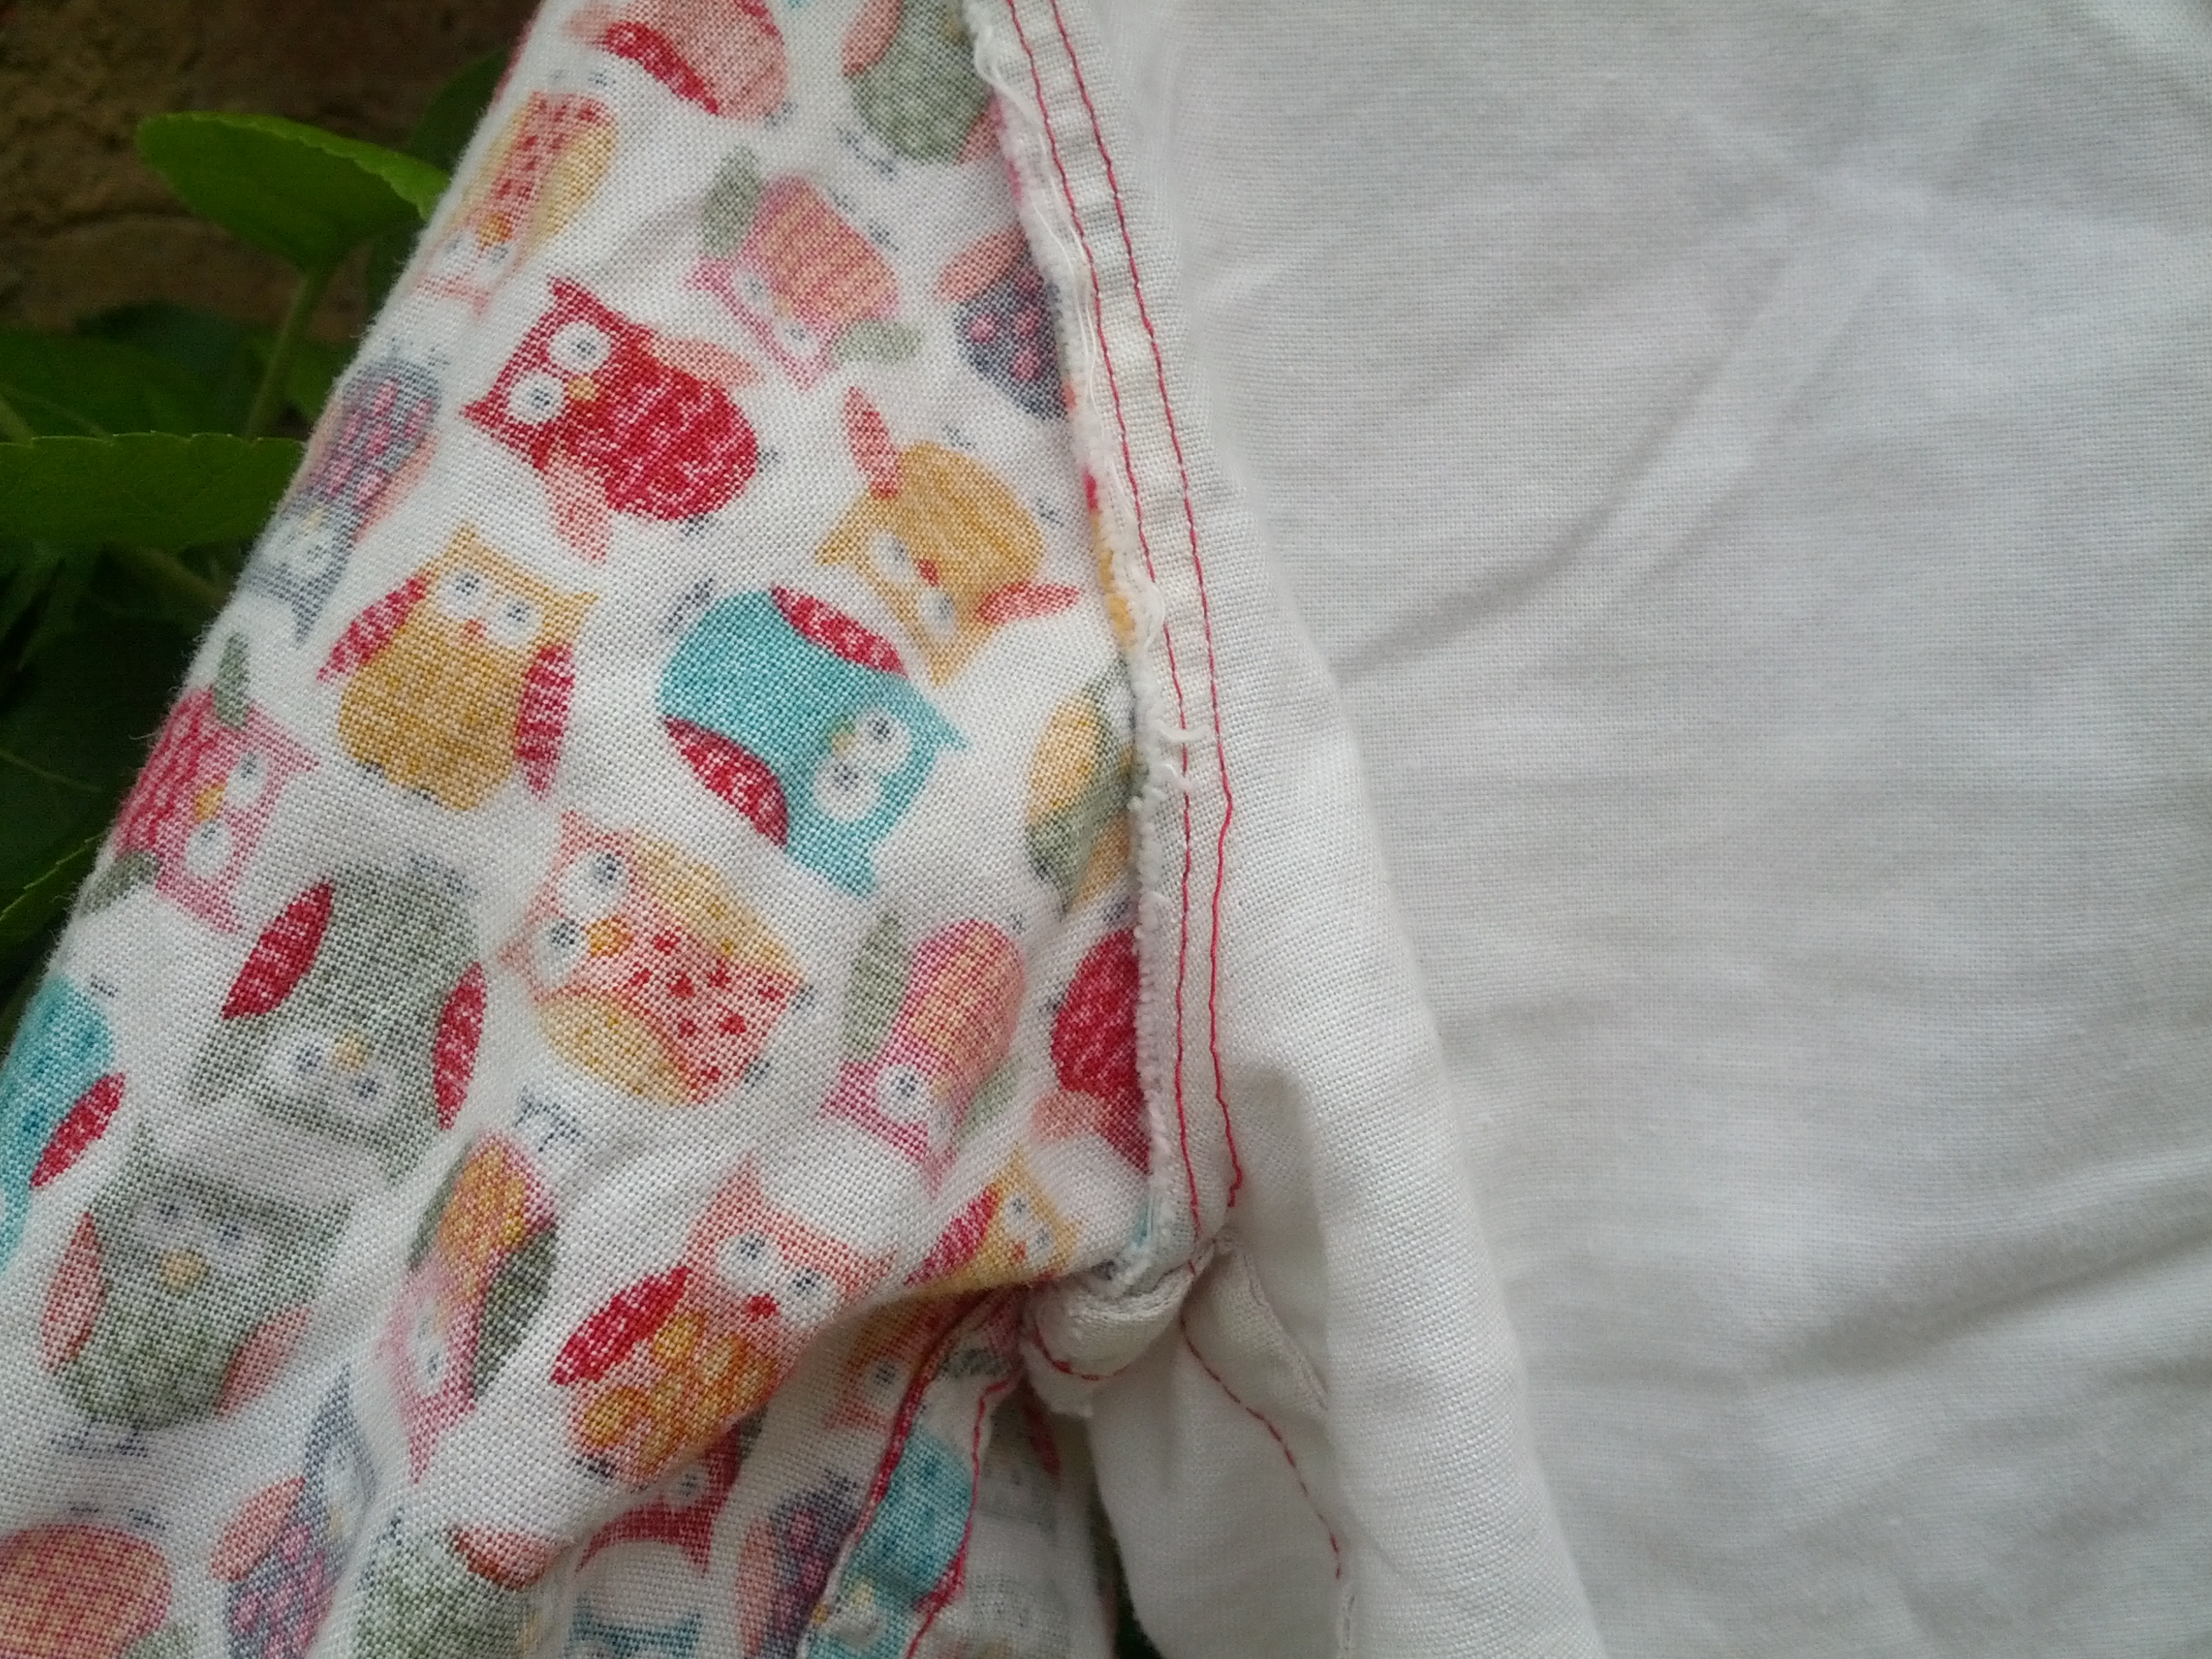
However, unfortunately on one of the sleeves, I’ve suffered a bit of an issue – both rows of stitching have ripped.
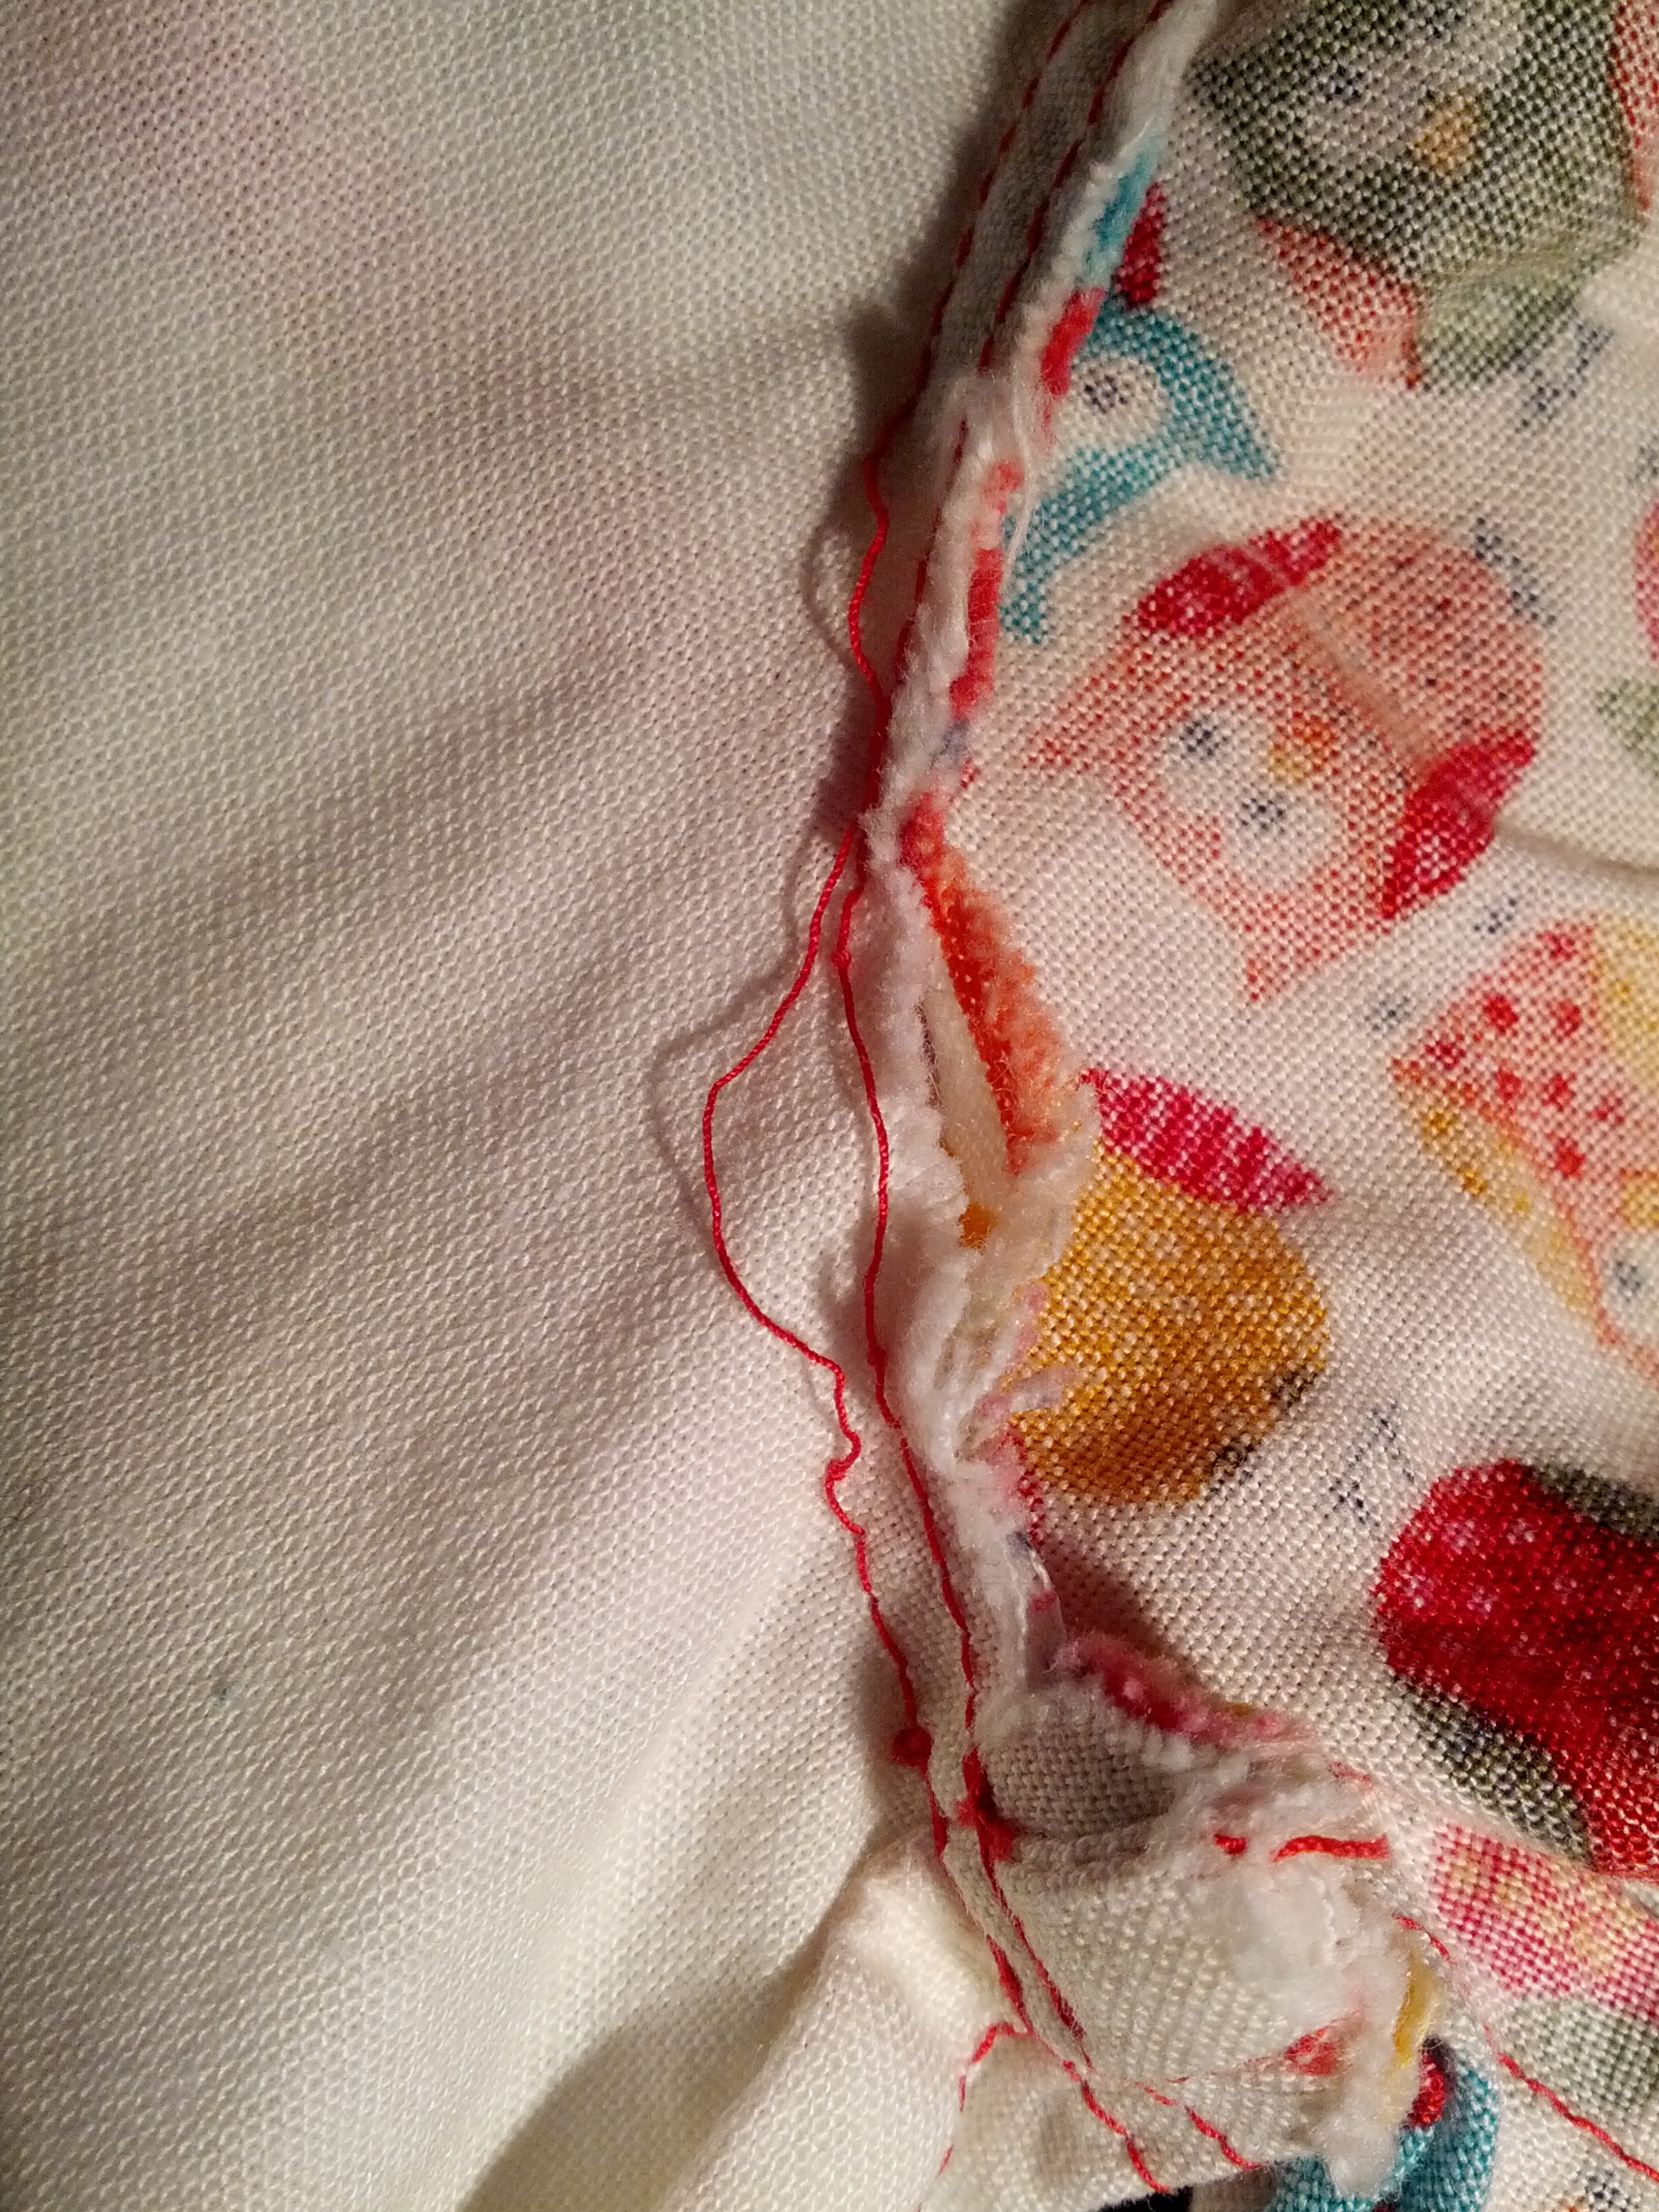
I think the stitching has ripped because the material doesn’t have any give in it, and maybe I should have made a slightly larger size. Once it’s on my daughter it fits beautifully, but it is a bit difficult for her to get it on and off. If I make these again, I’m definitely going to lower the opening in the back seam a bit further (which would mean altering the facing, gulp) in order to make it easier to take on and off. It could though be because the thread seems to be breaking rather easily.
All in all though, we both love these pyjamas, and really, there’s not a lot more I can ask for than to see a smiling face in clothes I have made with love. I’m one happy mum 🙂